How to Create & Save Flashcard Sets
Ellii has over 3,000 flashcards to help students learn vocabulary. You can use them to elicit, practice, or review vocabulary or grammar structures with your students. Use them as a warm-up, filler, or review for a related lesson. You can even use them as a vocabulary or grammar lesson unto themselves.
Step-by-Step Instructions
Log into your account here:
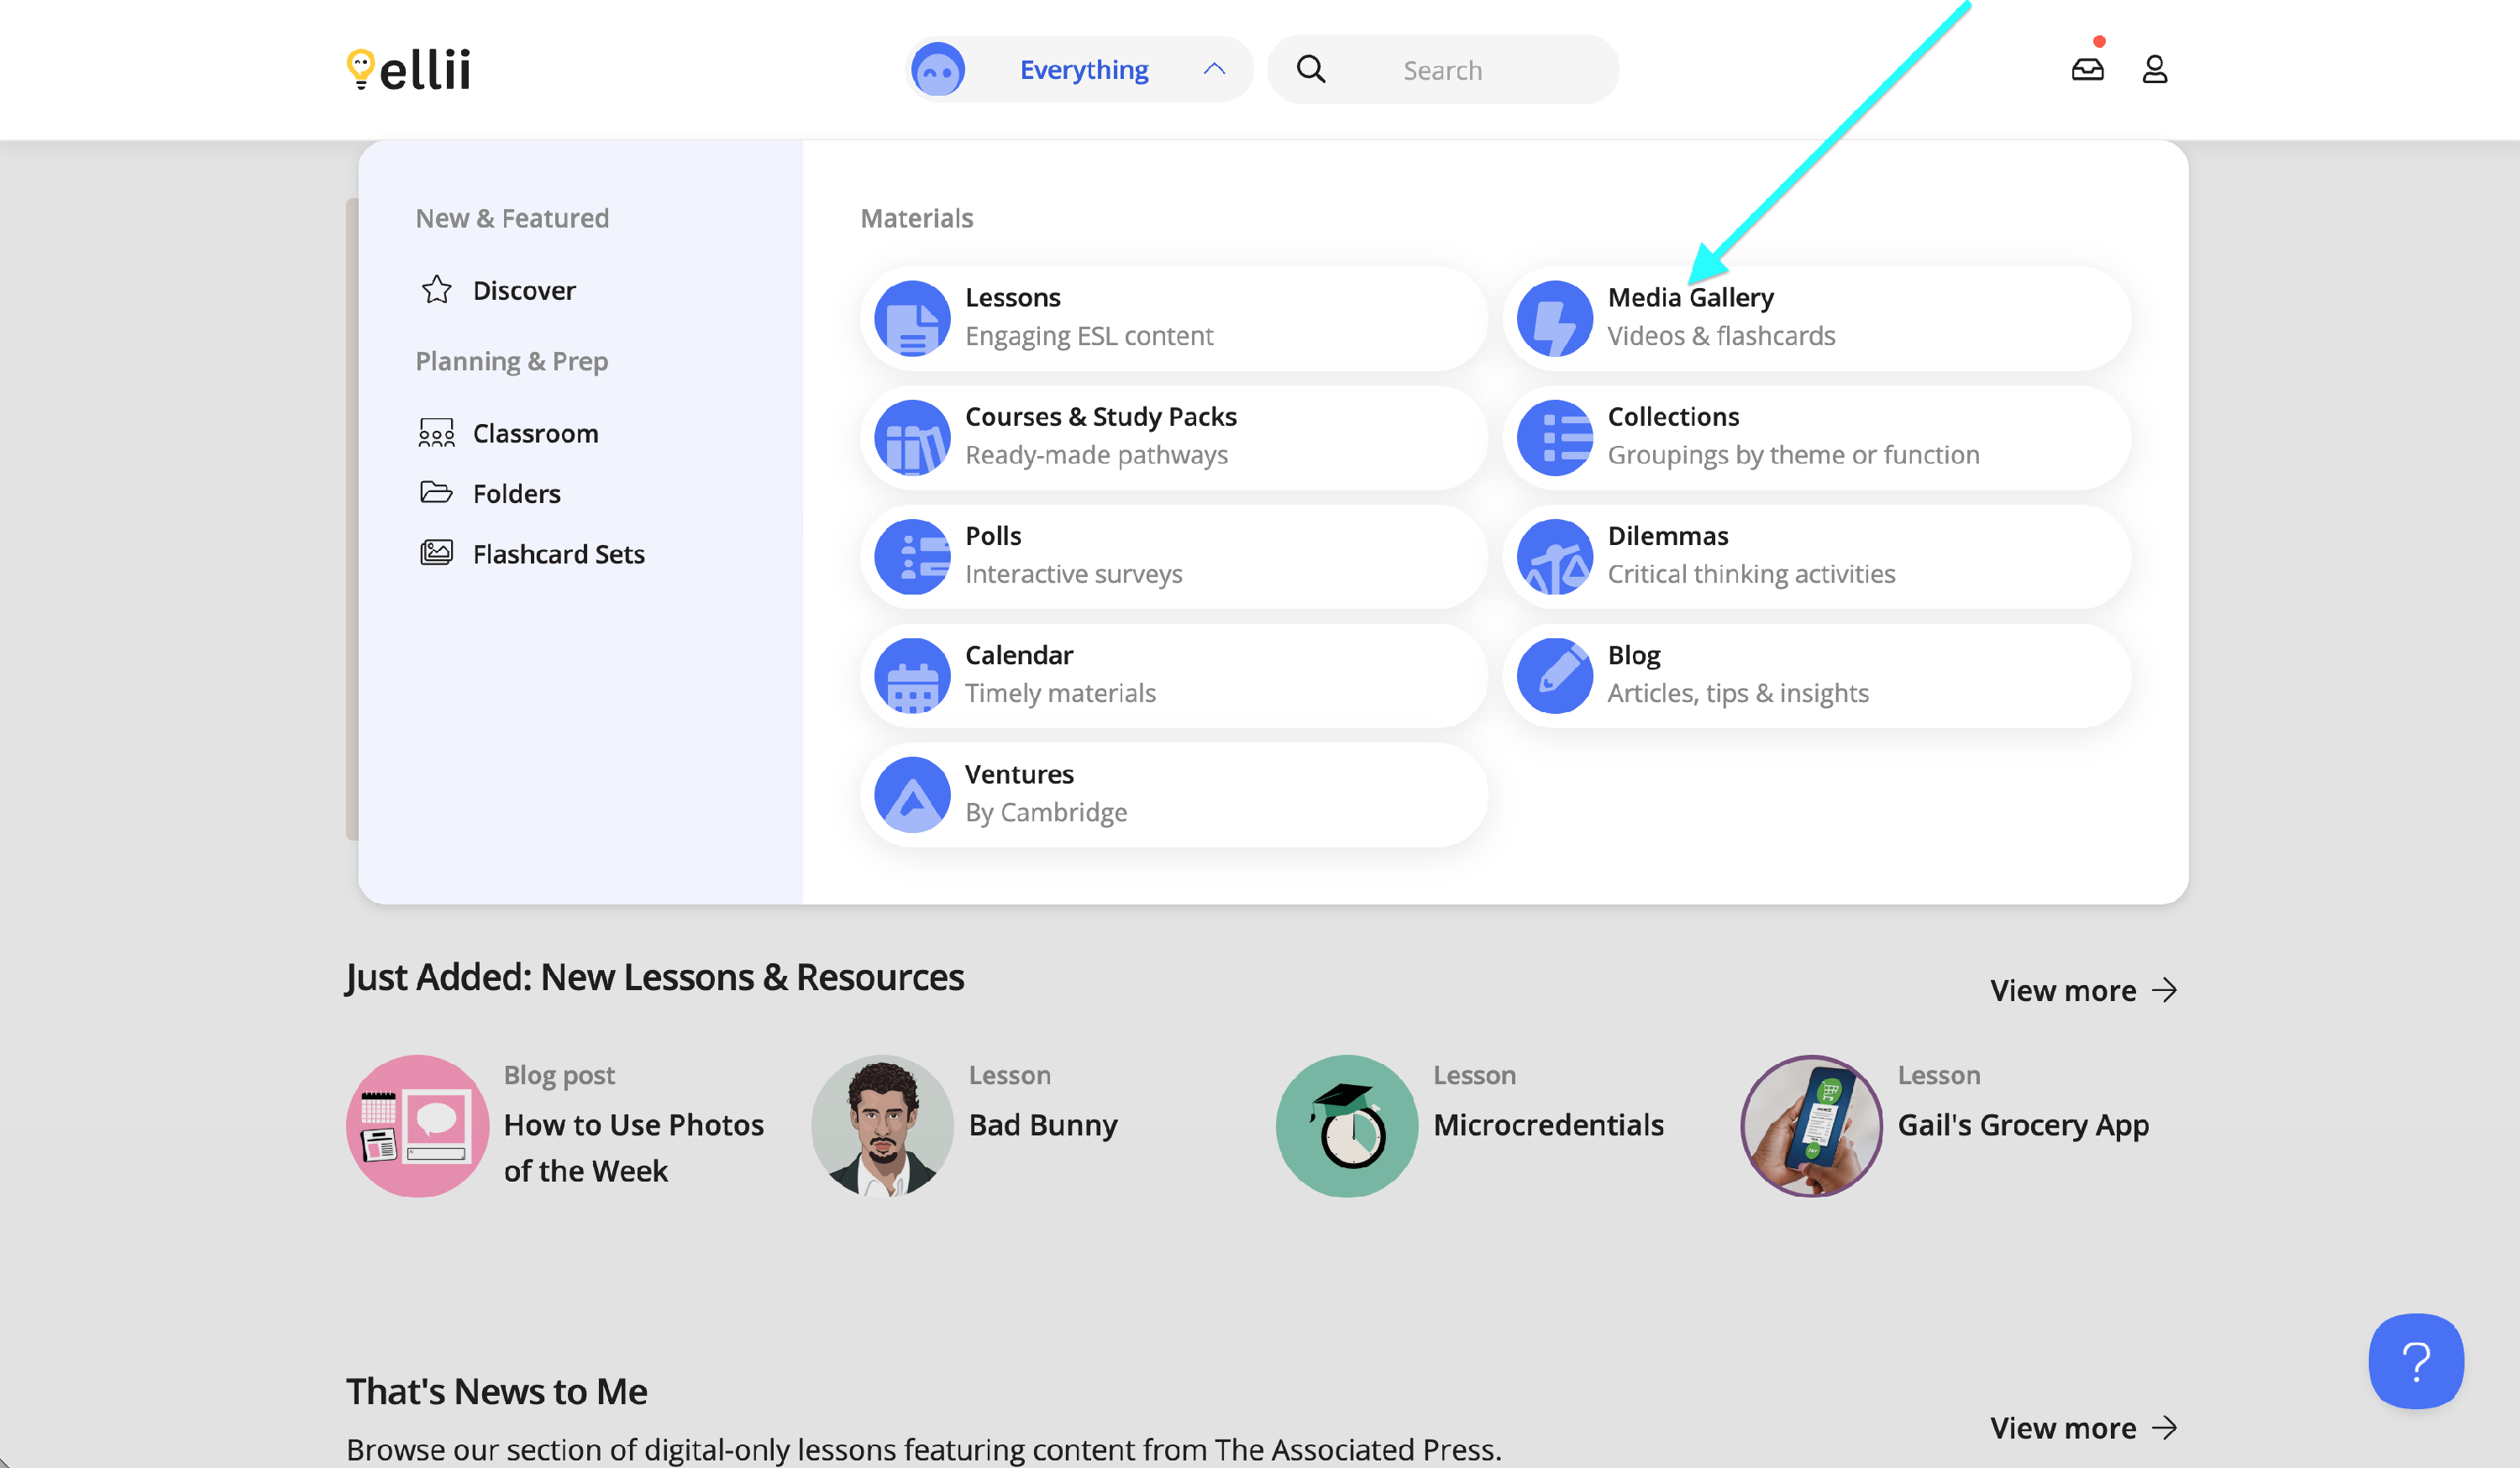
Step 1
Once you have successfully logged in, click on the Everything menu and select Media Gallery.

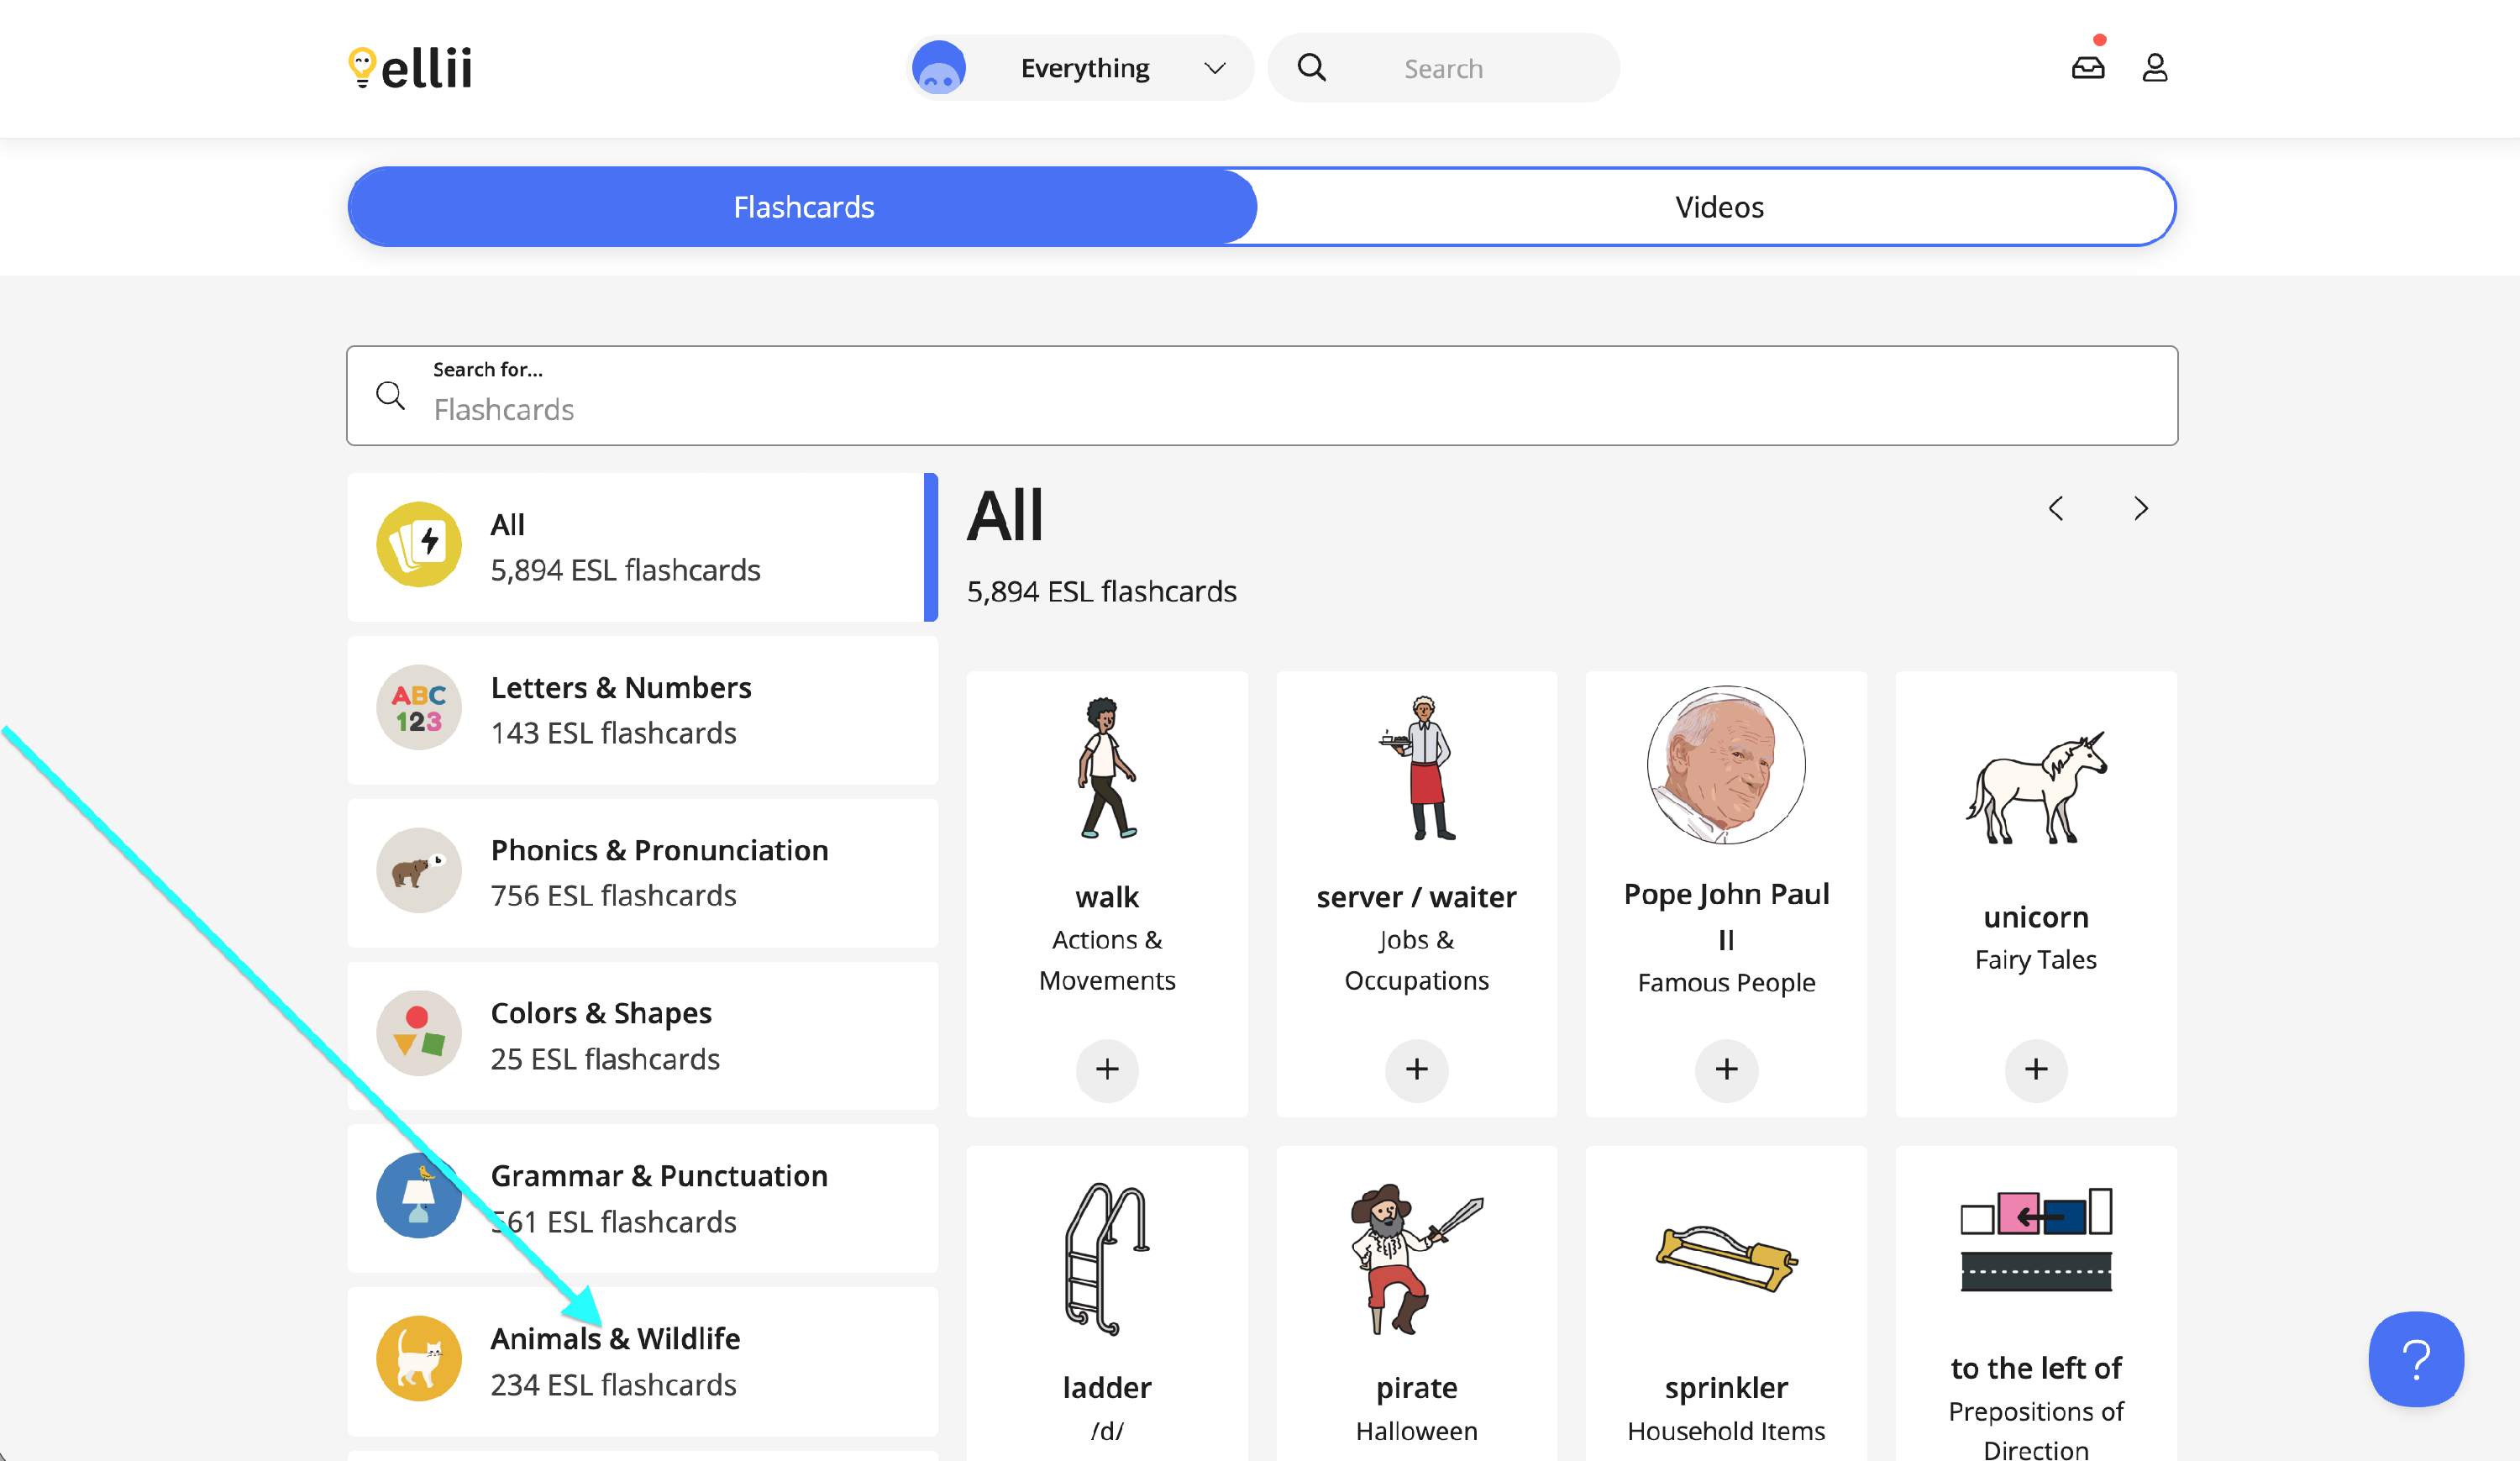
Step 2
You will automatically land on the Flashcards page of the Media Gallery, where you will see a list of sections to choose from.

Step 3
Each section can be clicked to display the categories for that topic.
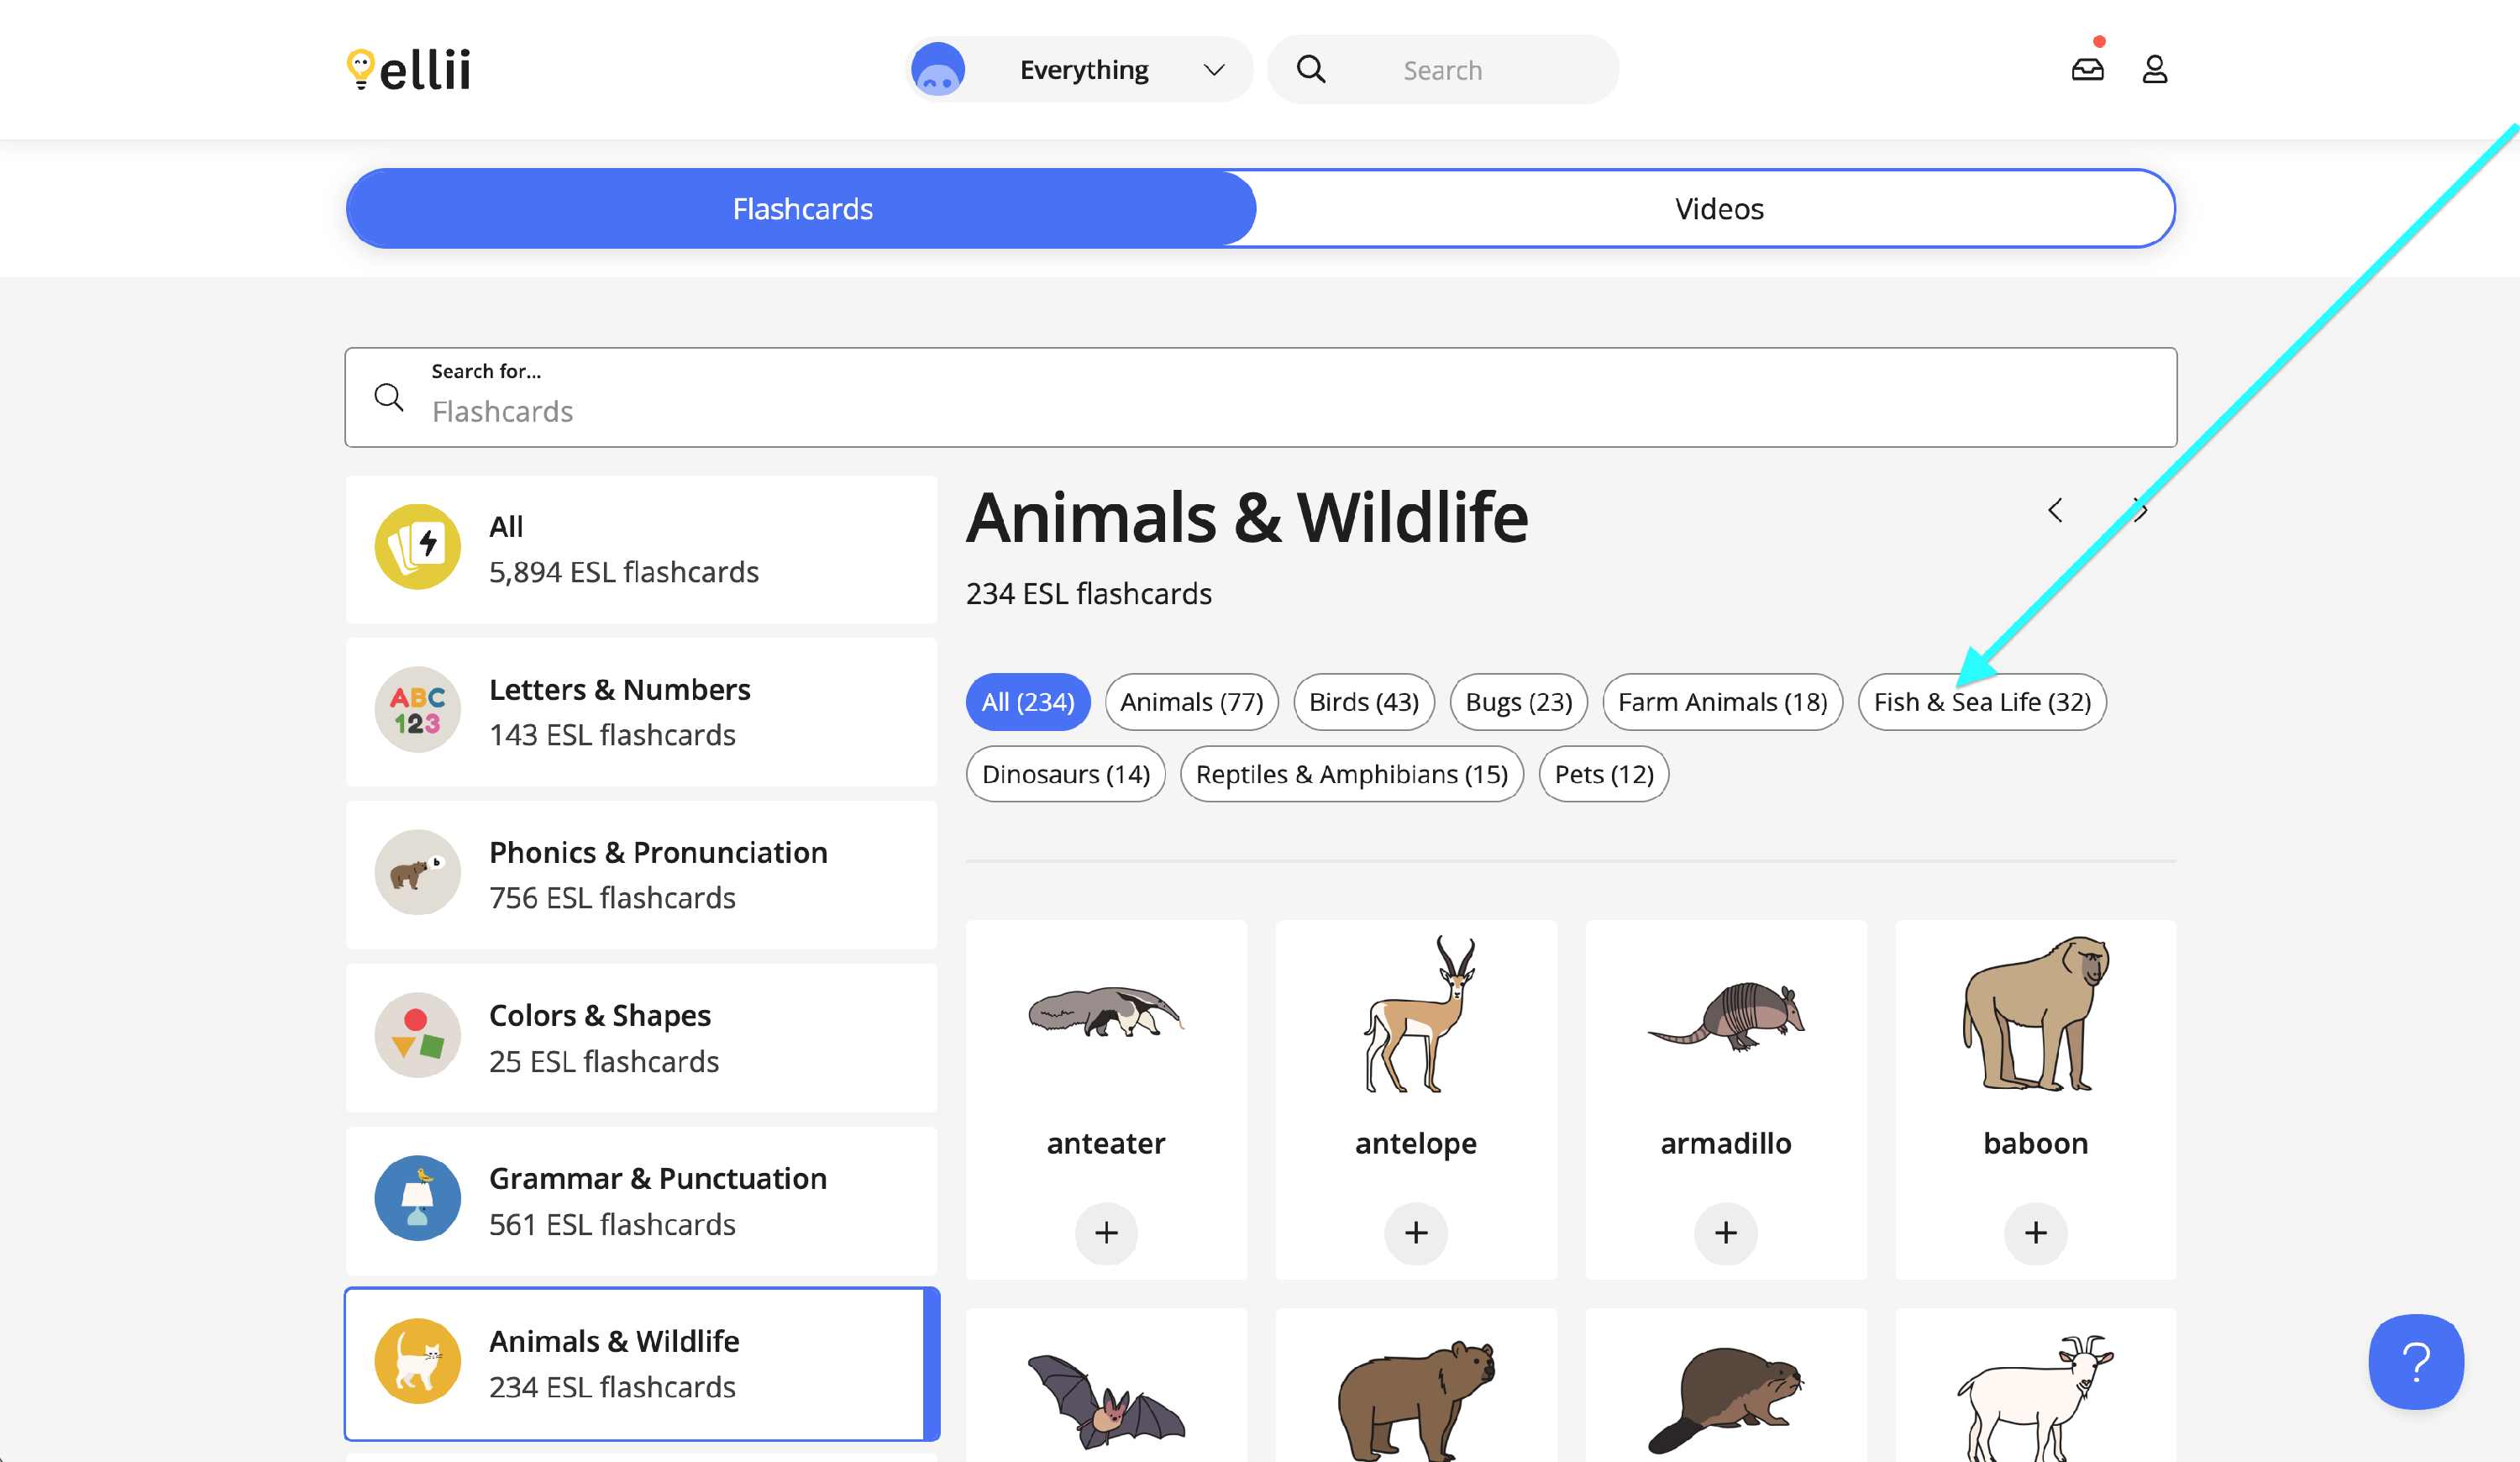
Step 4
You may then click on a category title to view that group of flashcards, or click All to browse through all the flashcards within the section.
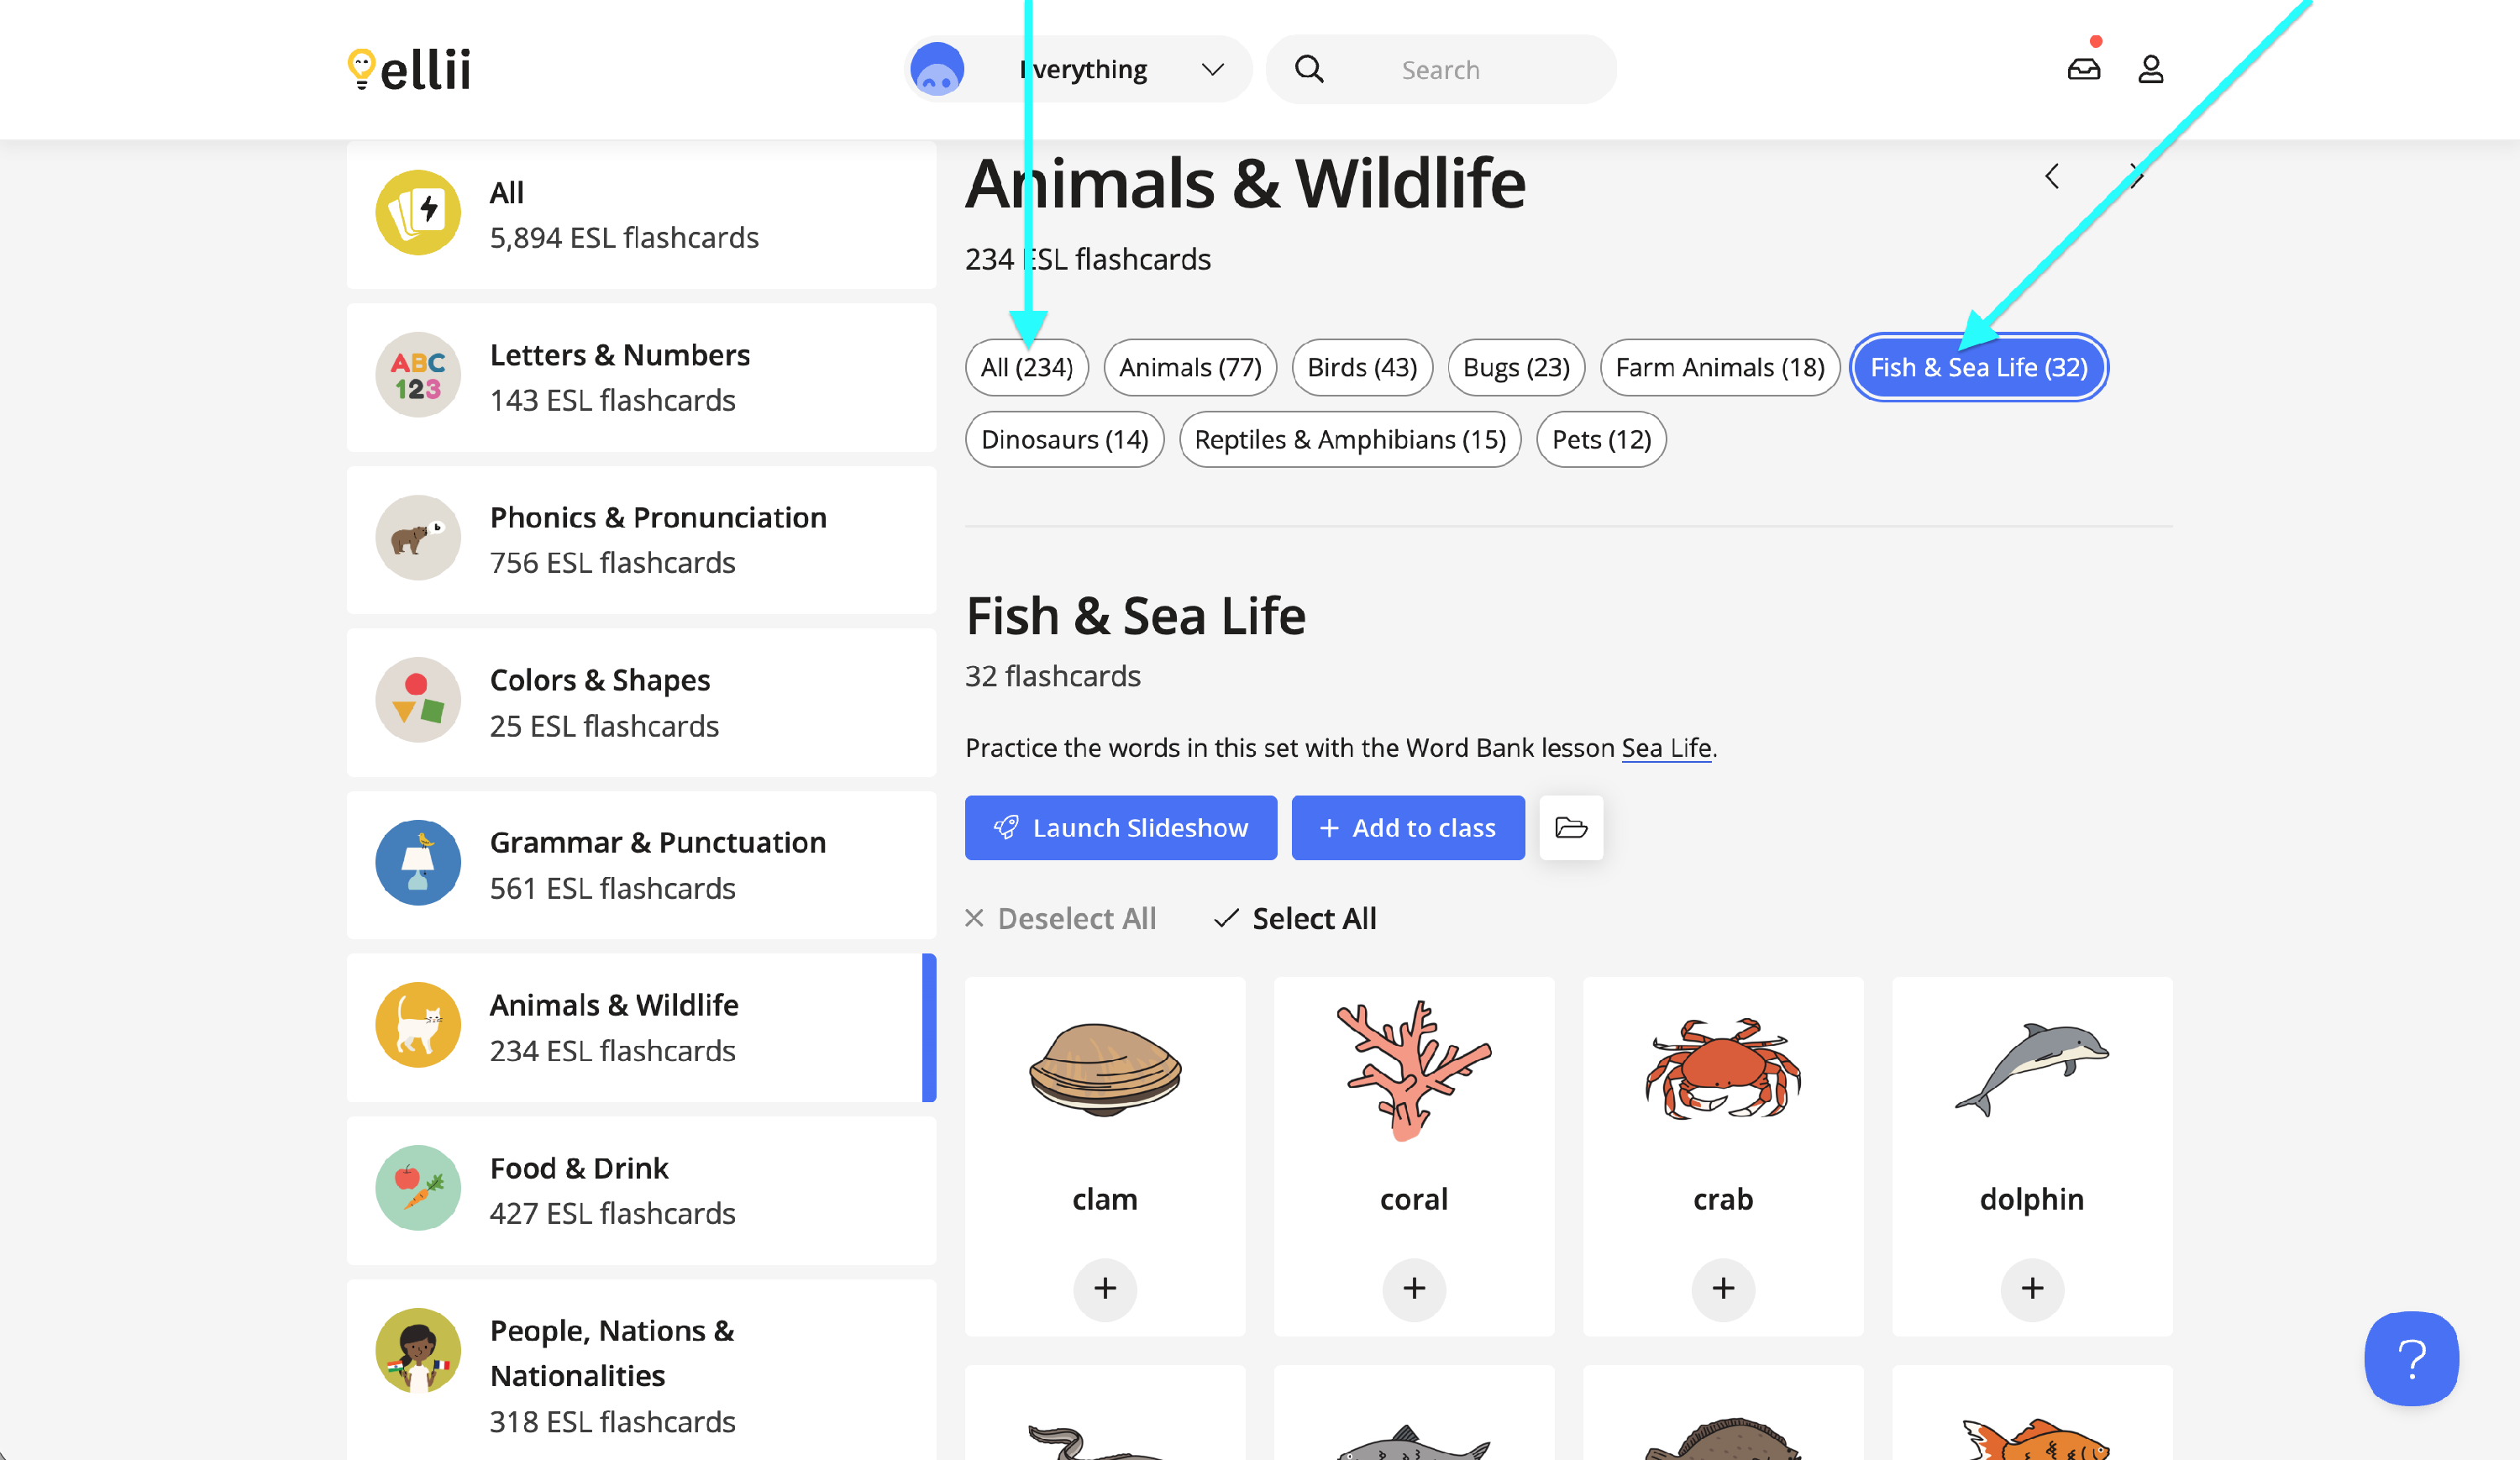
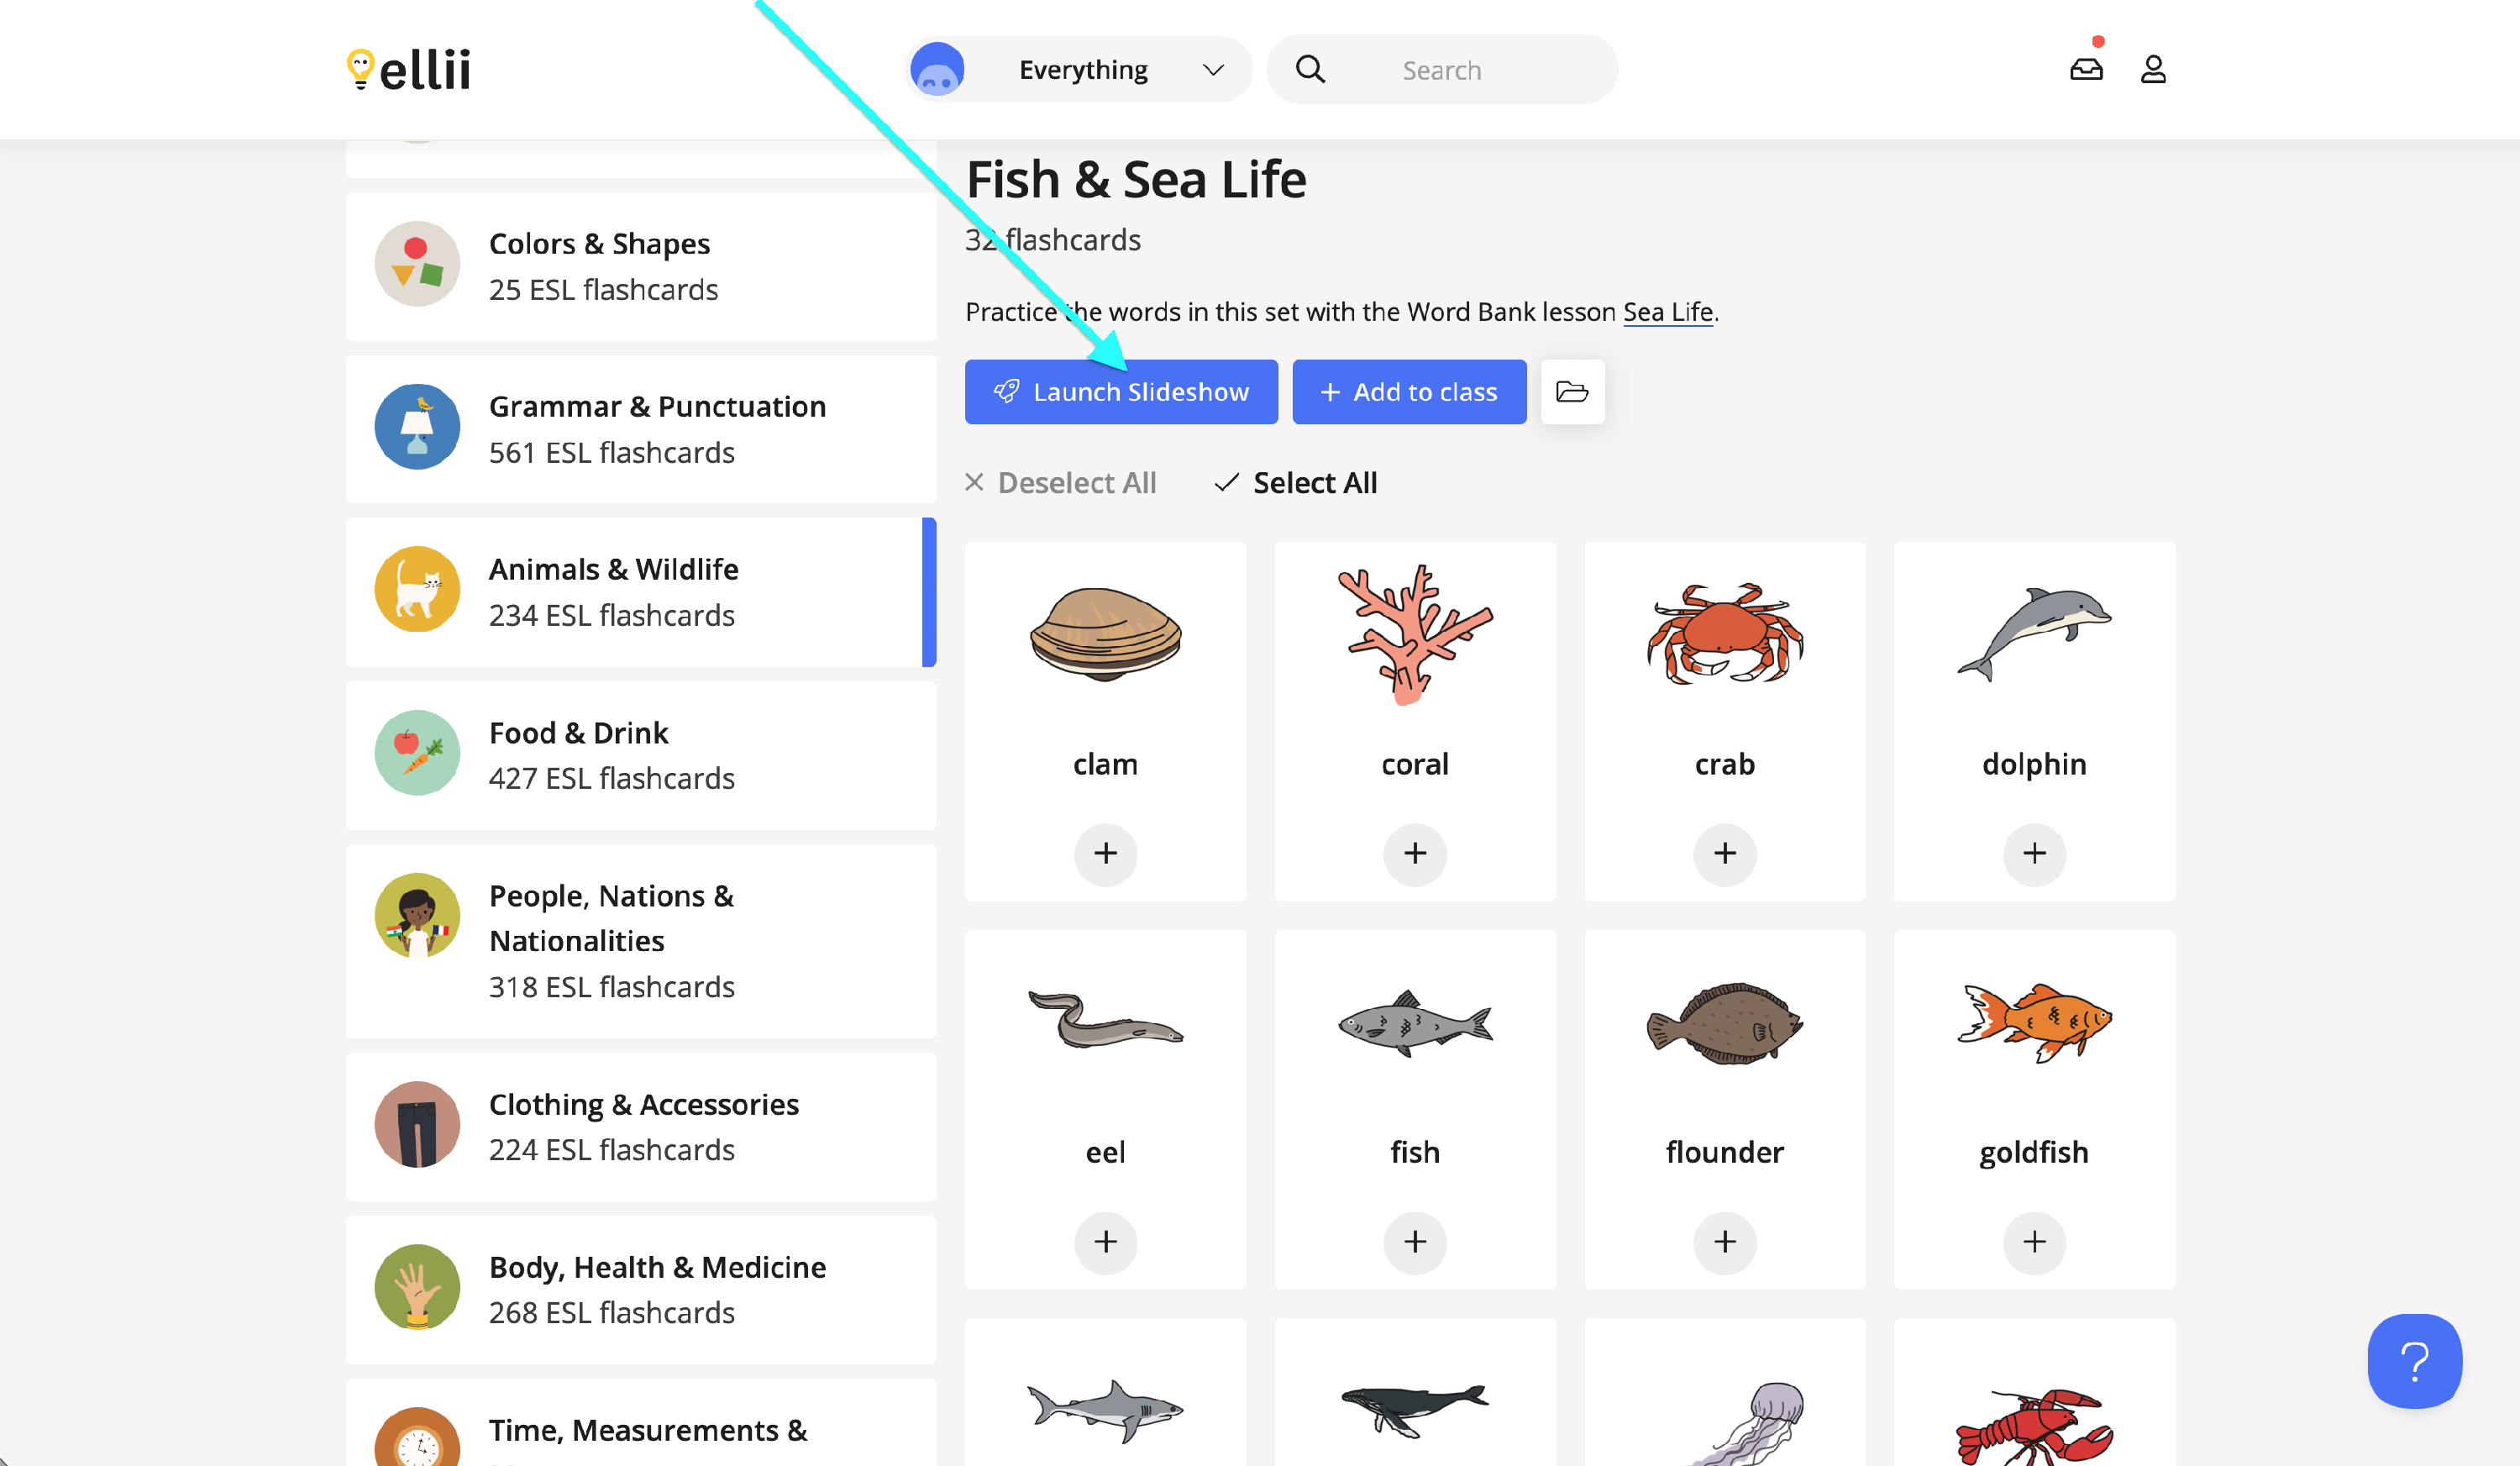
Step 5
You can display the flashcards within the category on a whiteboard or via screen-sharing by clicking on Launch Slideshow.
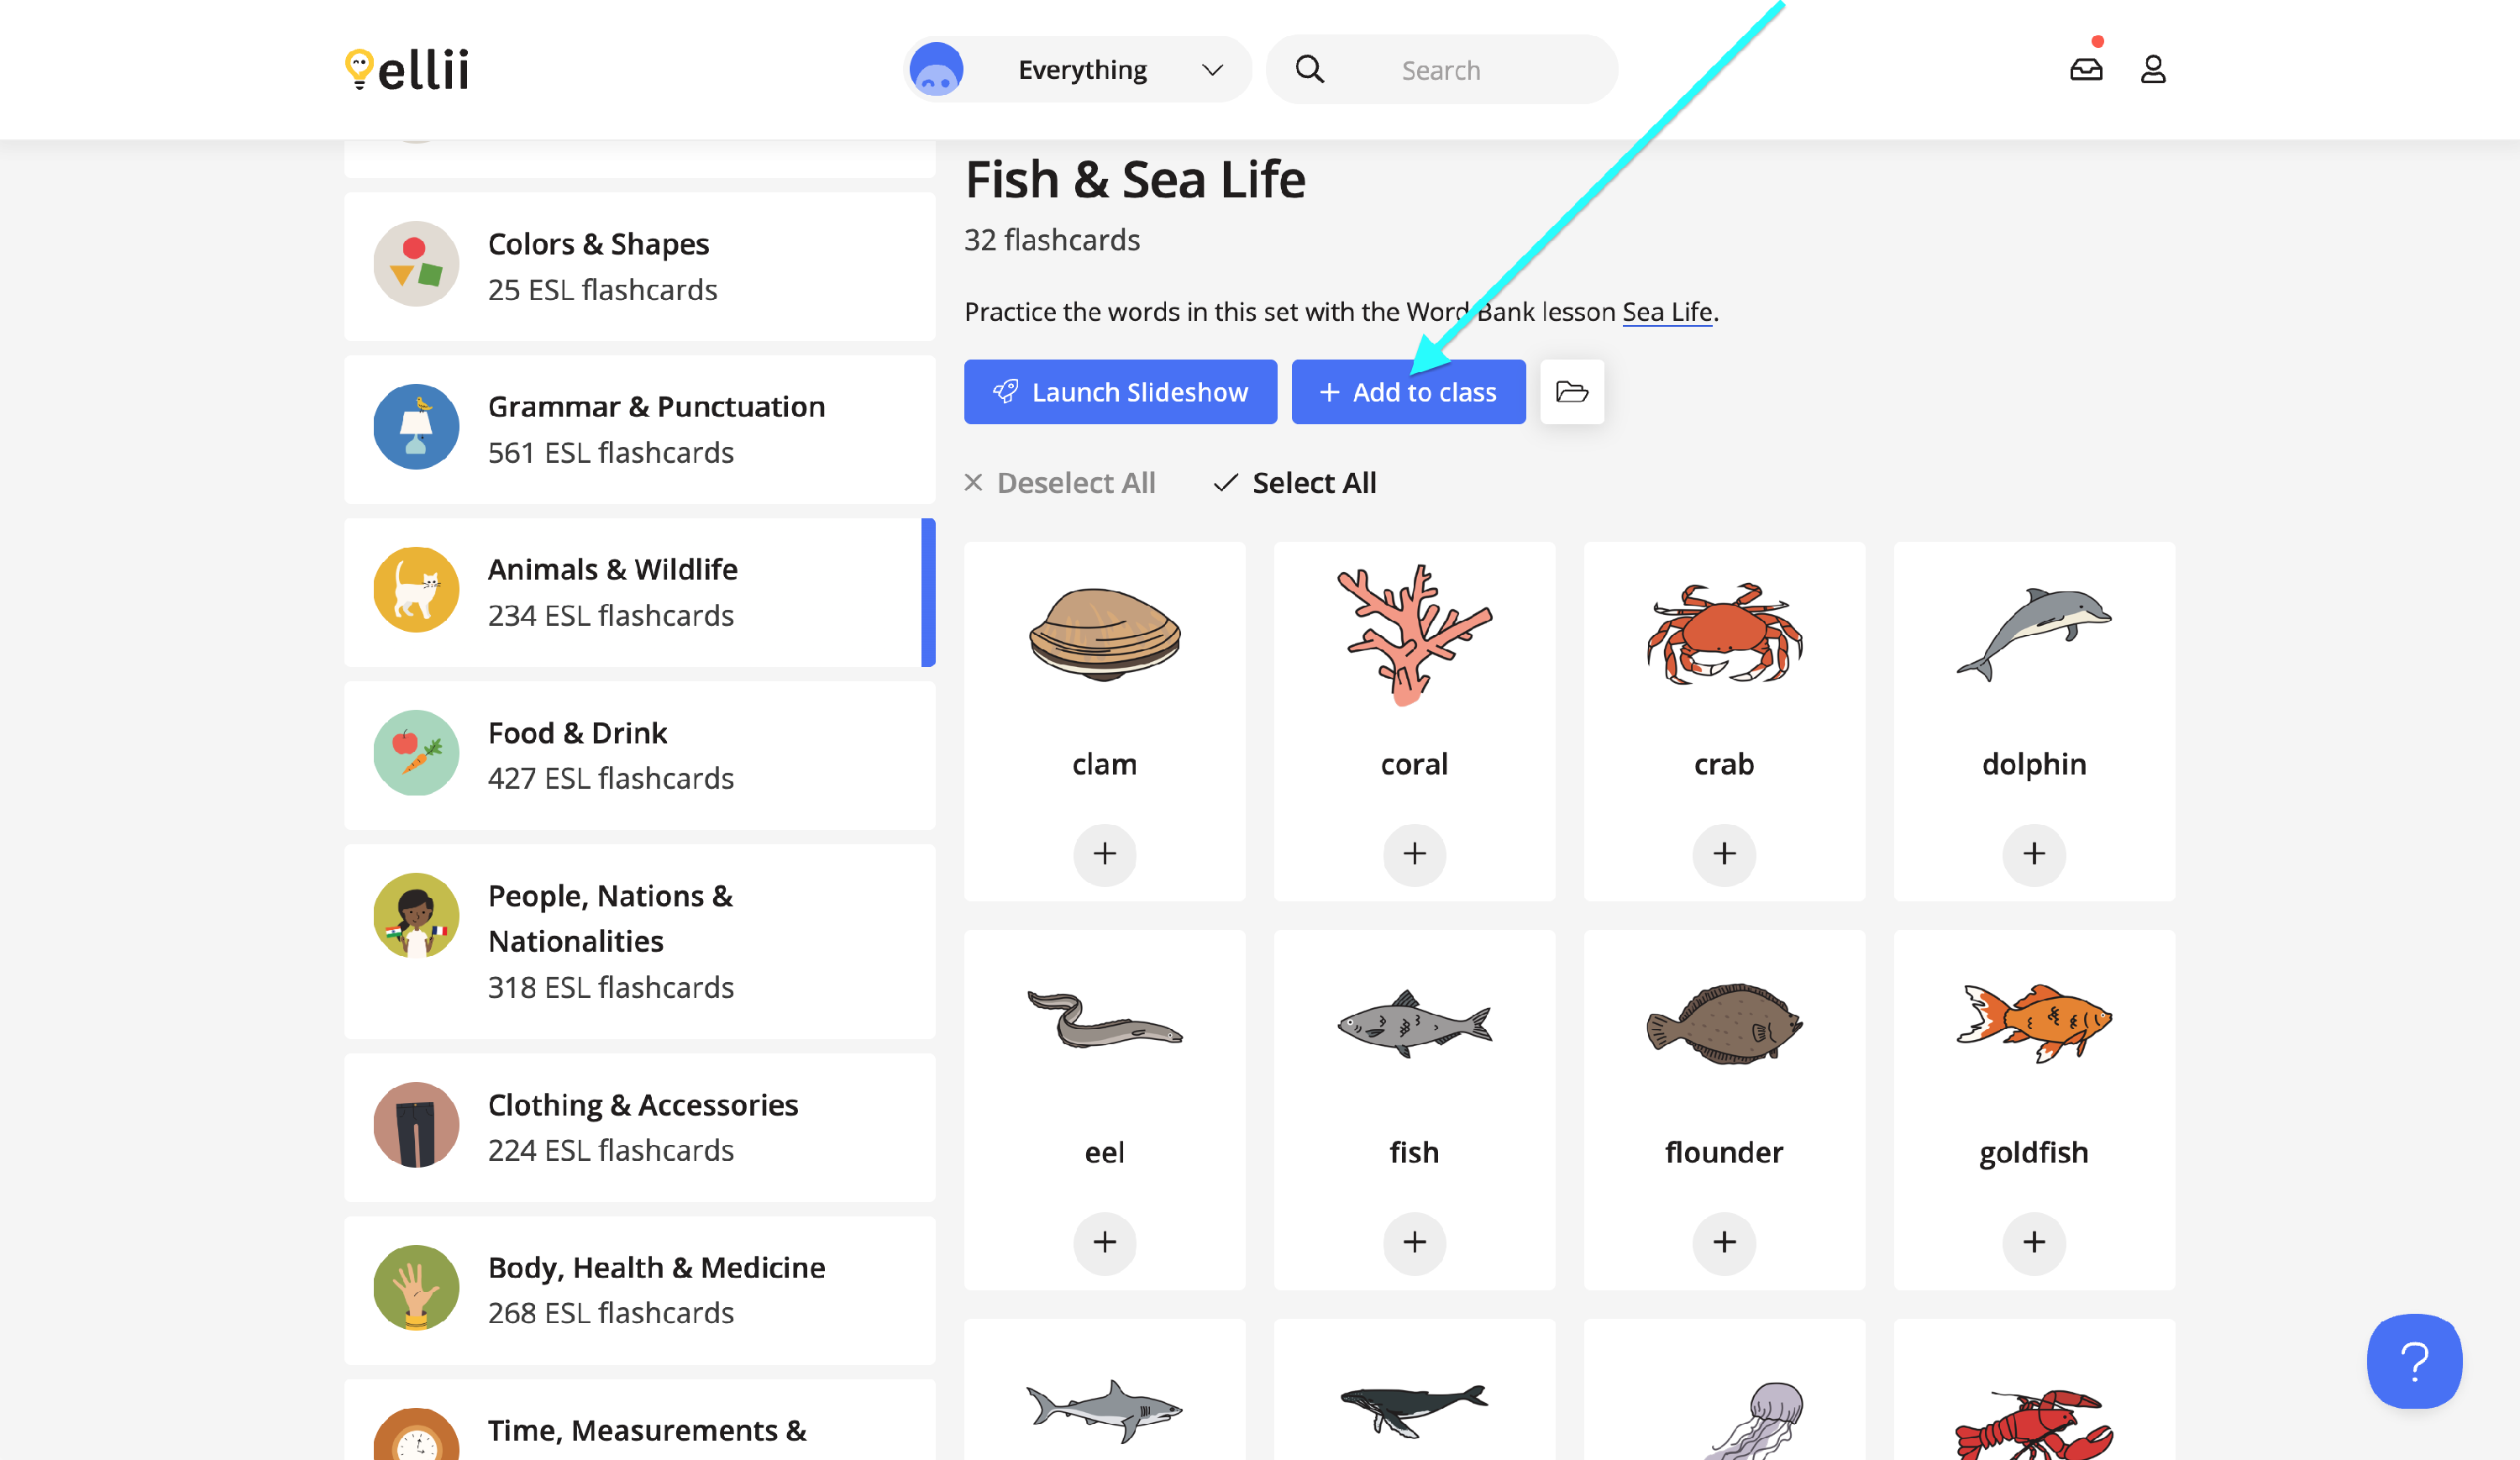
You can send the flashcards to your class by clicking on Add to class.
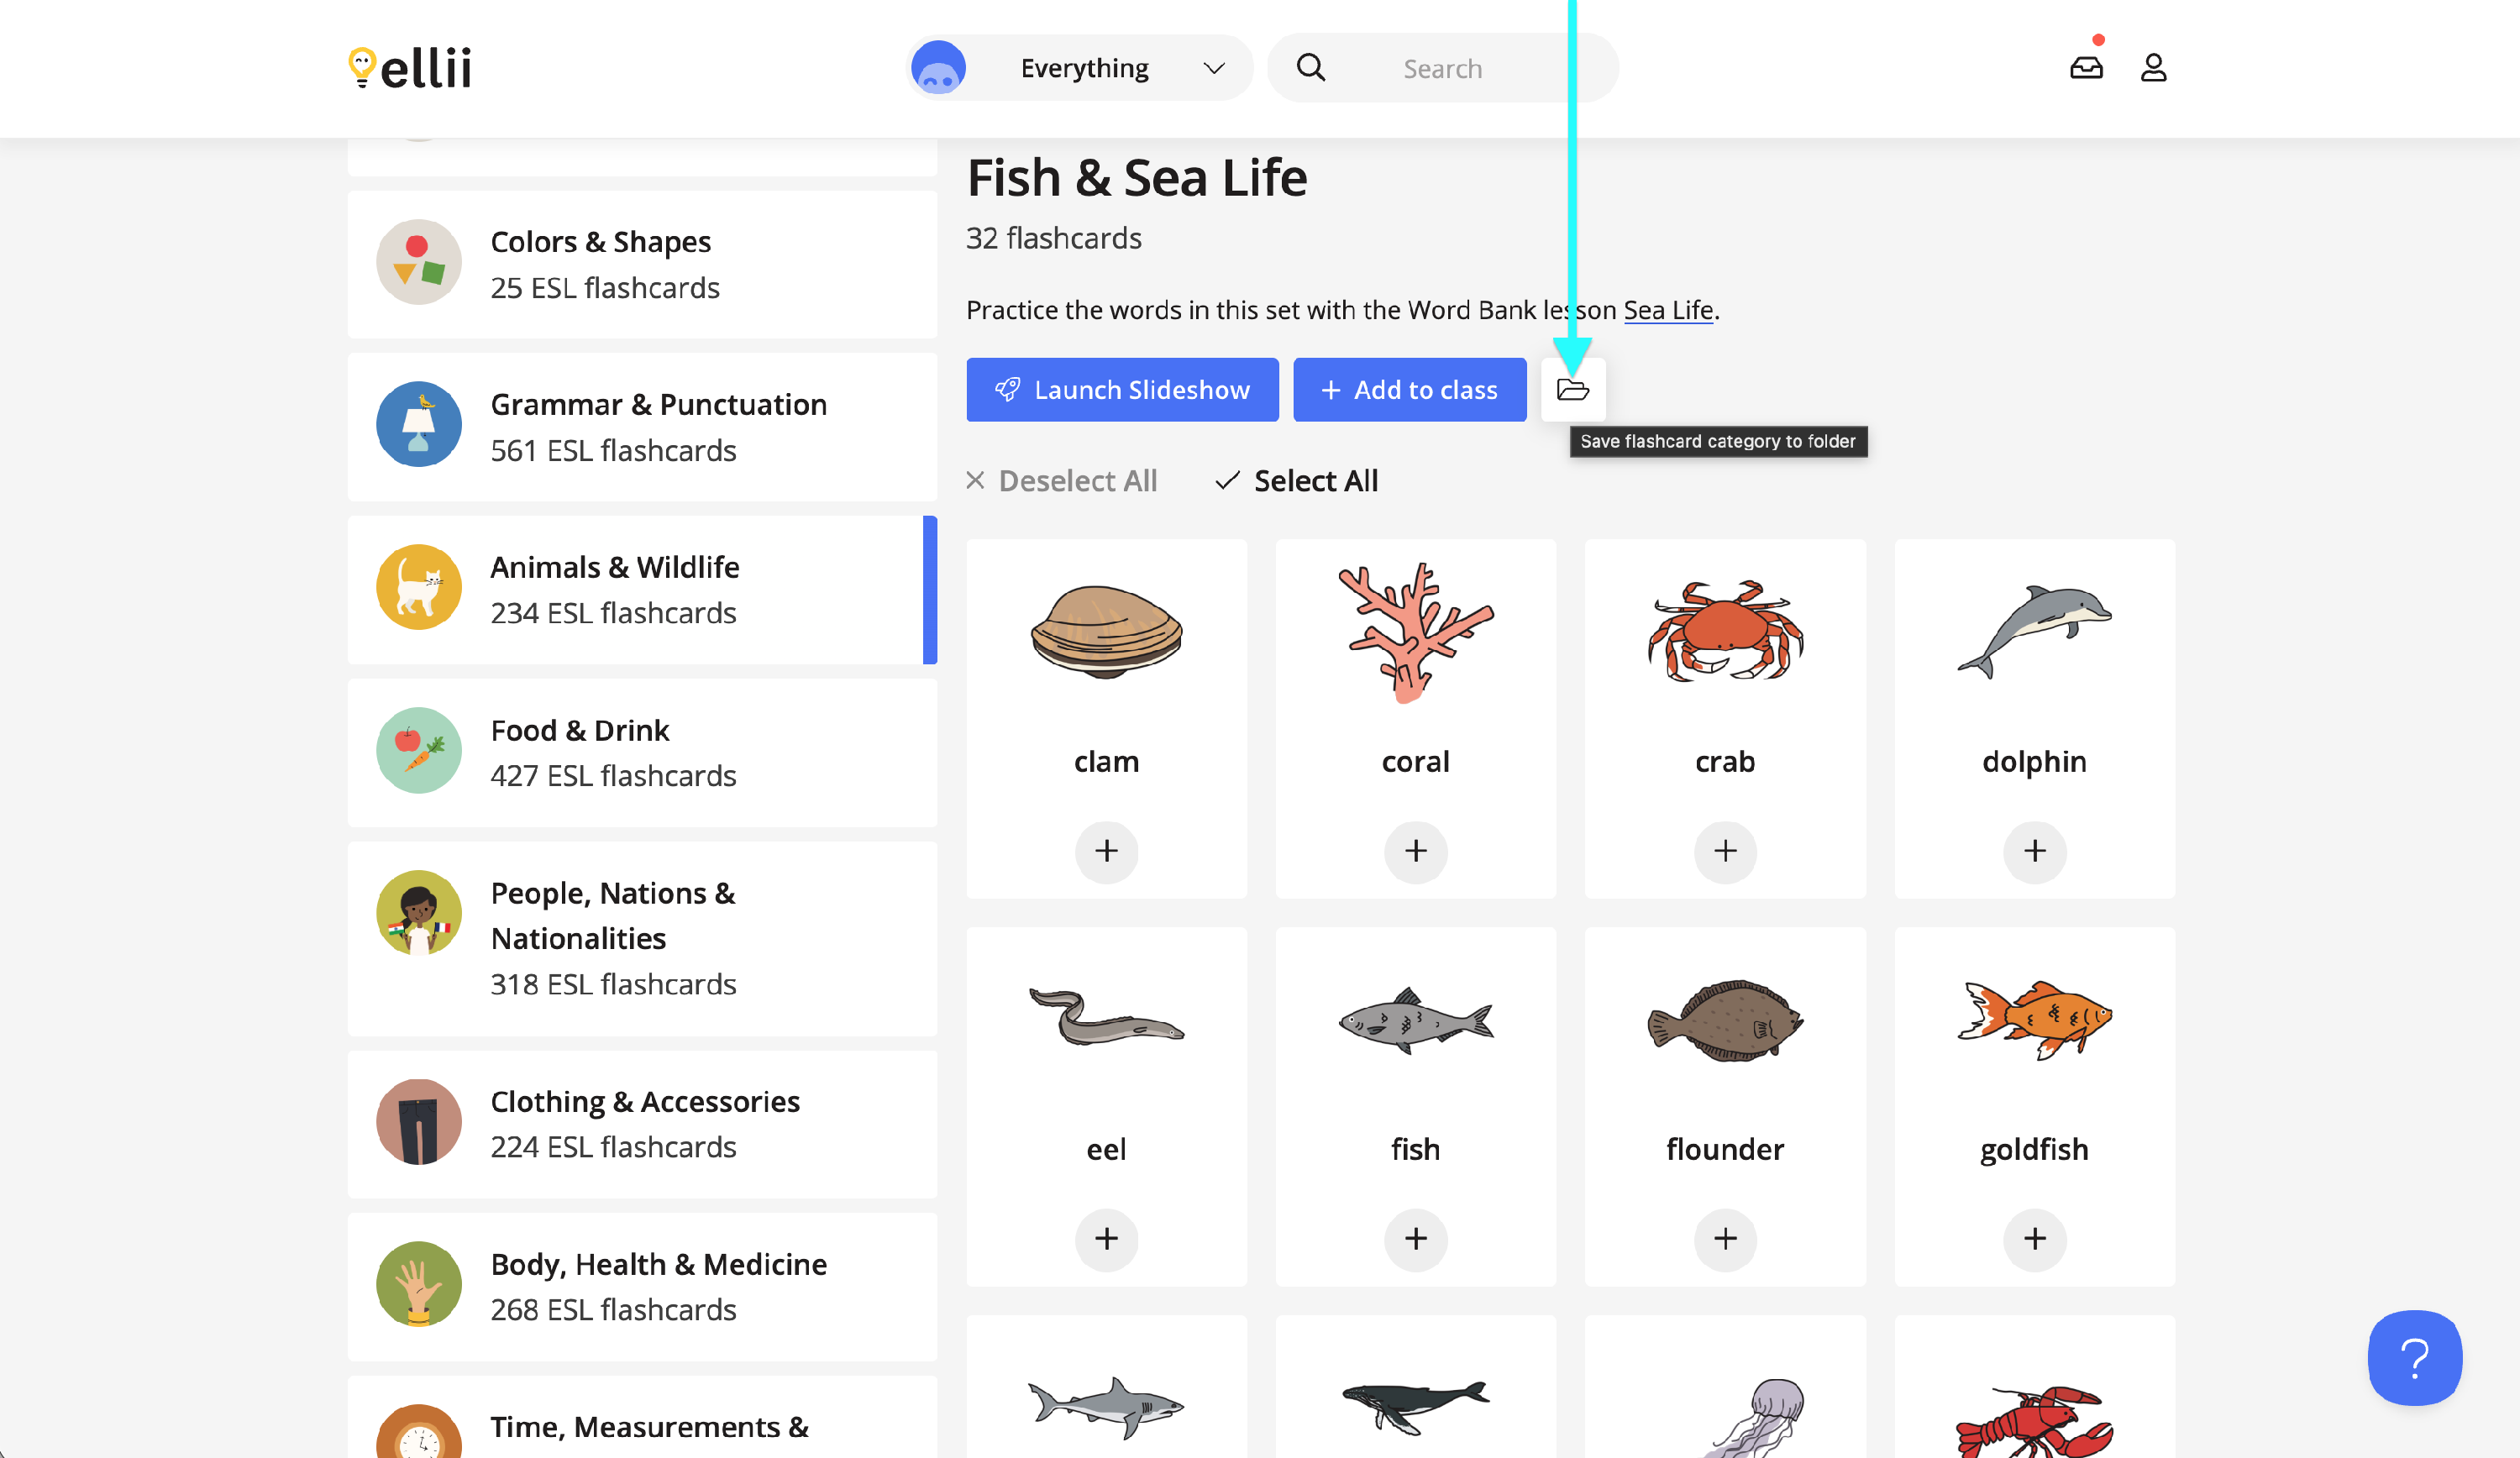
You can also save the flashcard category to a folder.
Step 6
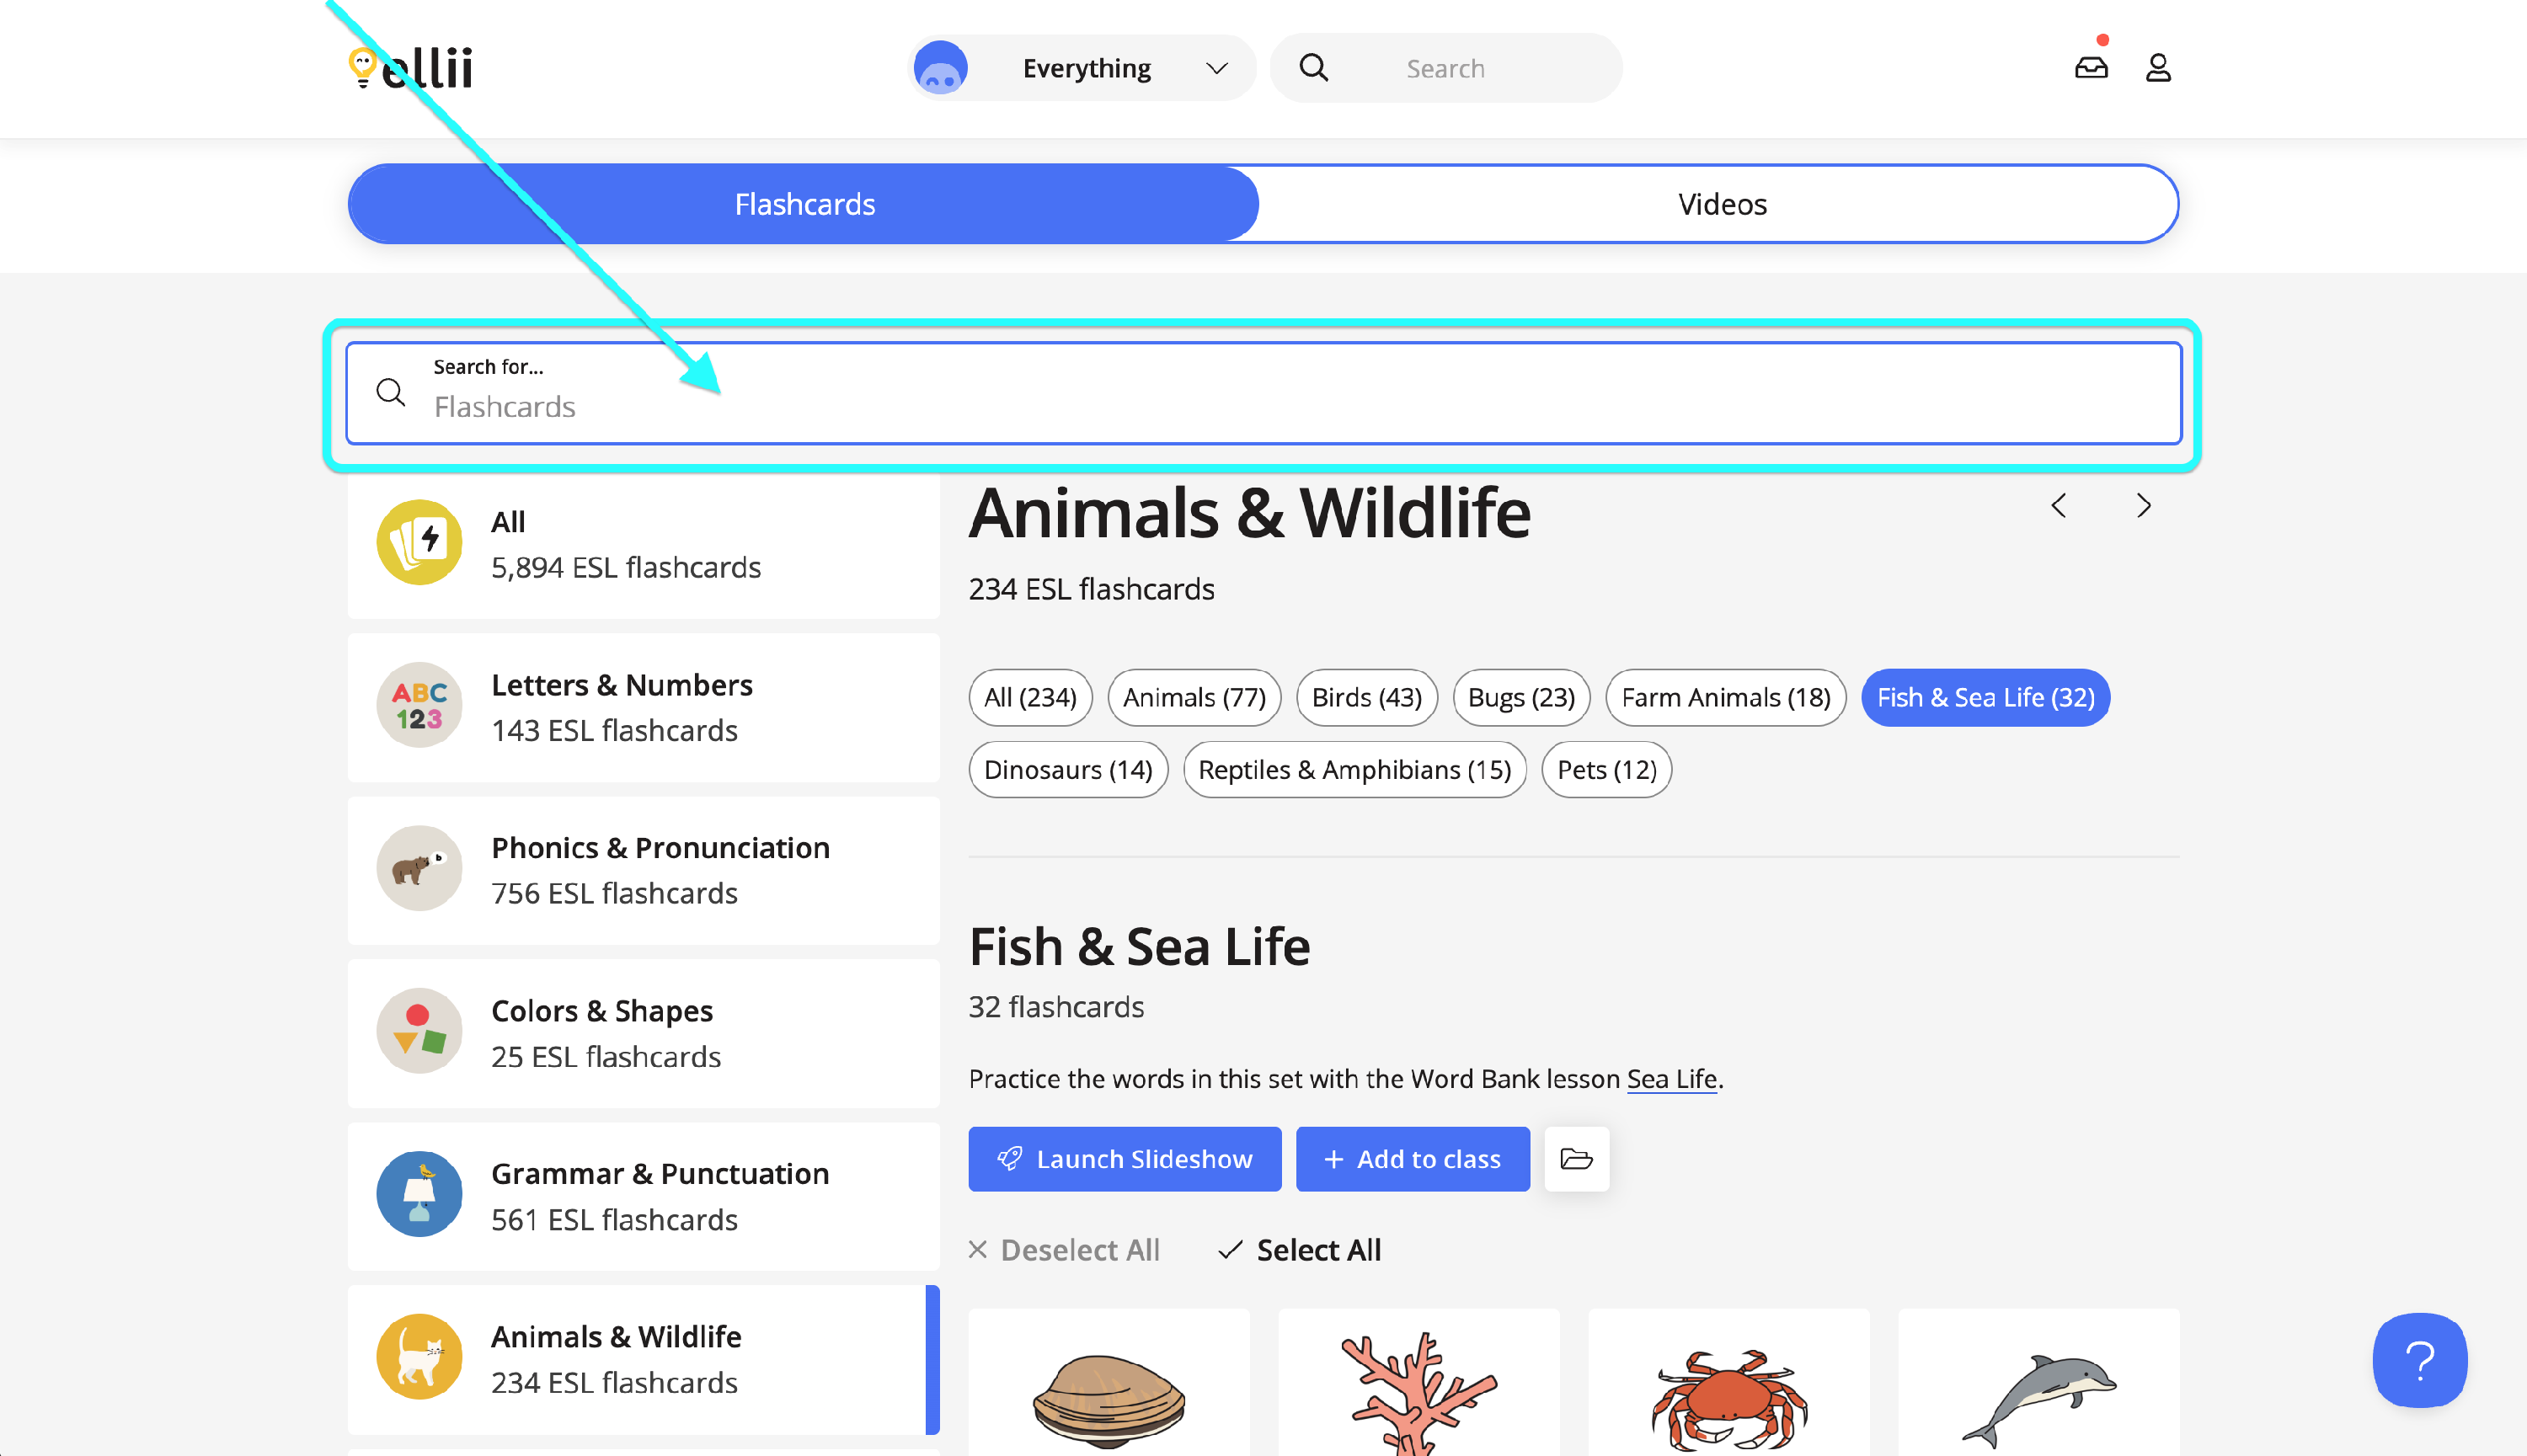
You can search for flashcards using the search bar.
Step 7
From the flashcard section or after choosing a category, you can browse through the thumbnails of the flashcards. Clicking on the flashcard will open a larger version of the image along with the audio for the flashcard.

Step 8
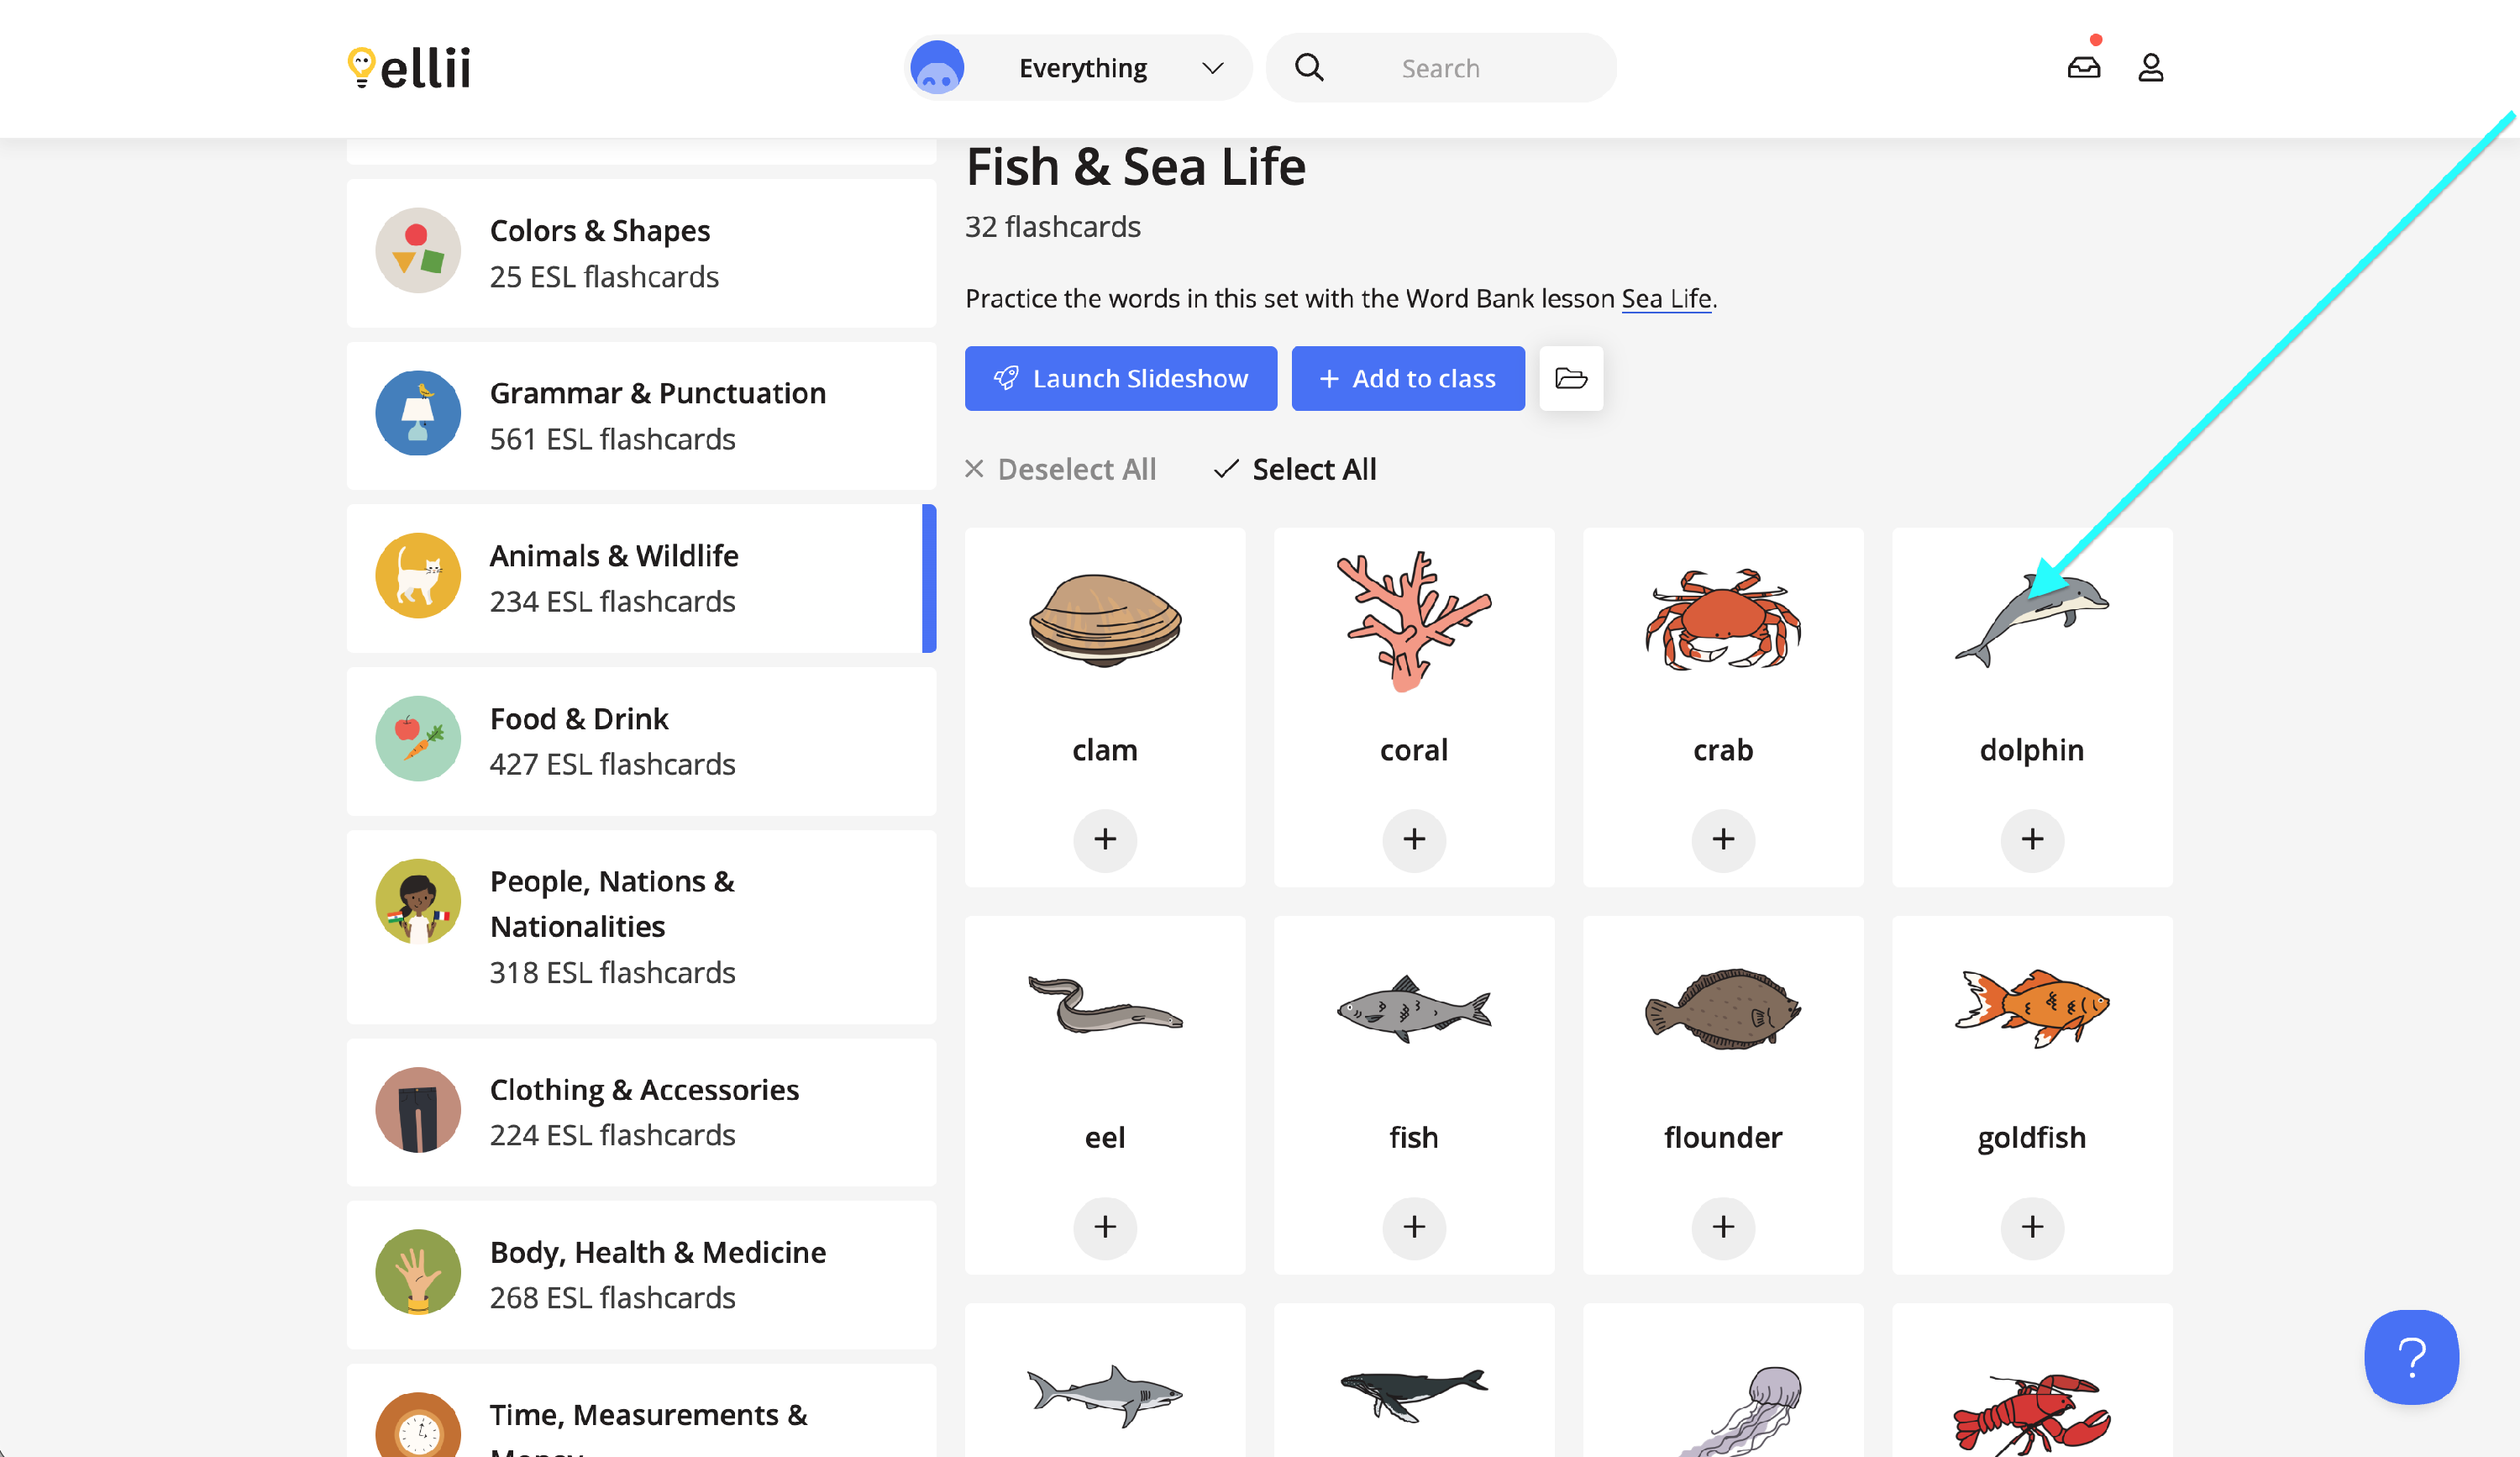
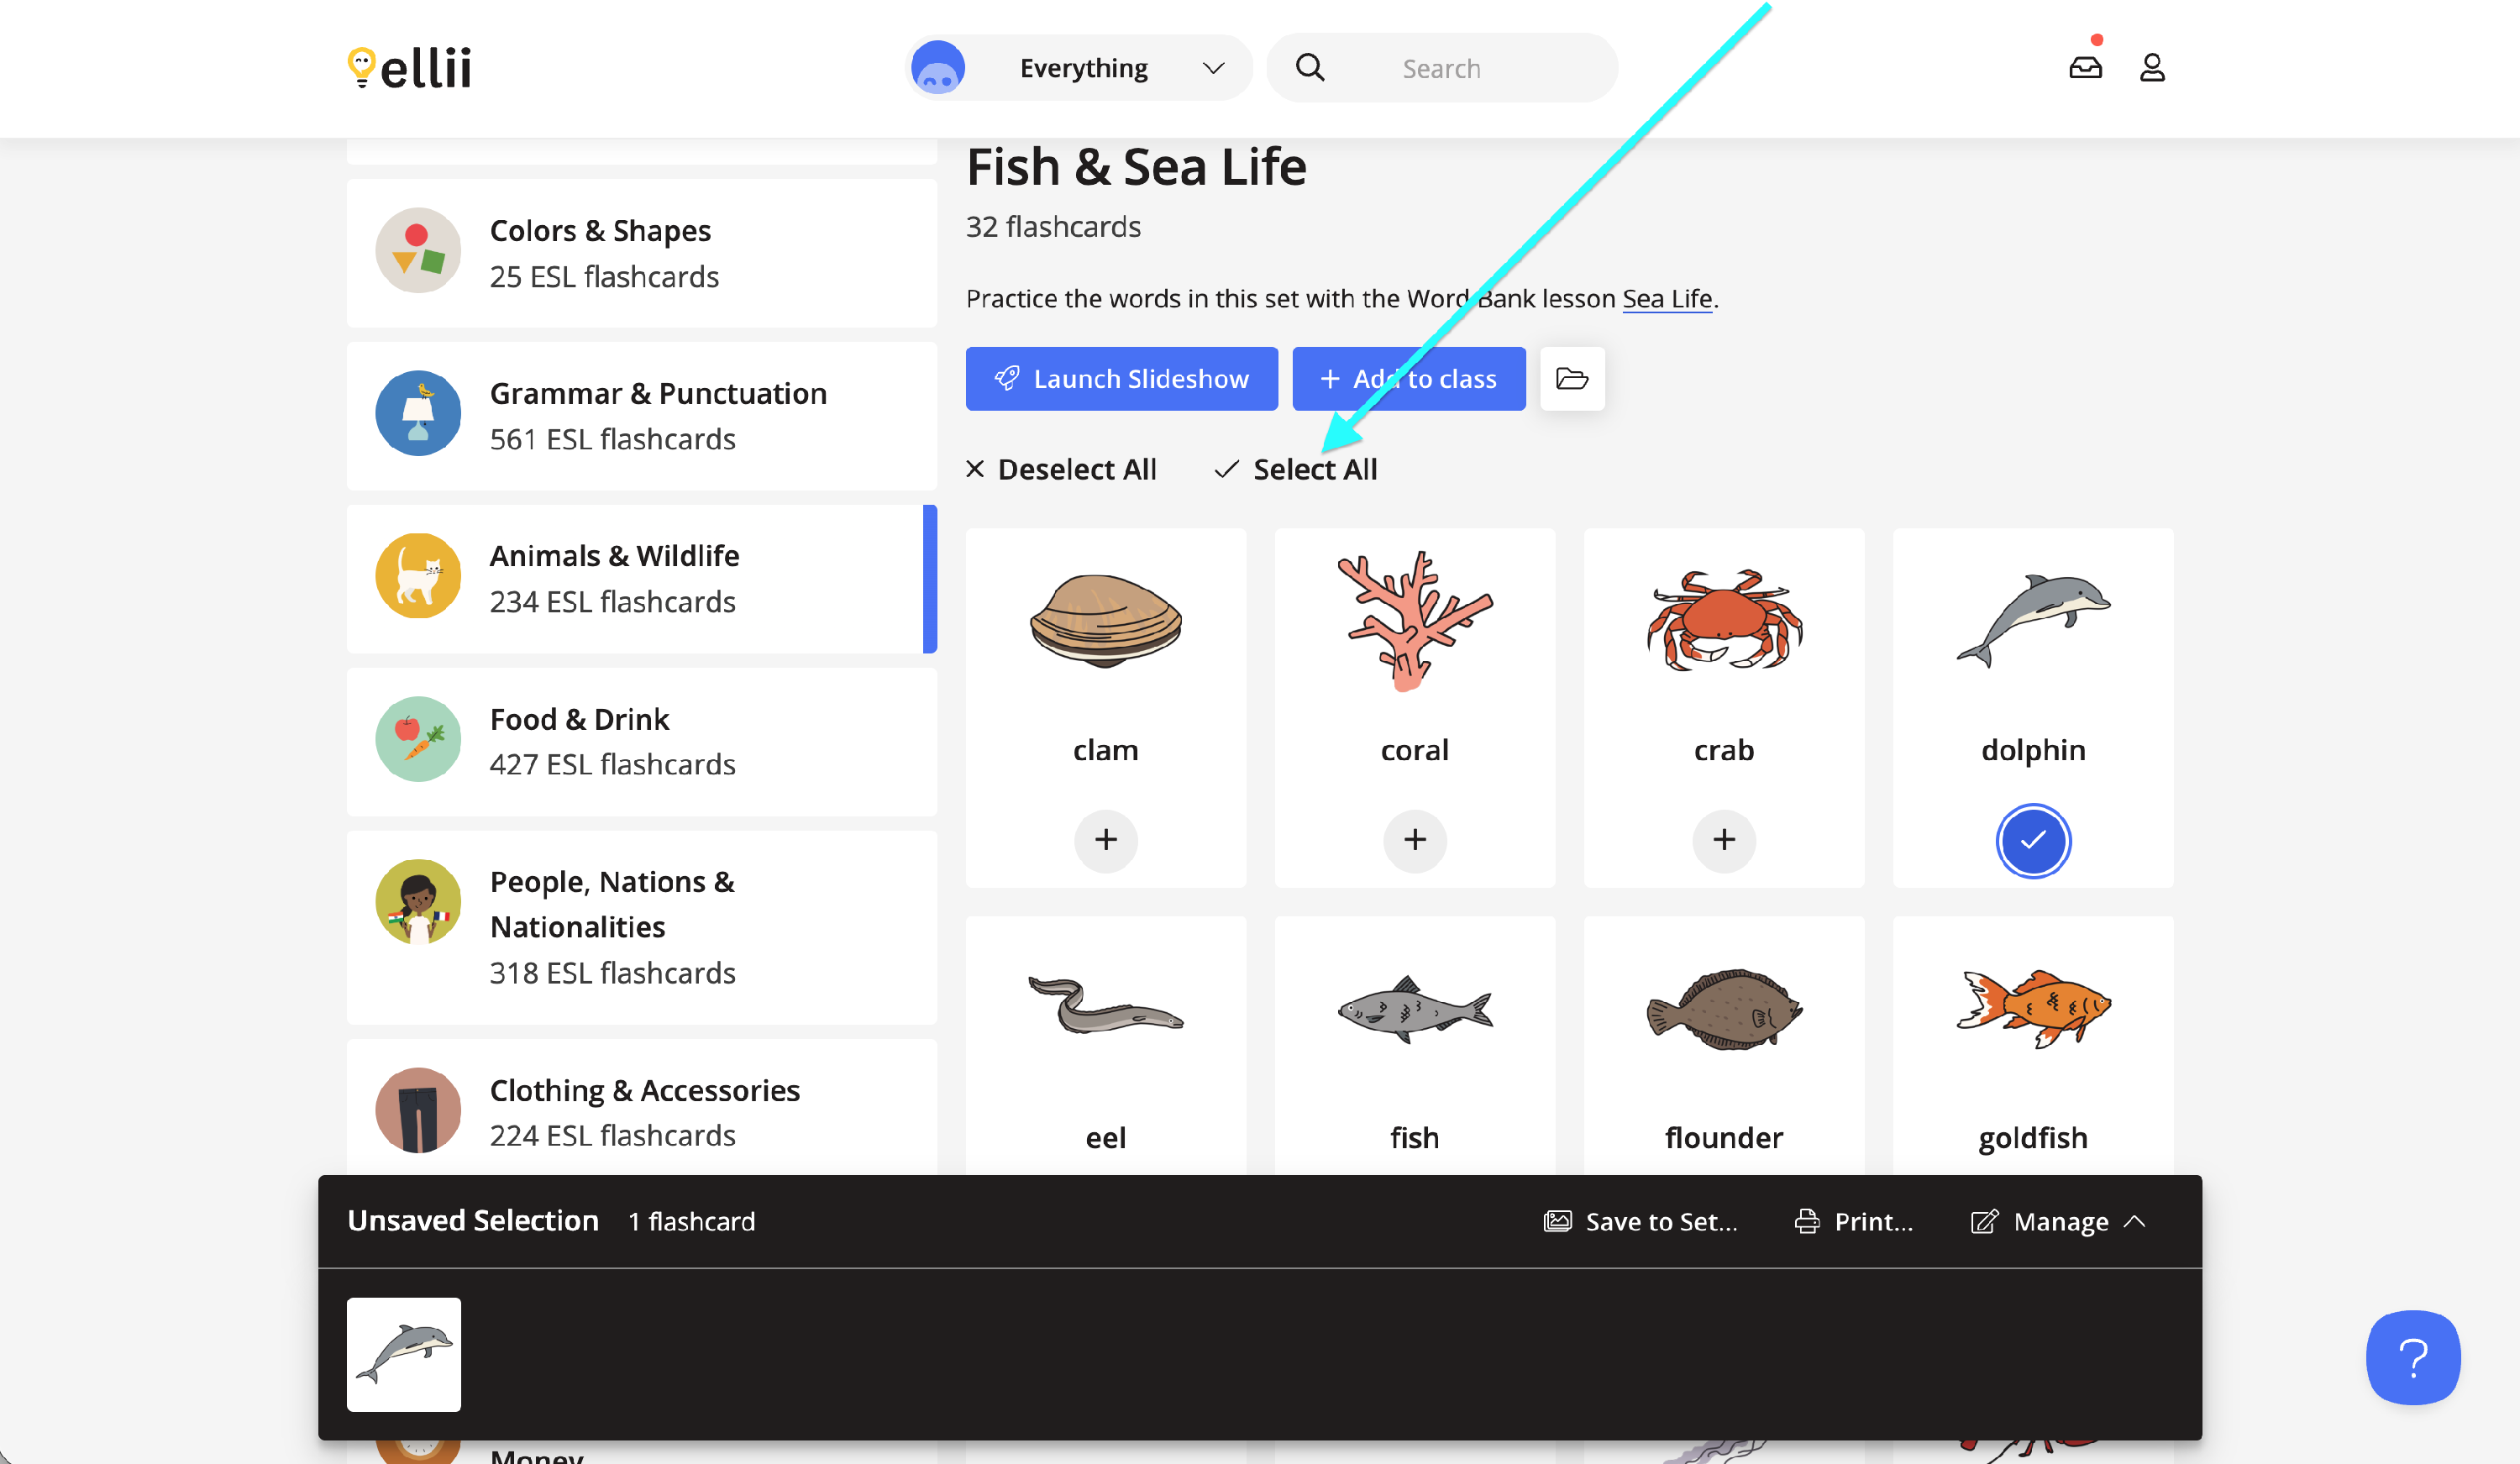
To begin creating your flashcard set, click on the "+" under the flashcard that you would like to add.
Step 9
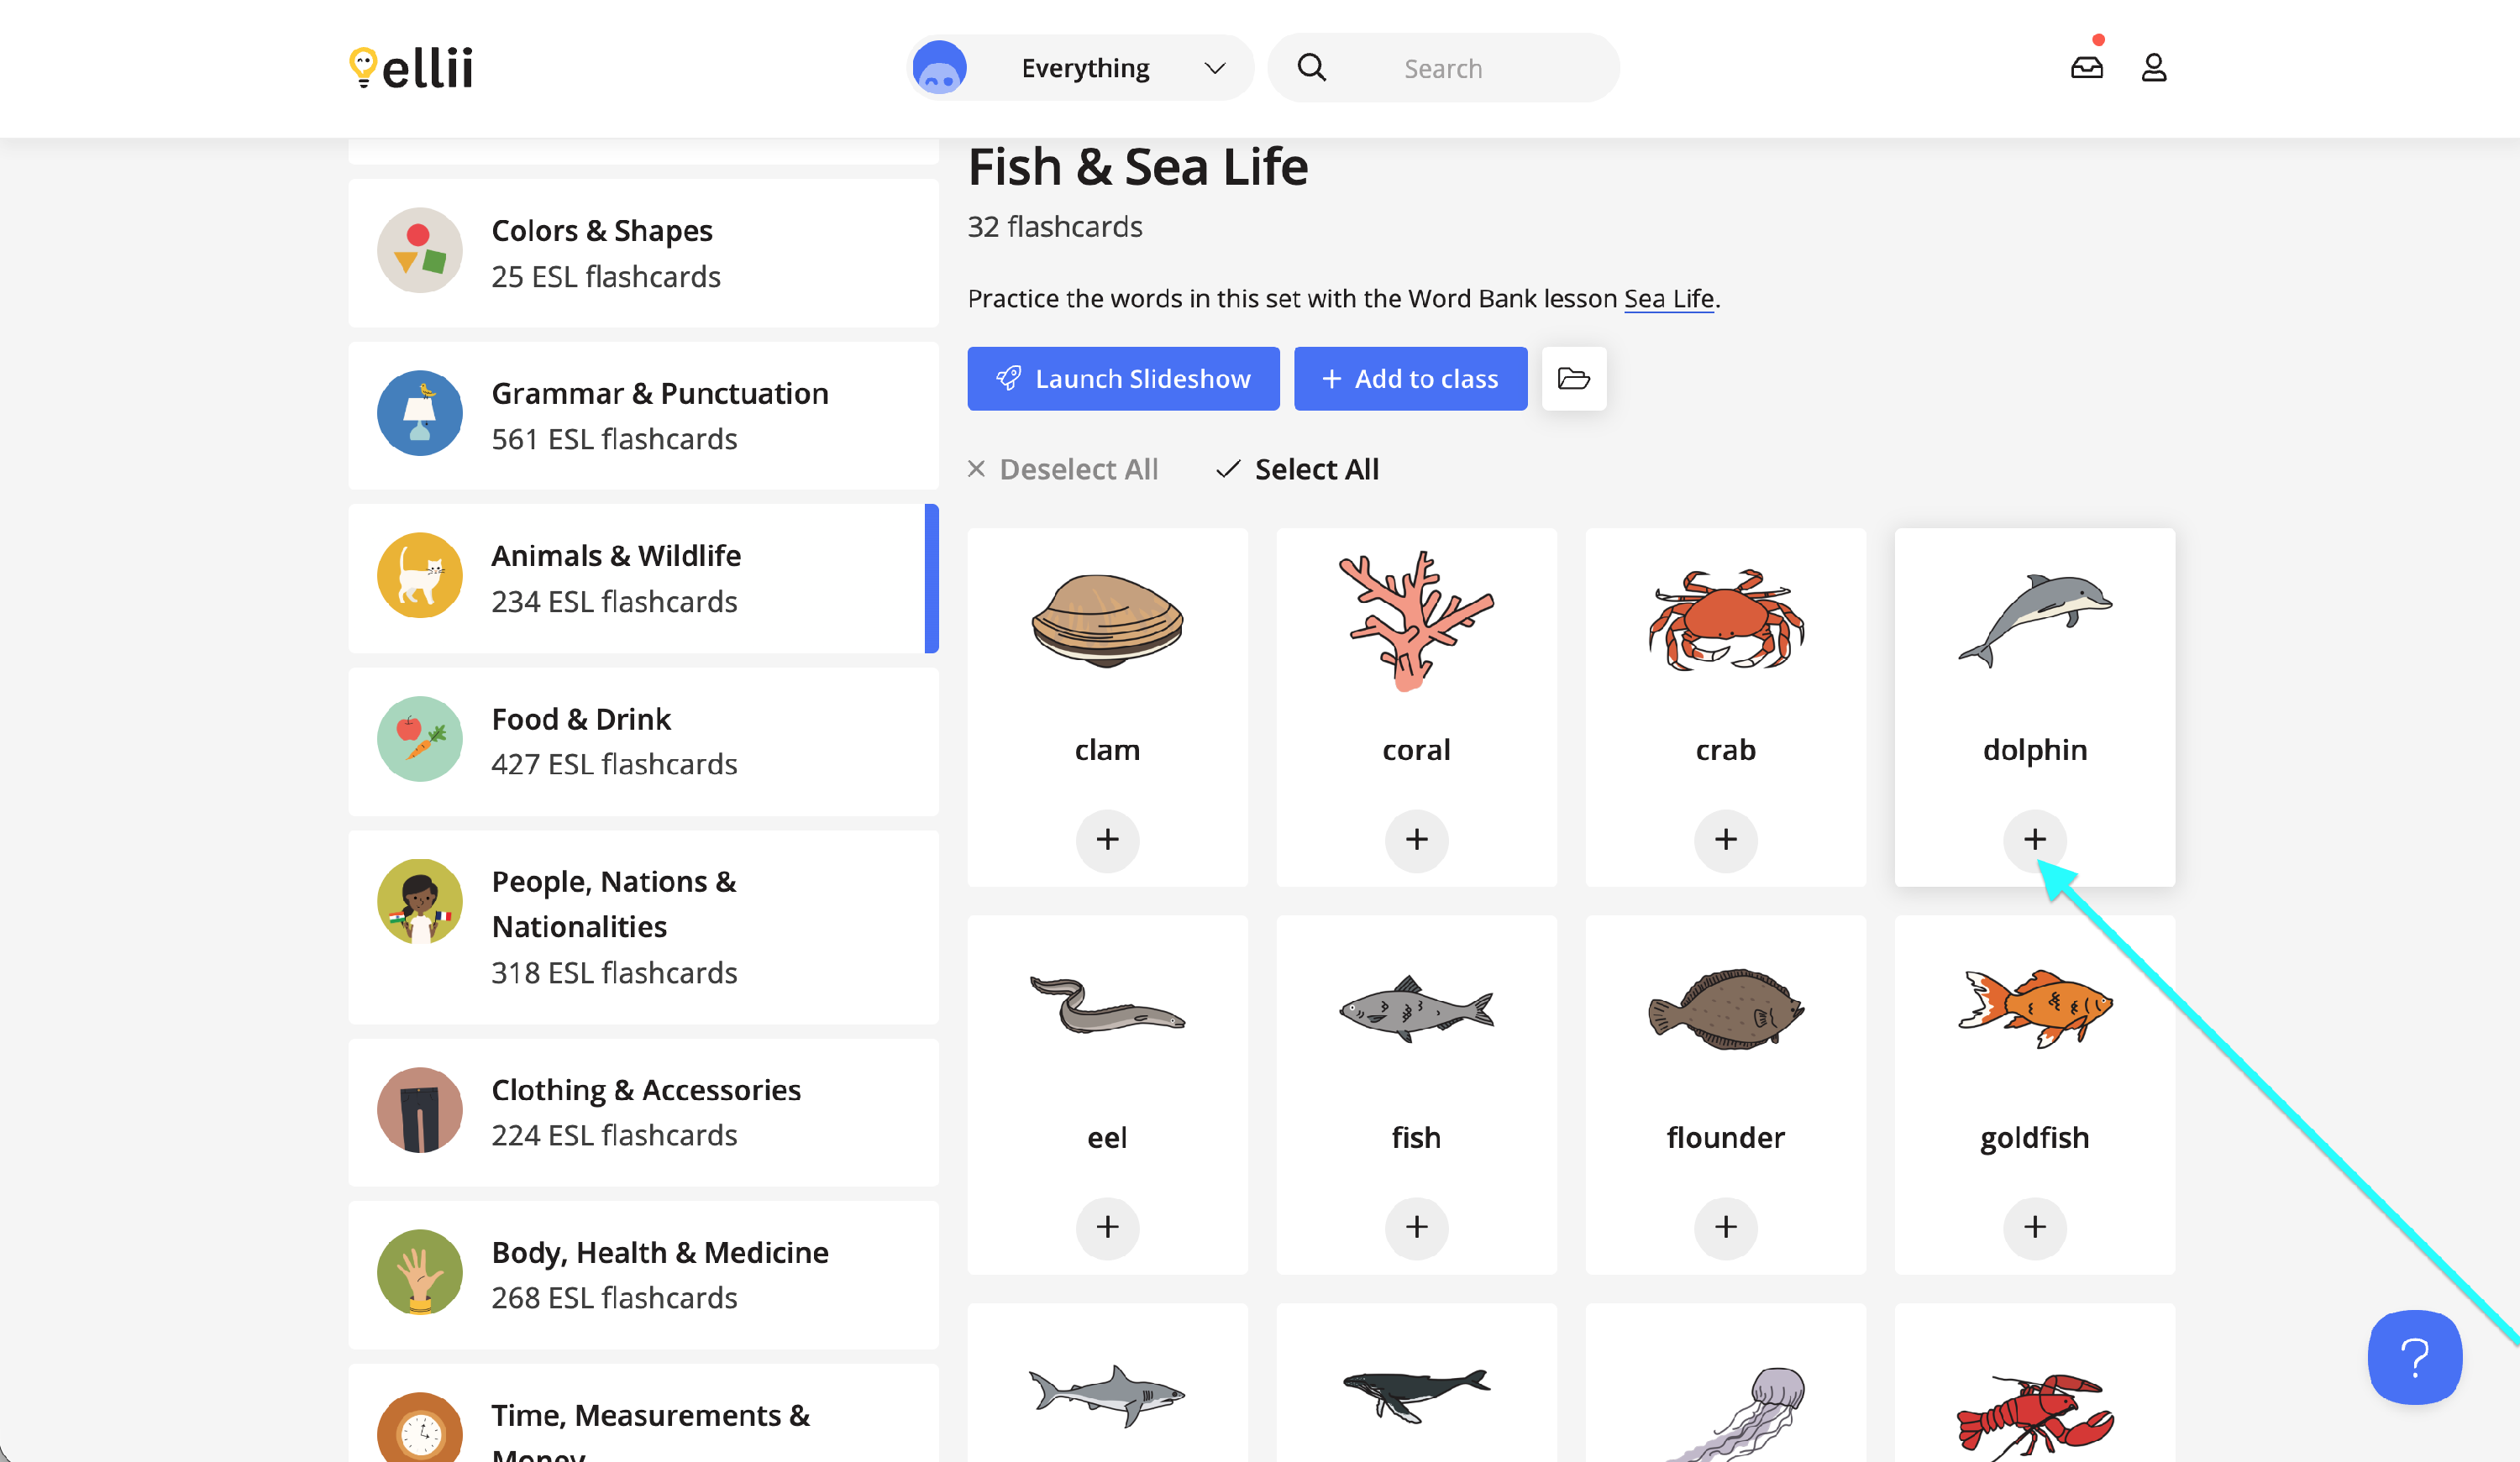
The image will appear on your flashcard drawer at the bottom of the page after it has been added.
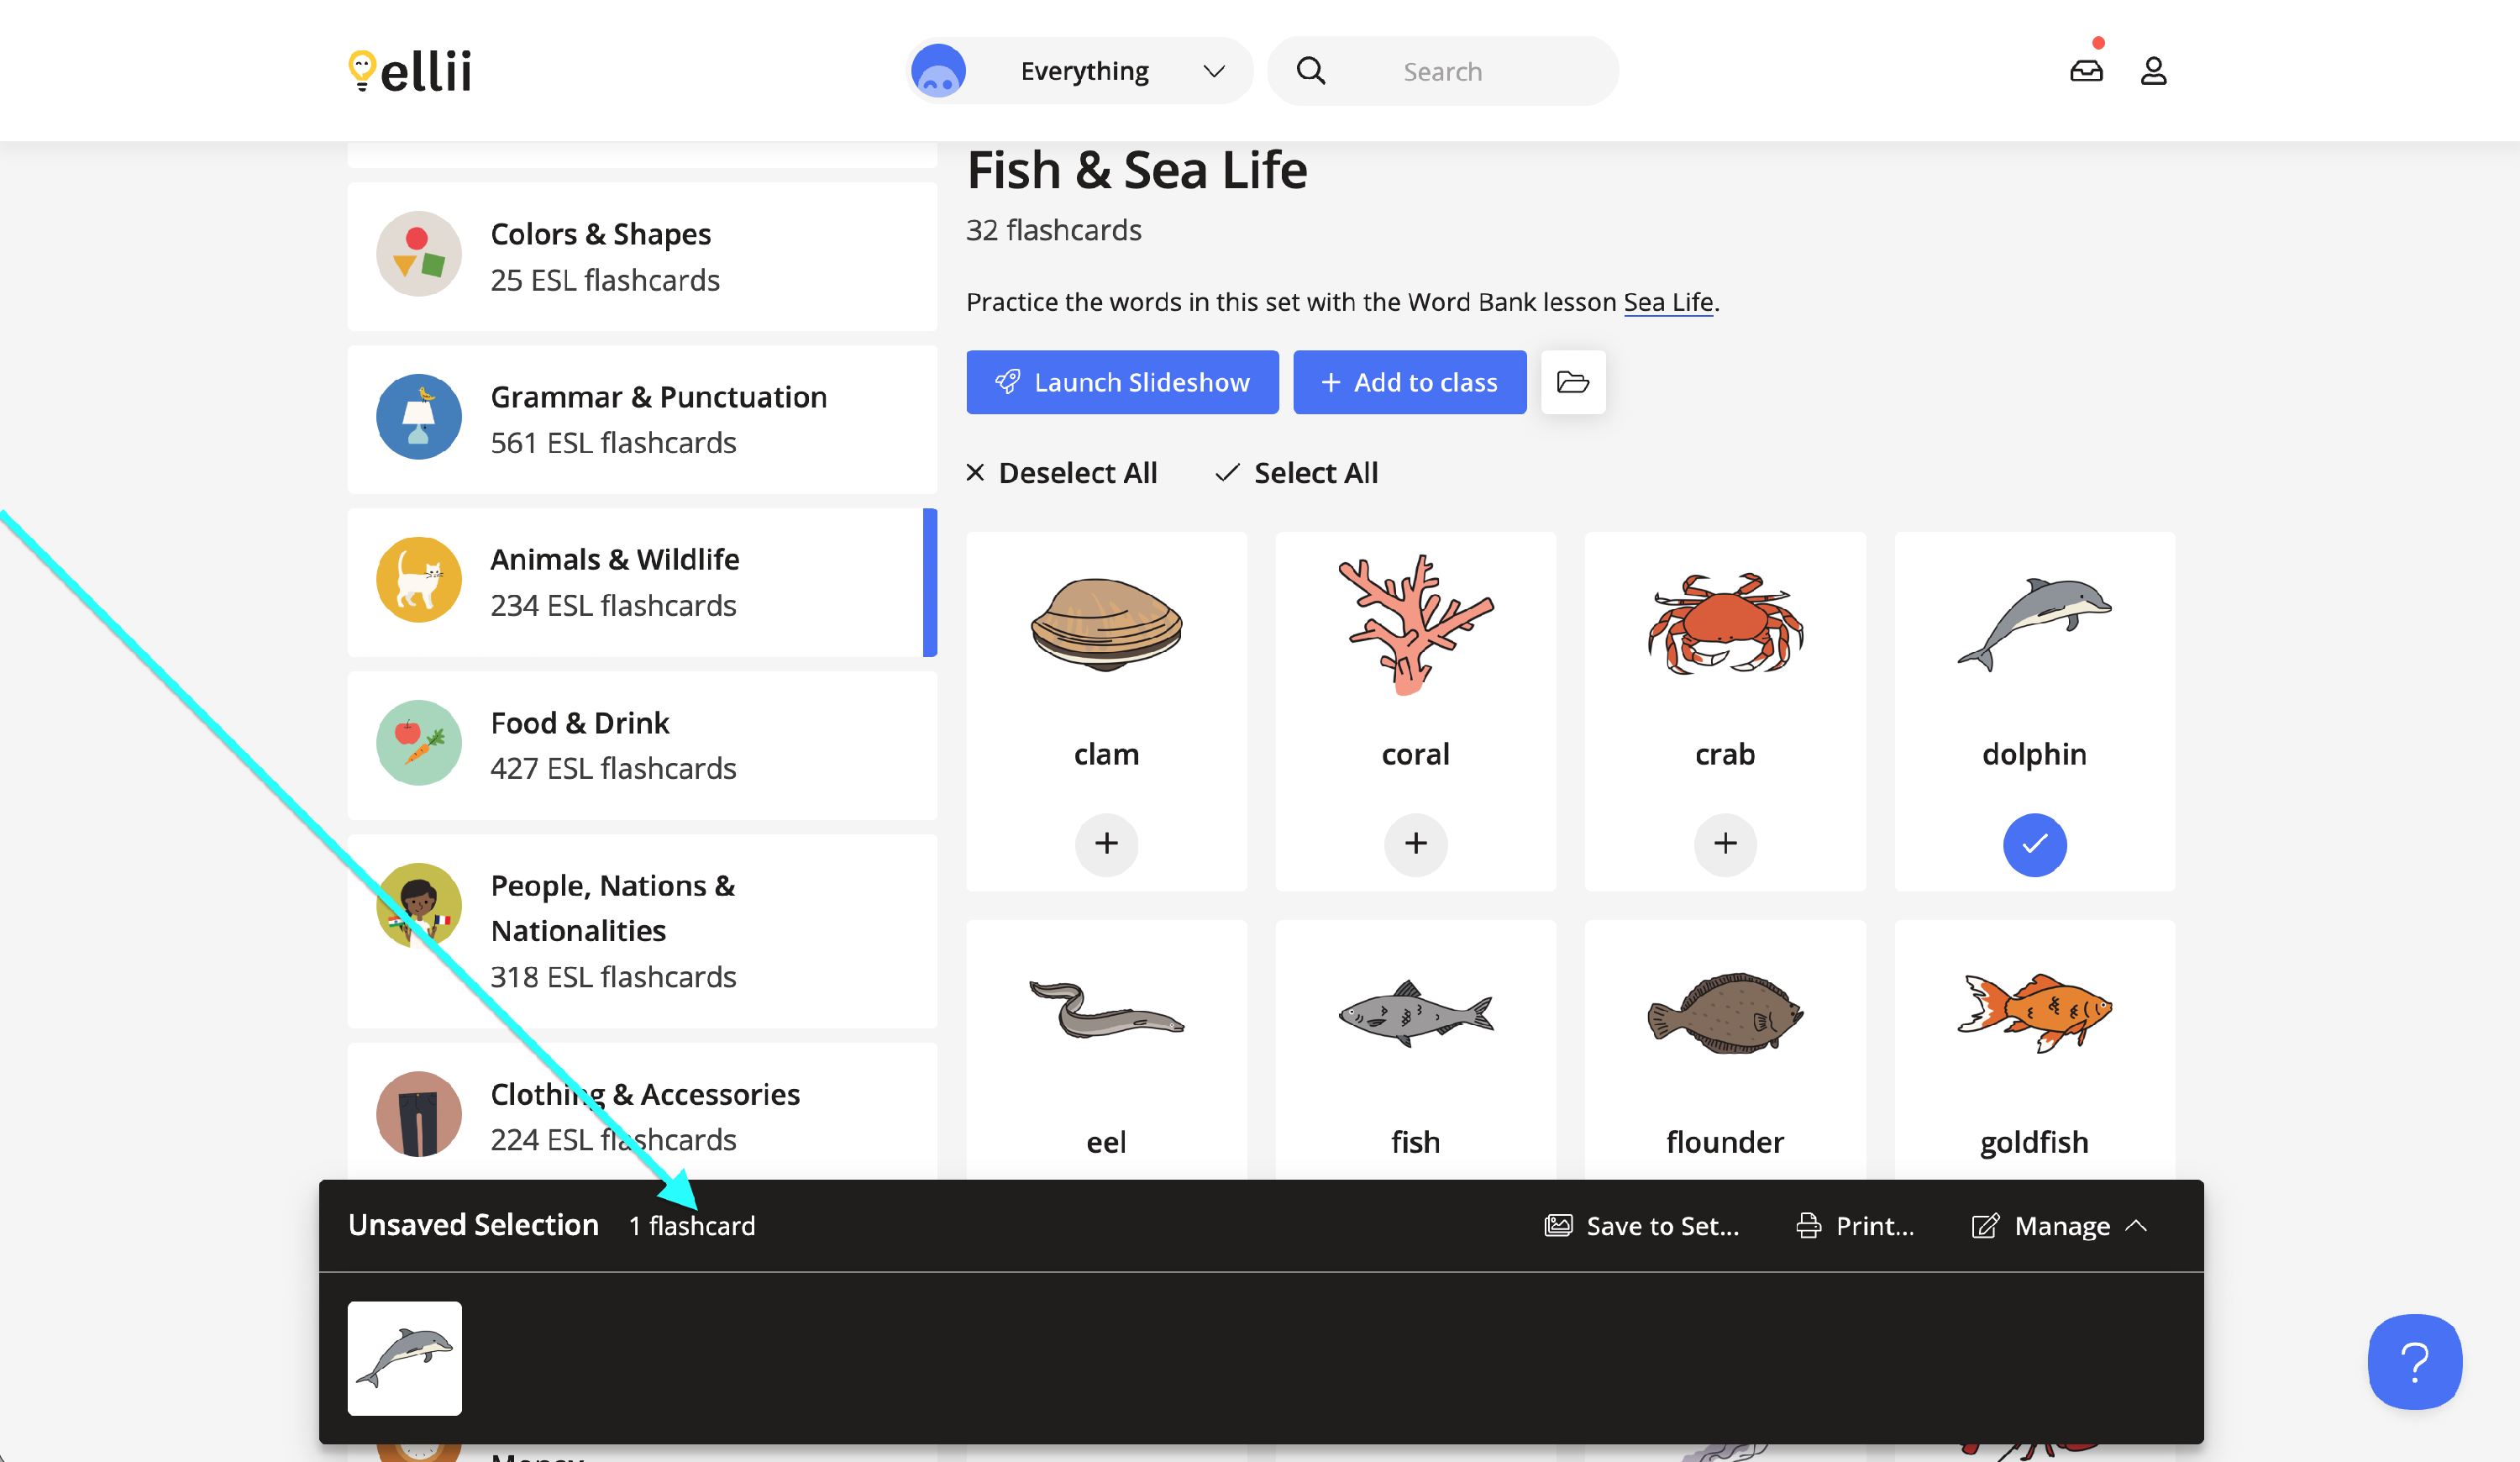
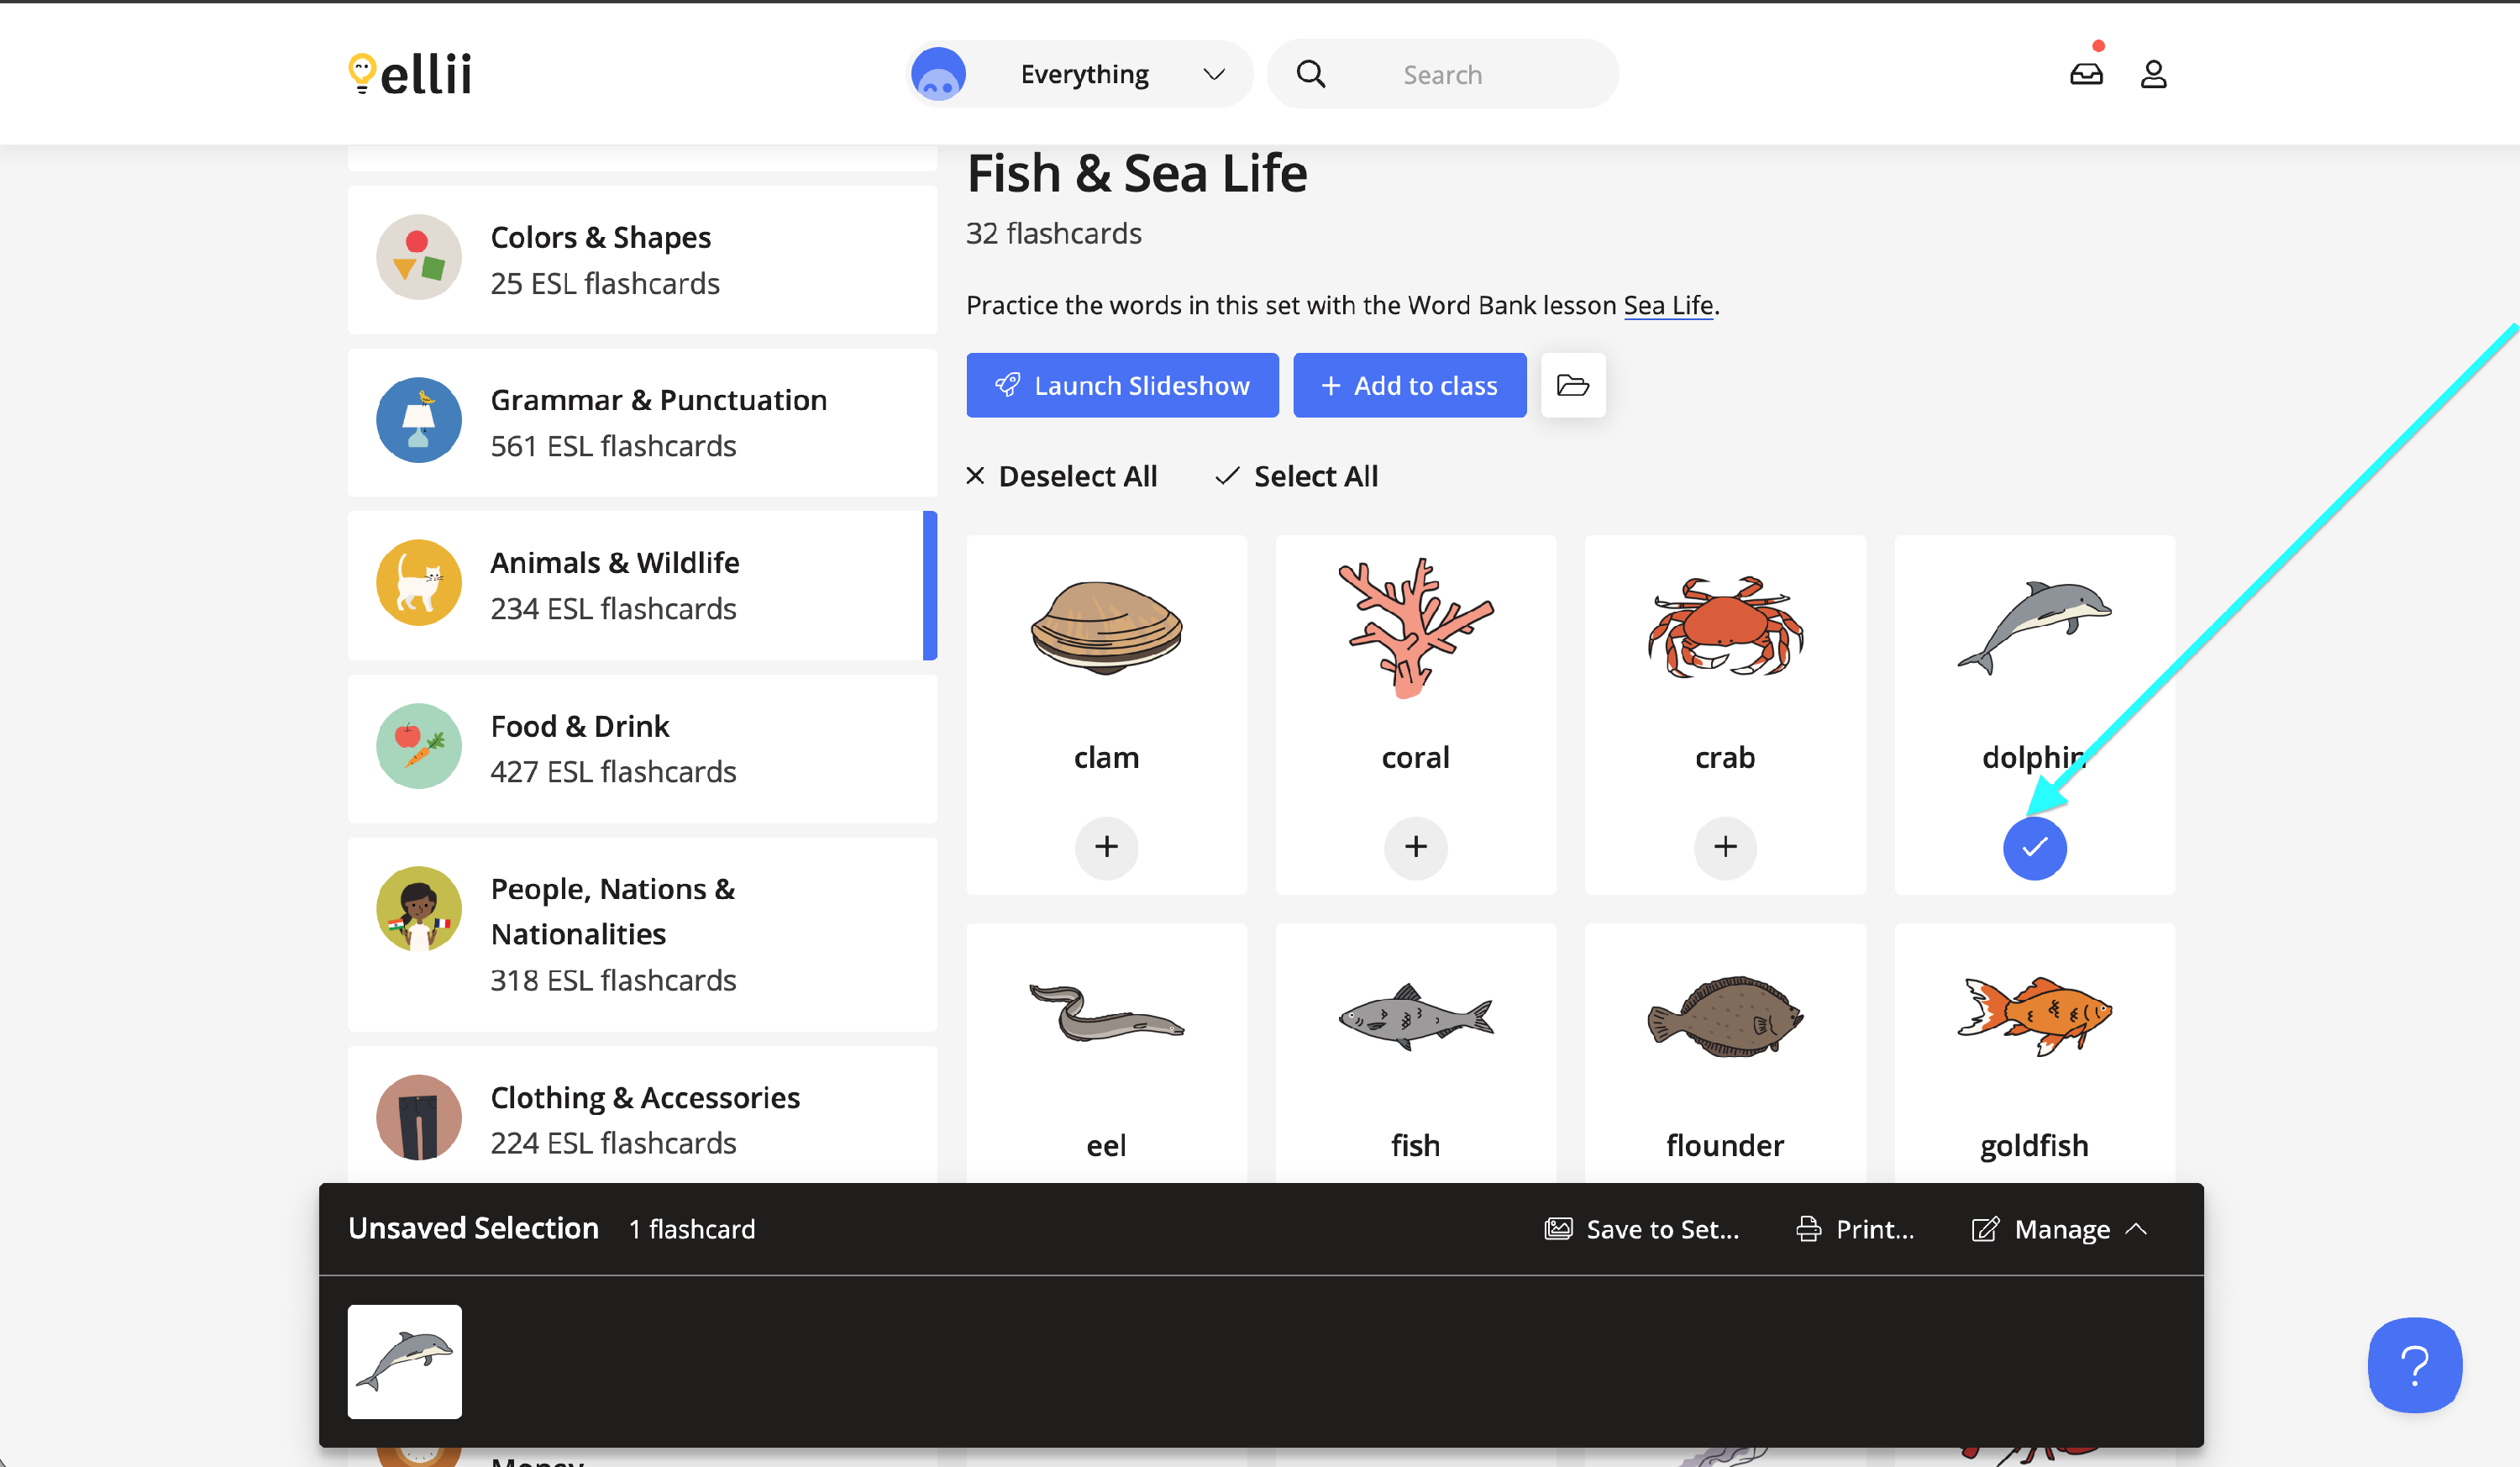
Once selected, the image will also have a blue checkmark under it to make it easier to see what has already been selected.
Step 10
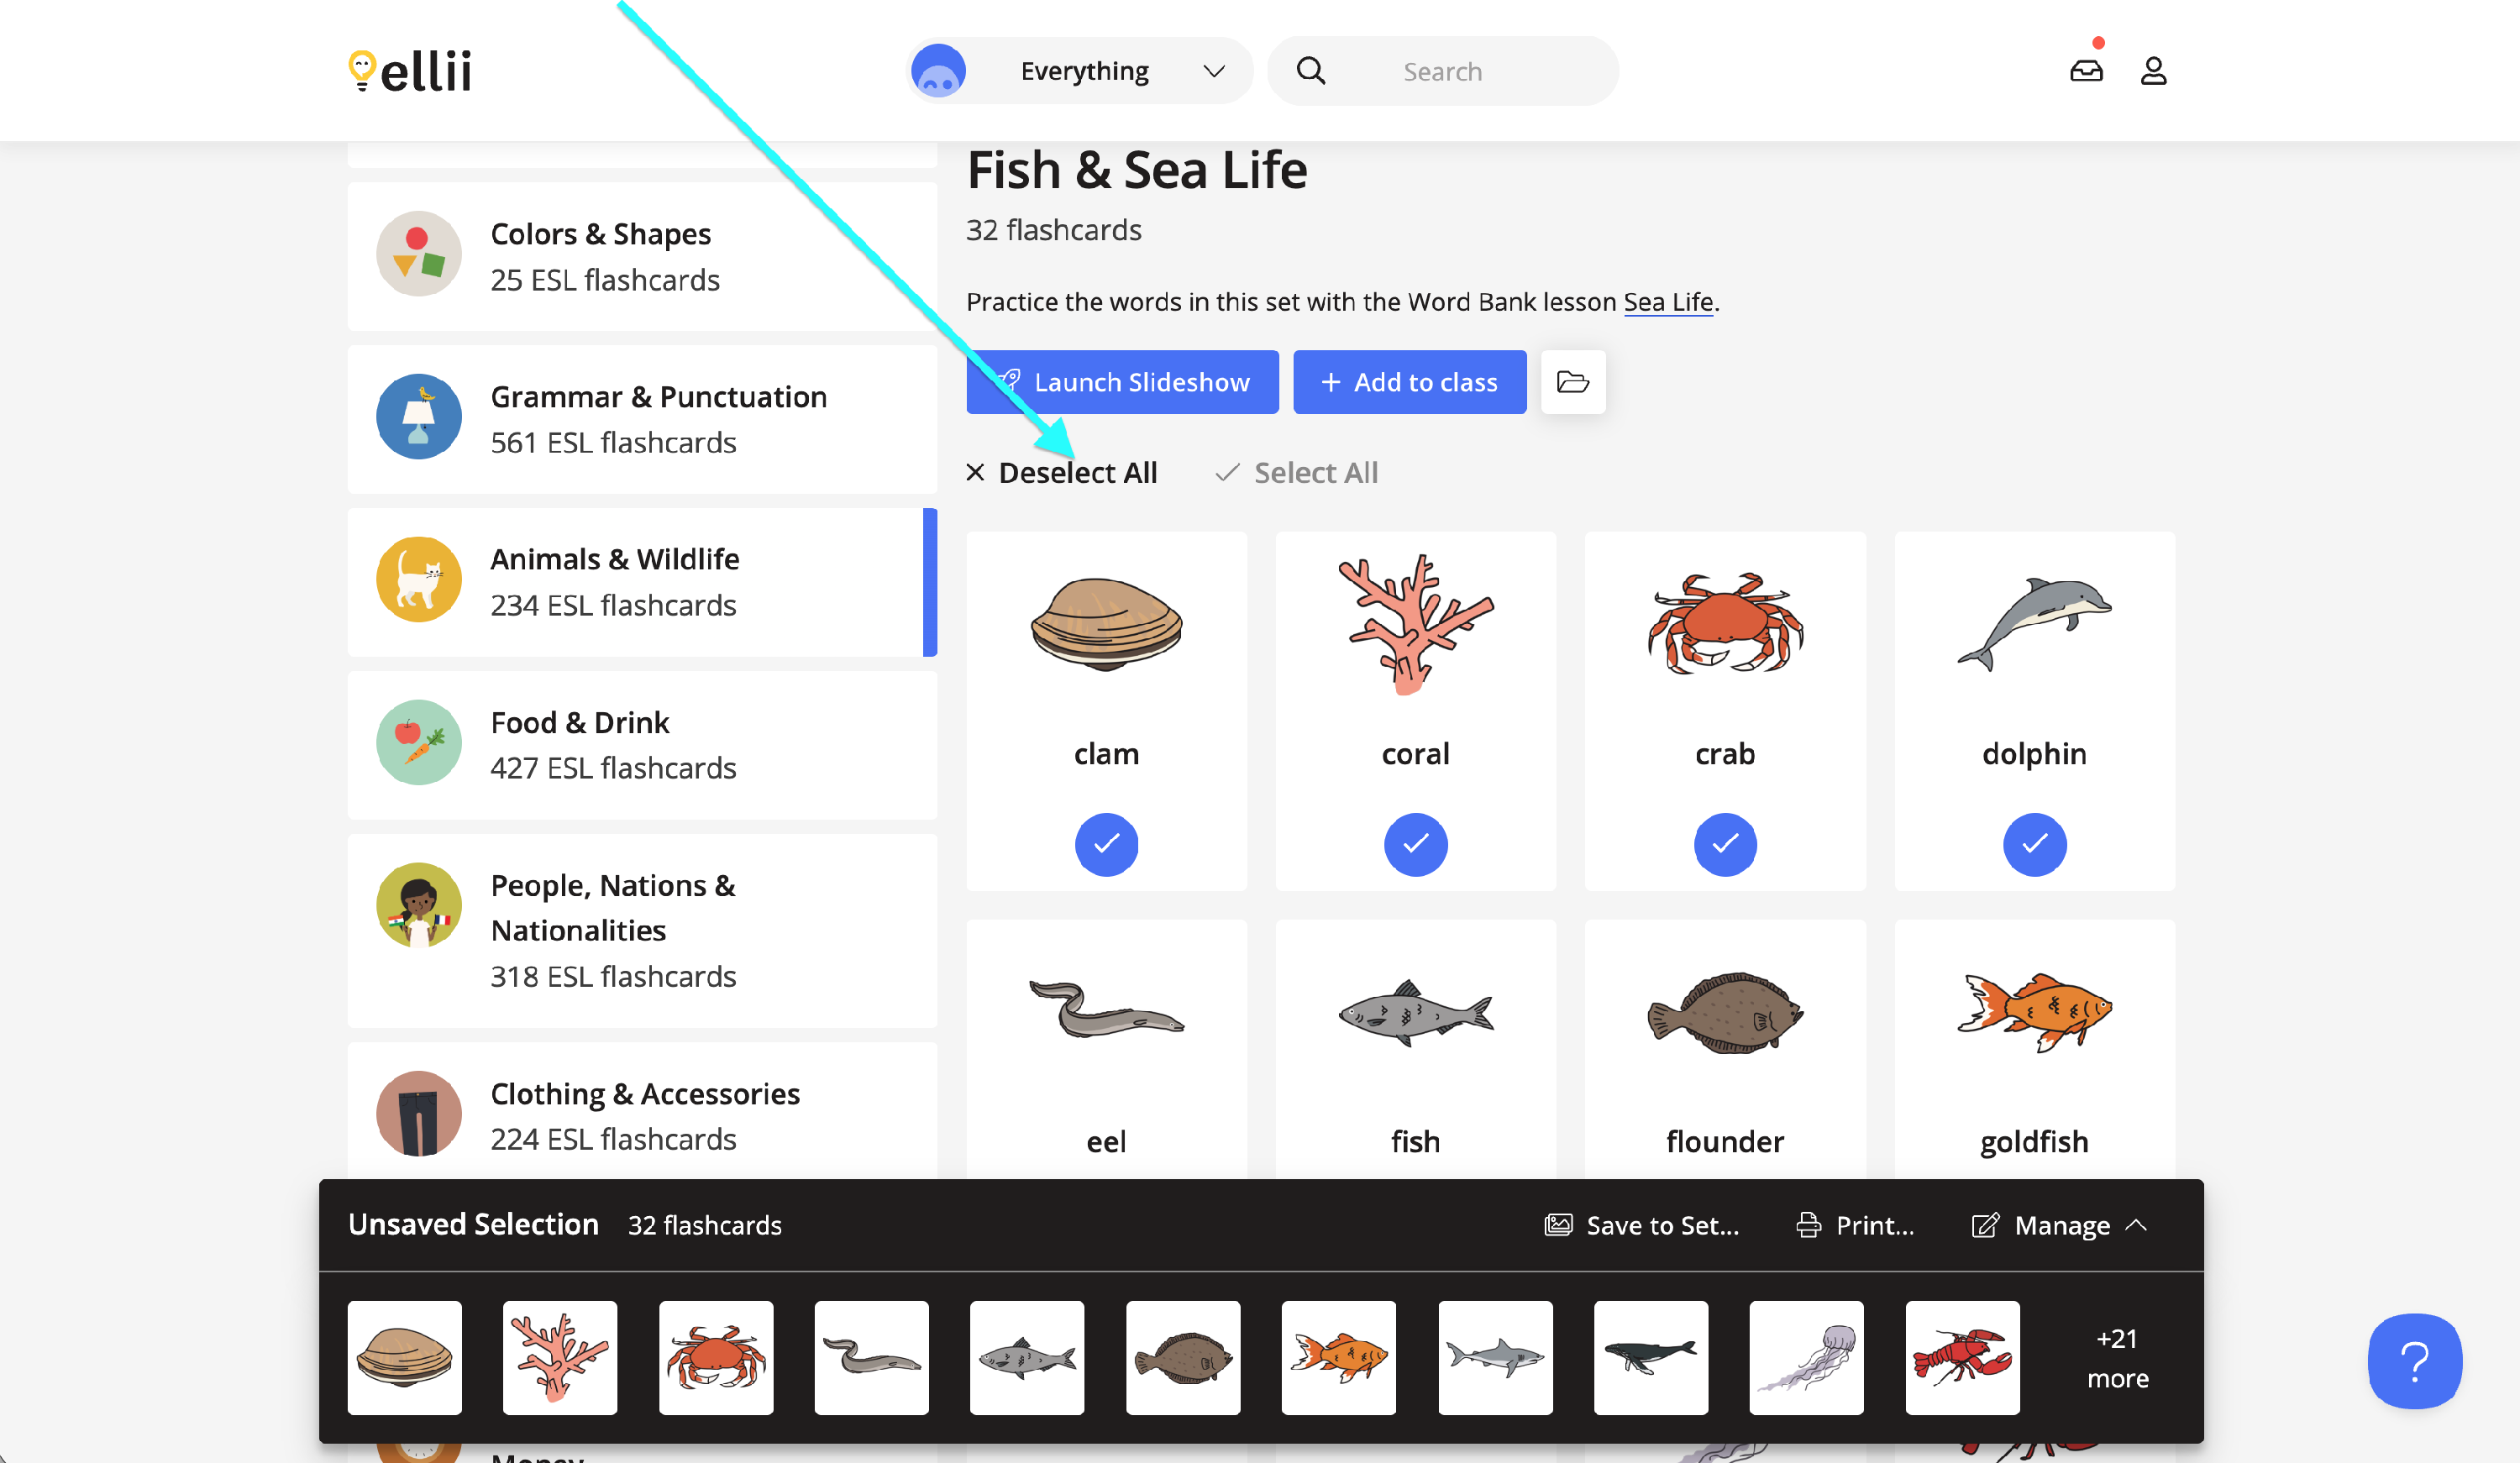
If you would like to select all the images in a category, click Select All.
Step 11
To remove all the images from your selected flashcards list, click Deselect All. This will remove all the images from your drawer within that category.
Step 12
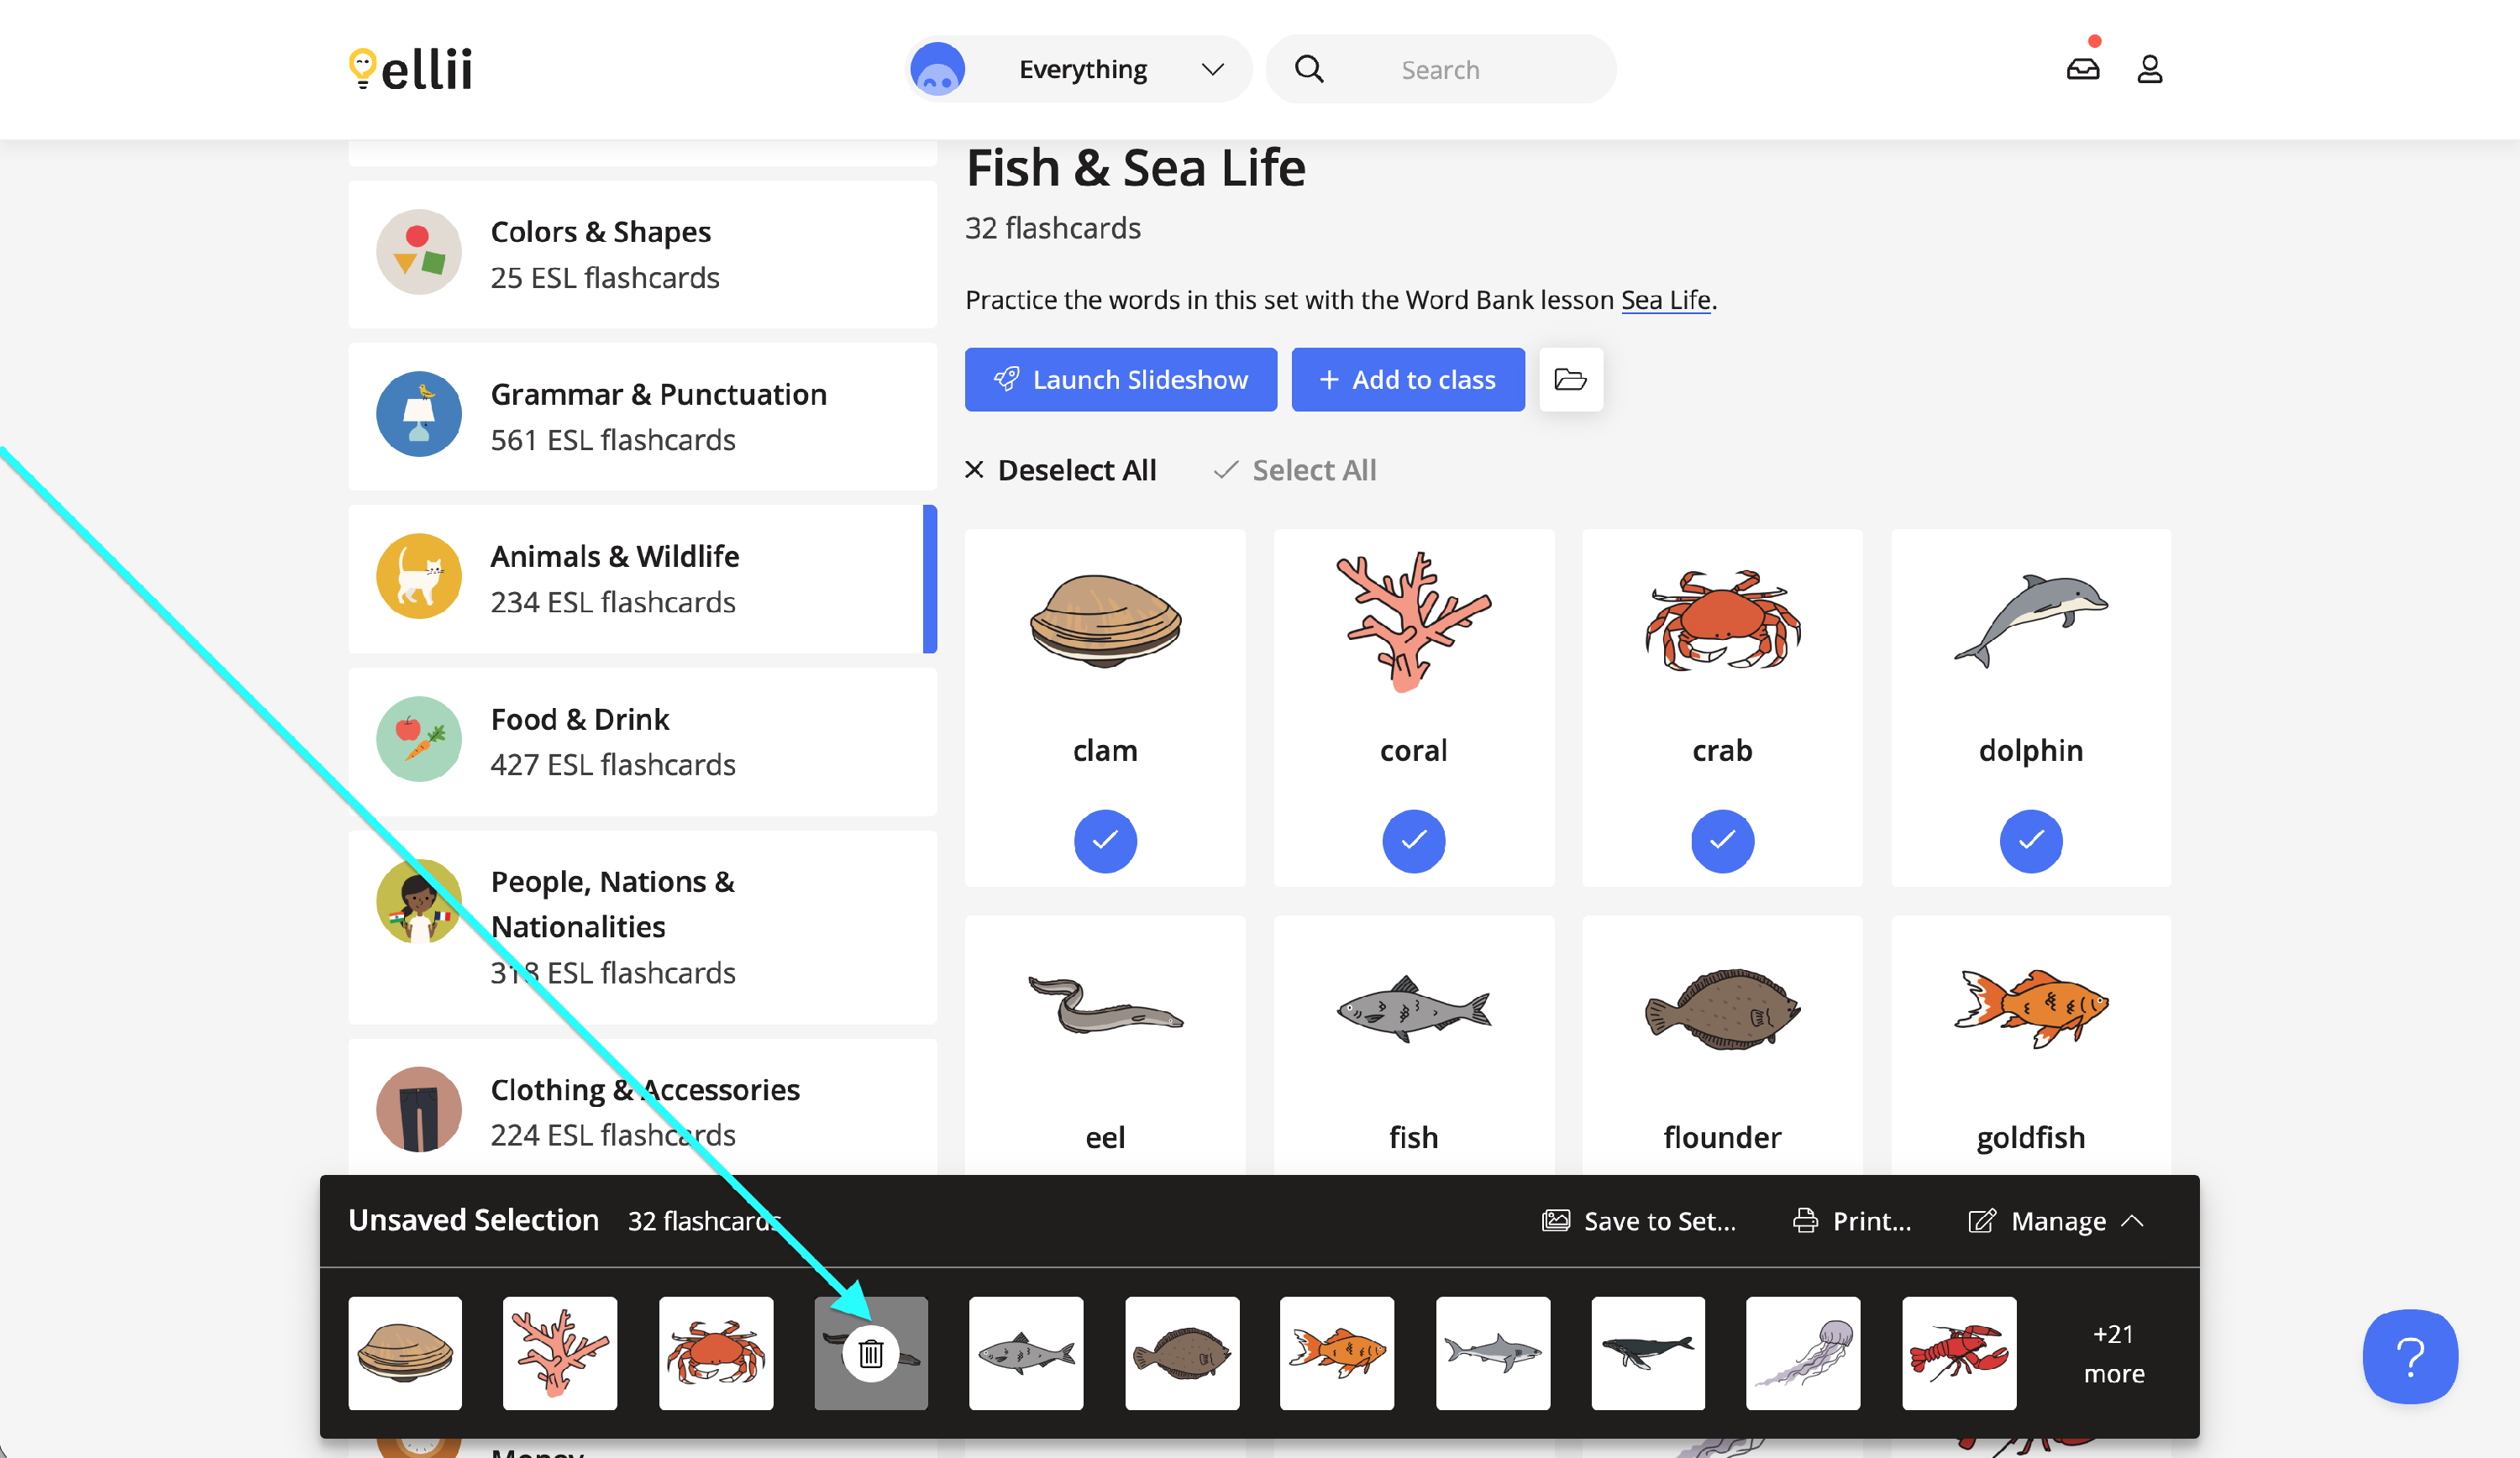
You can also remove flashcards from your drawer by hovering over the flashcard in the drawer and clicking the trash can button. This will remove the flashcard from your drawer and will also deselect the image (i.e., the blue checkmark will be removed).
Step 13
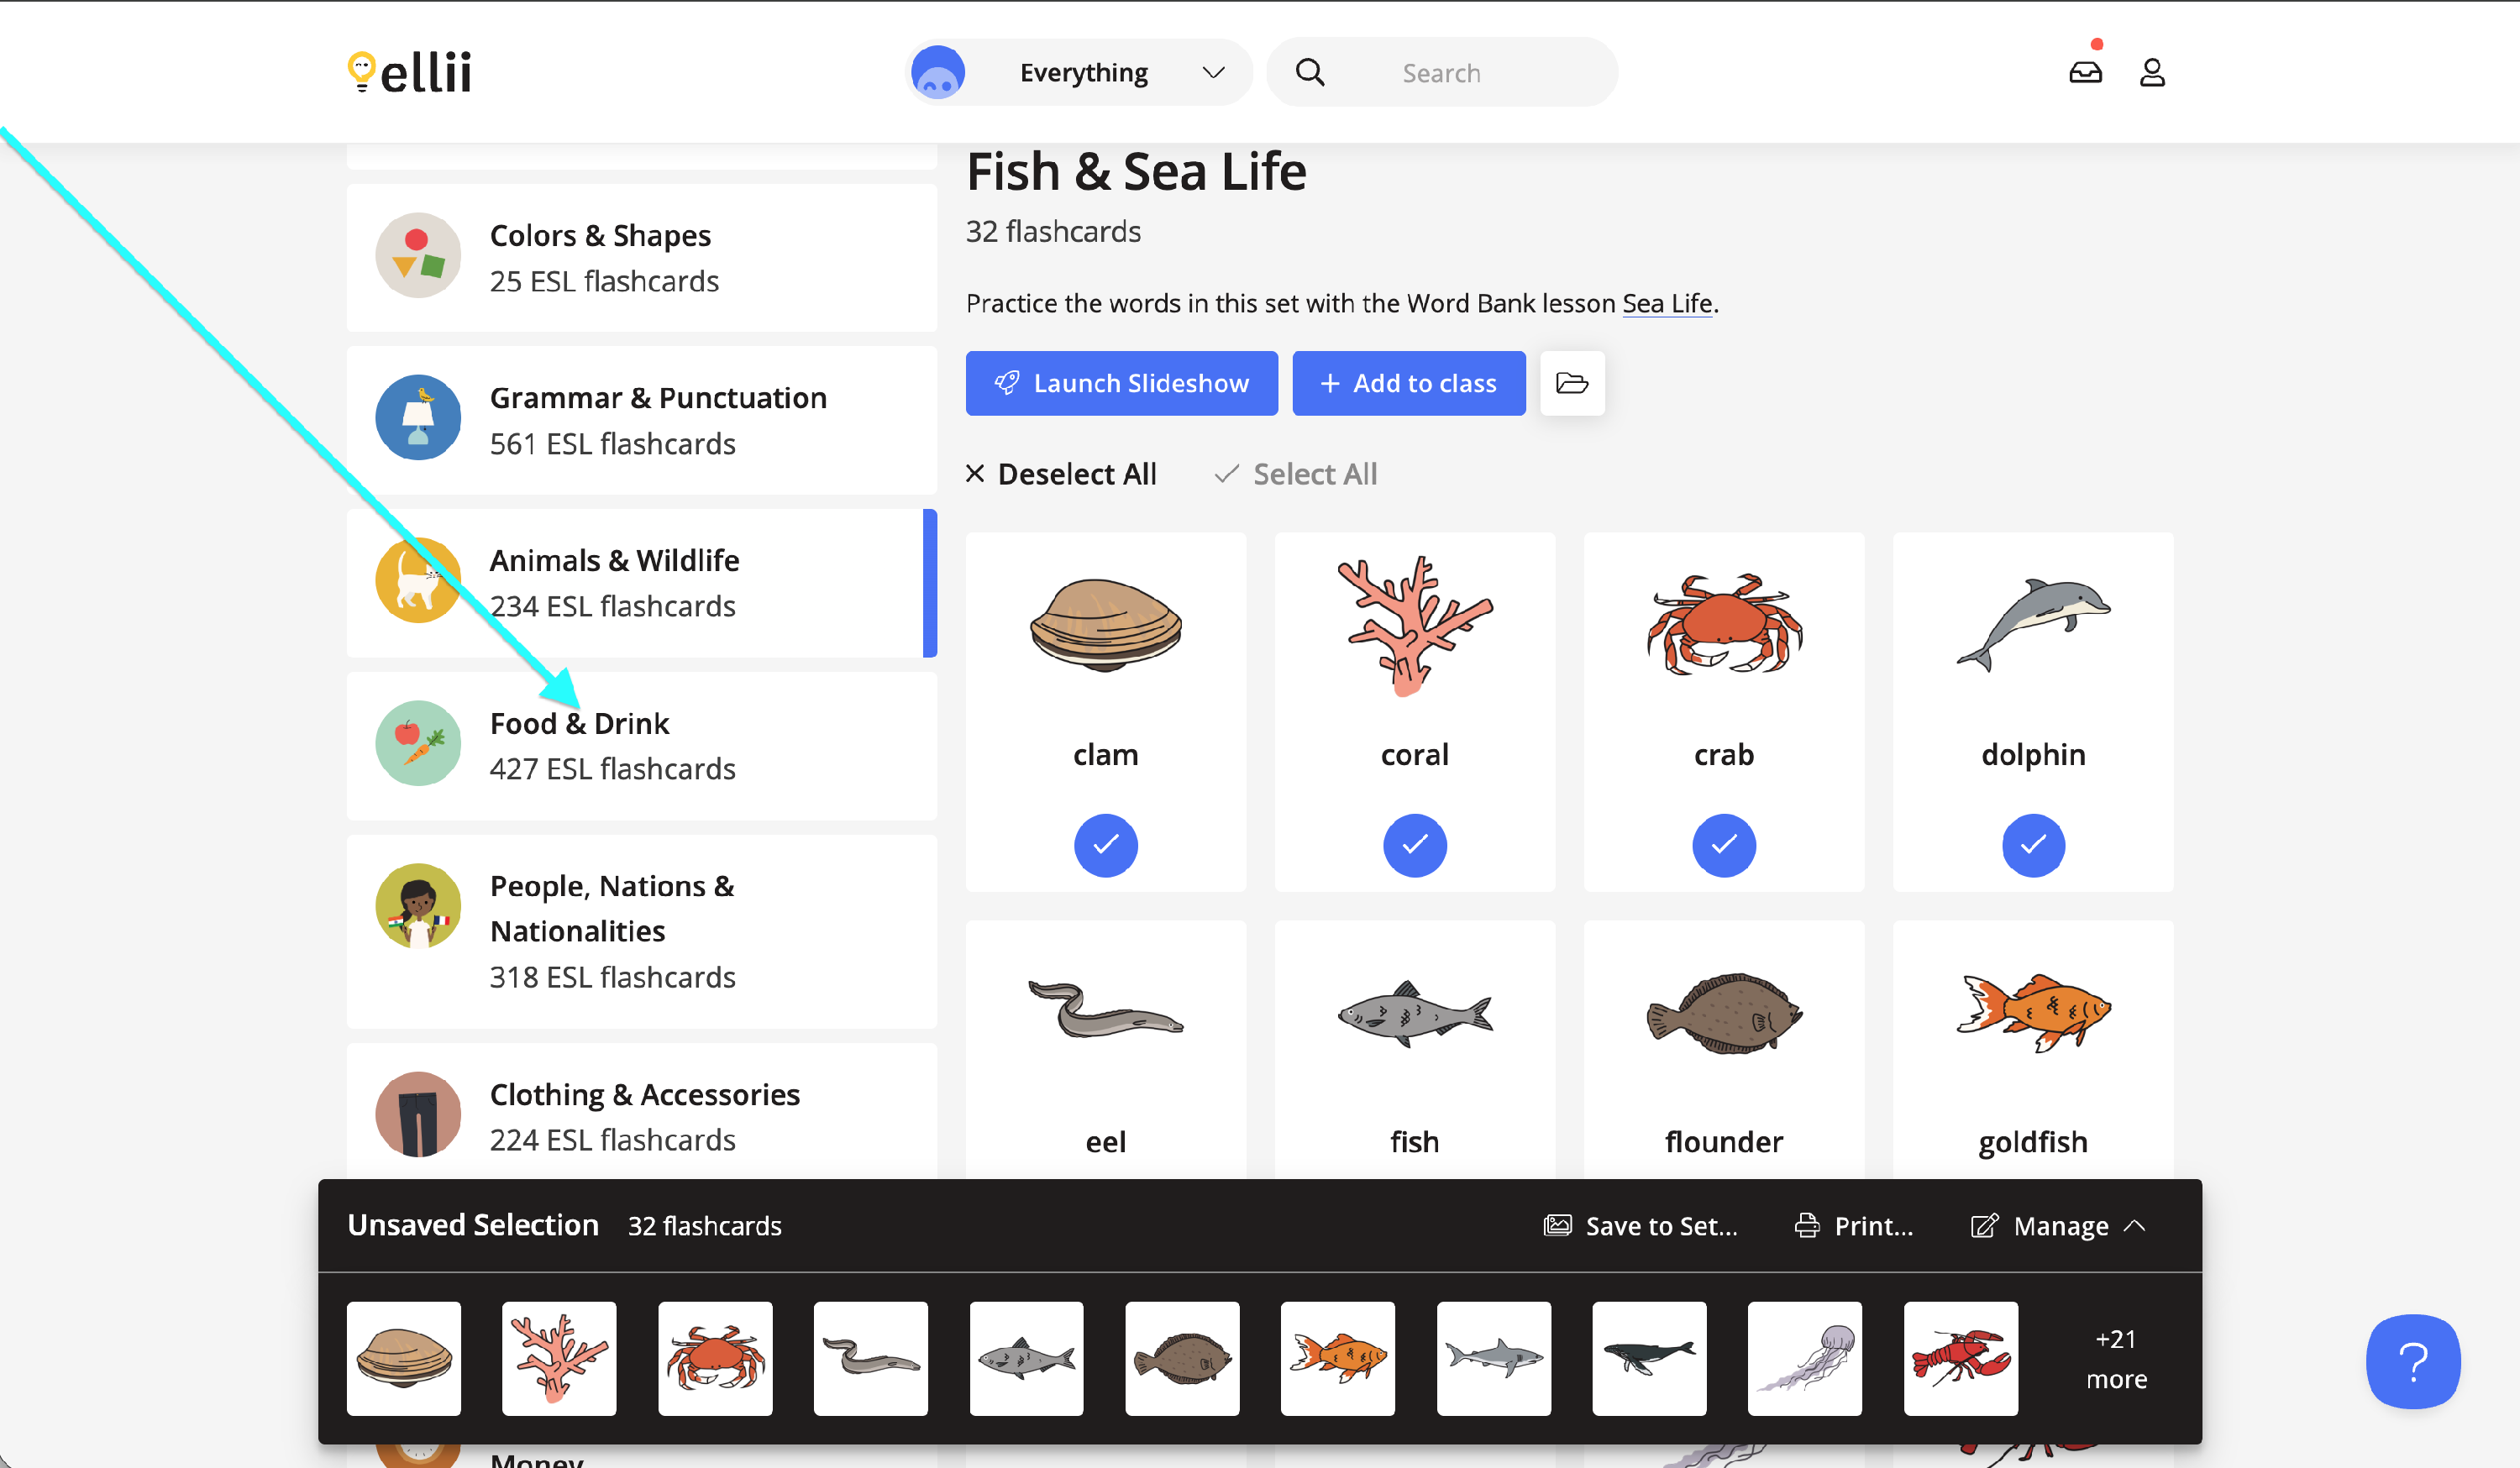
To include images from other sections, click the section name on the left to switch to a different section. Select the images from this section to add to your flashcard drawer at the bottom of the page.
Step 14
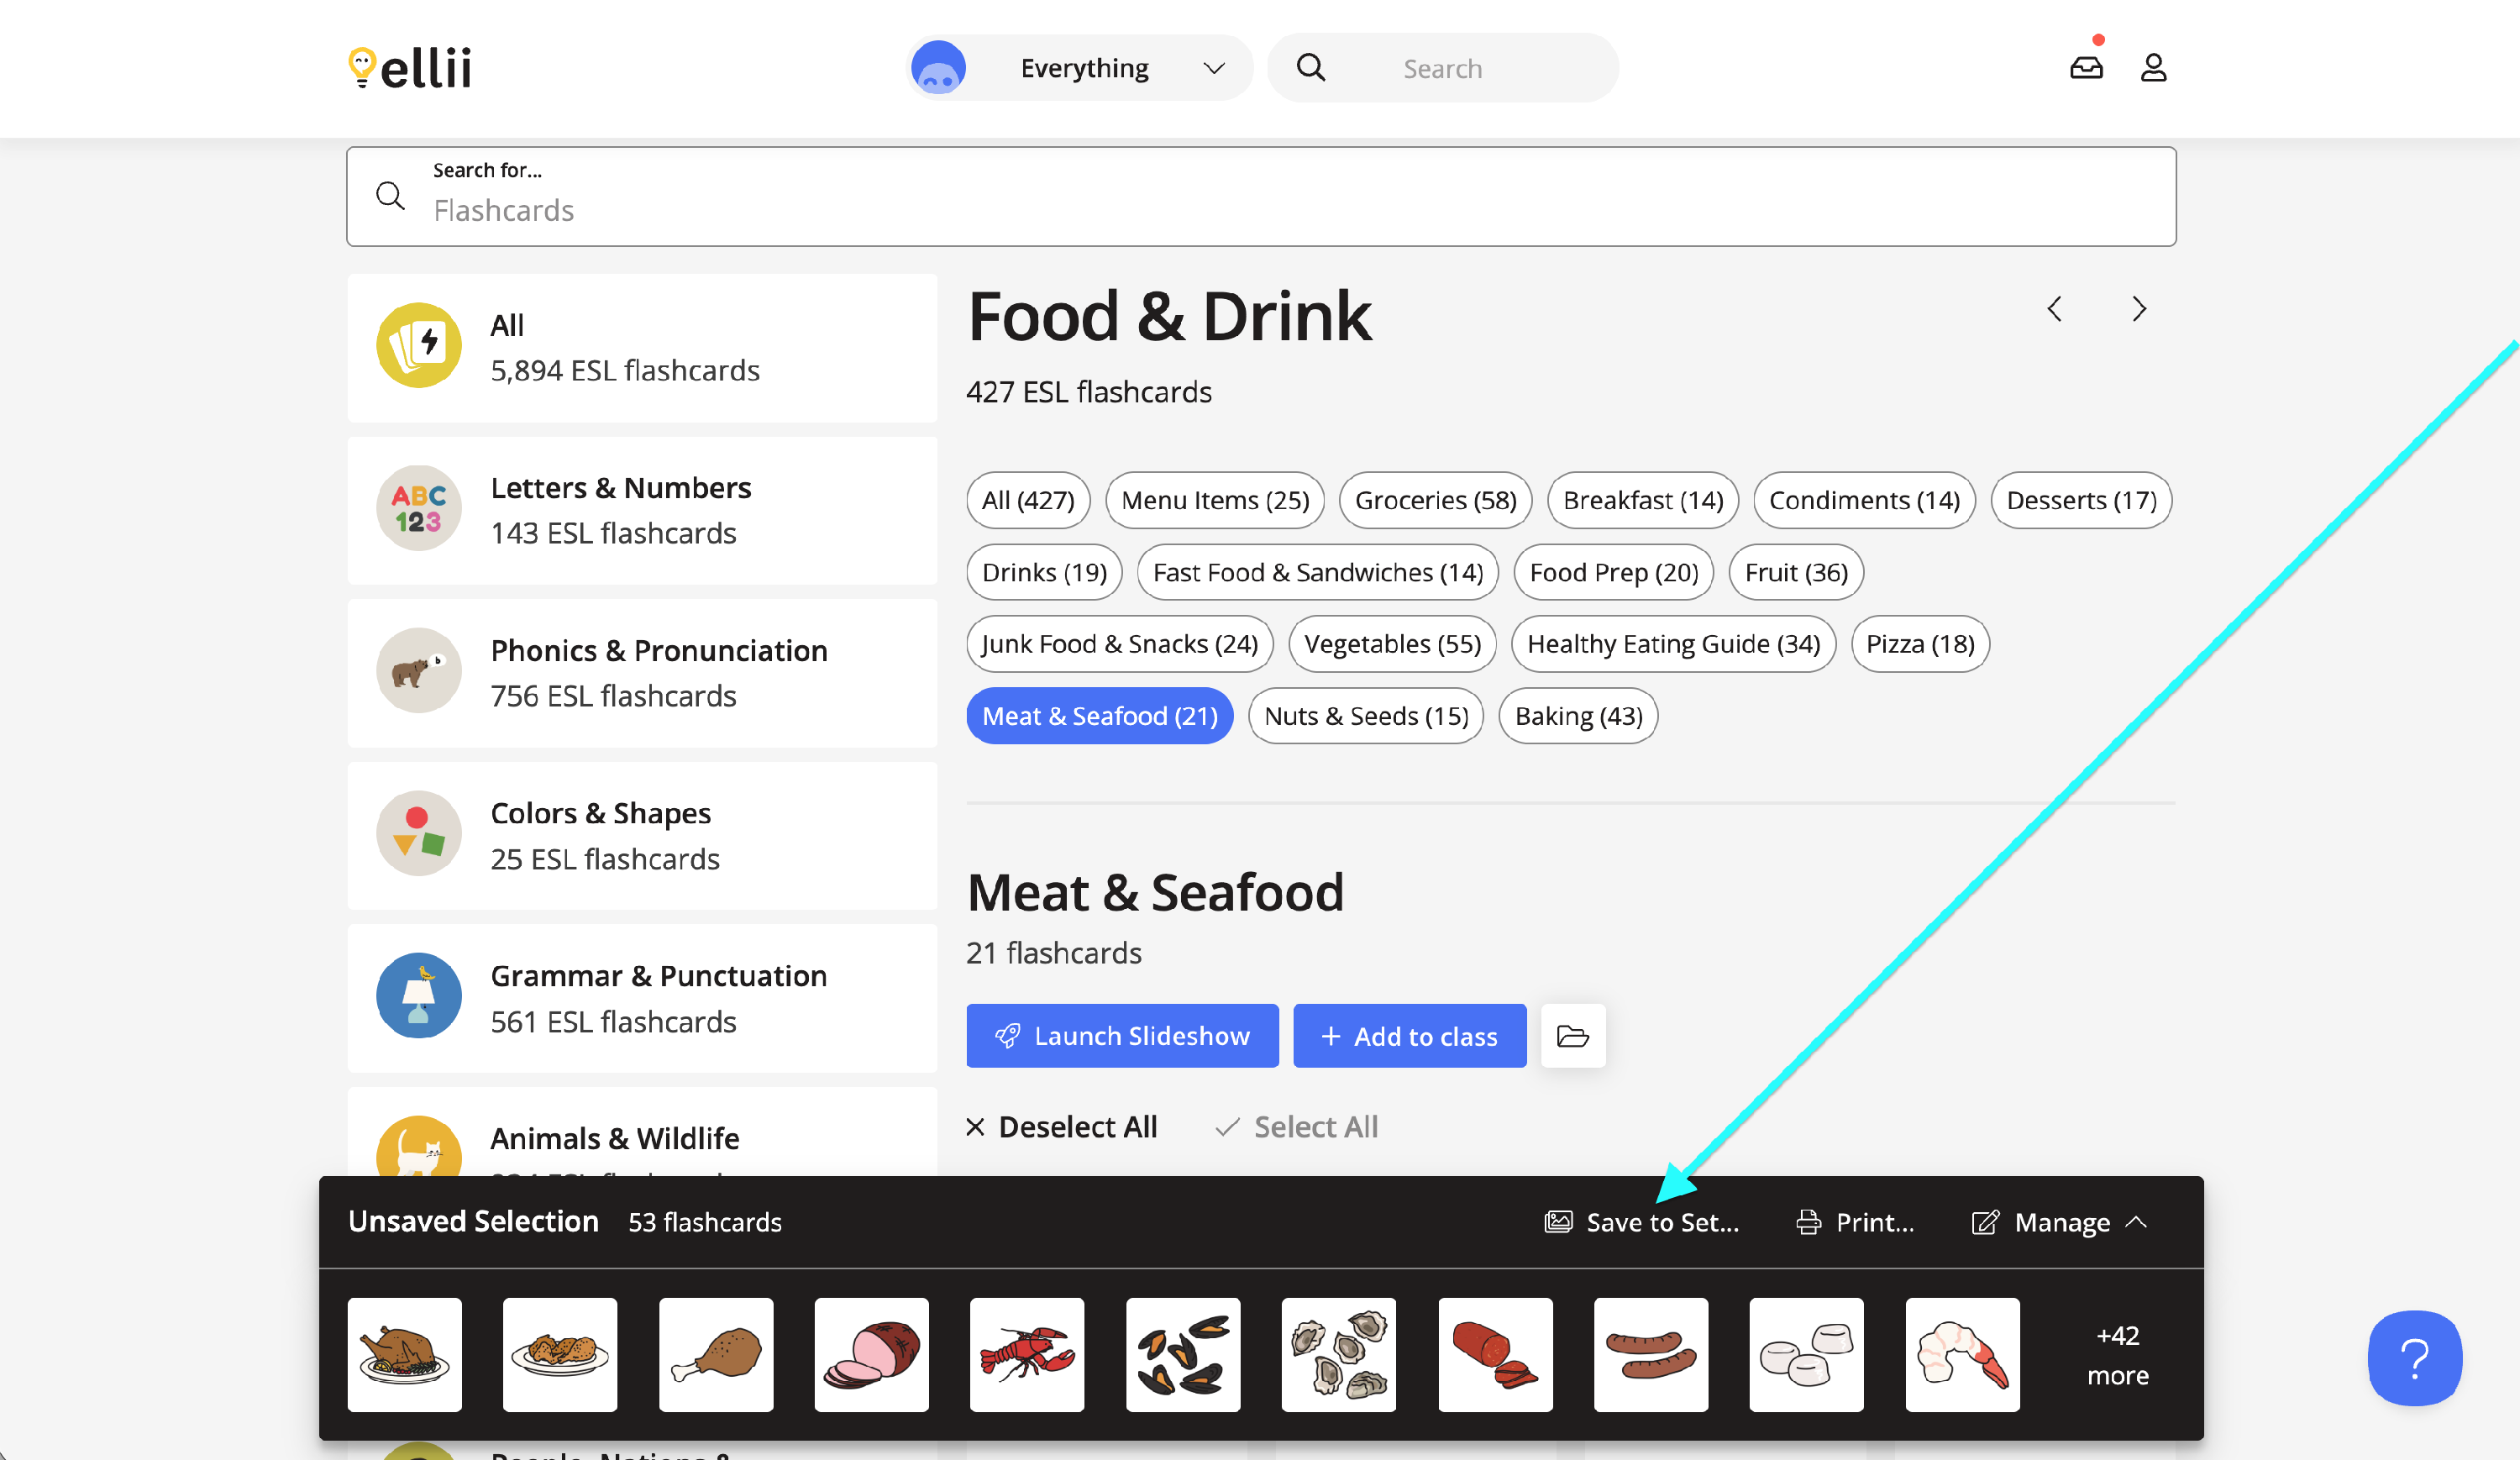
When you are finished adding flashcards to your drawer, you can save the flashcards in your drawer to an existing flashcard set or to a brand new one by clicking on Save to Set.
Step 15
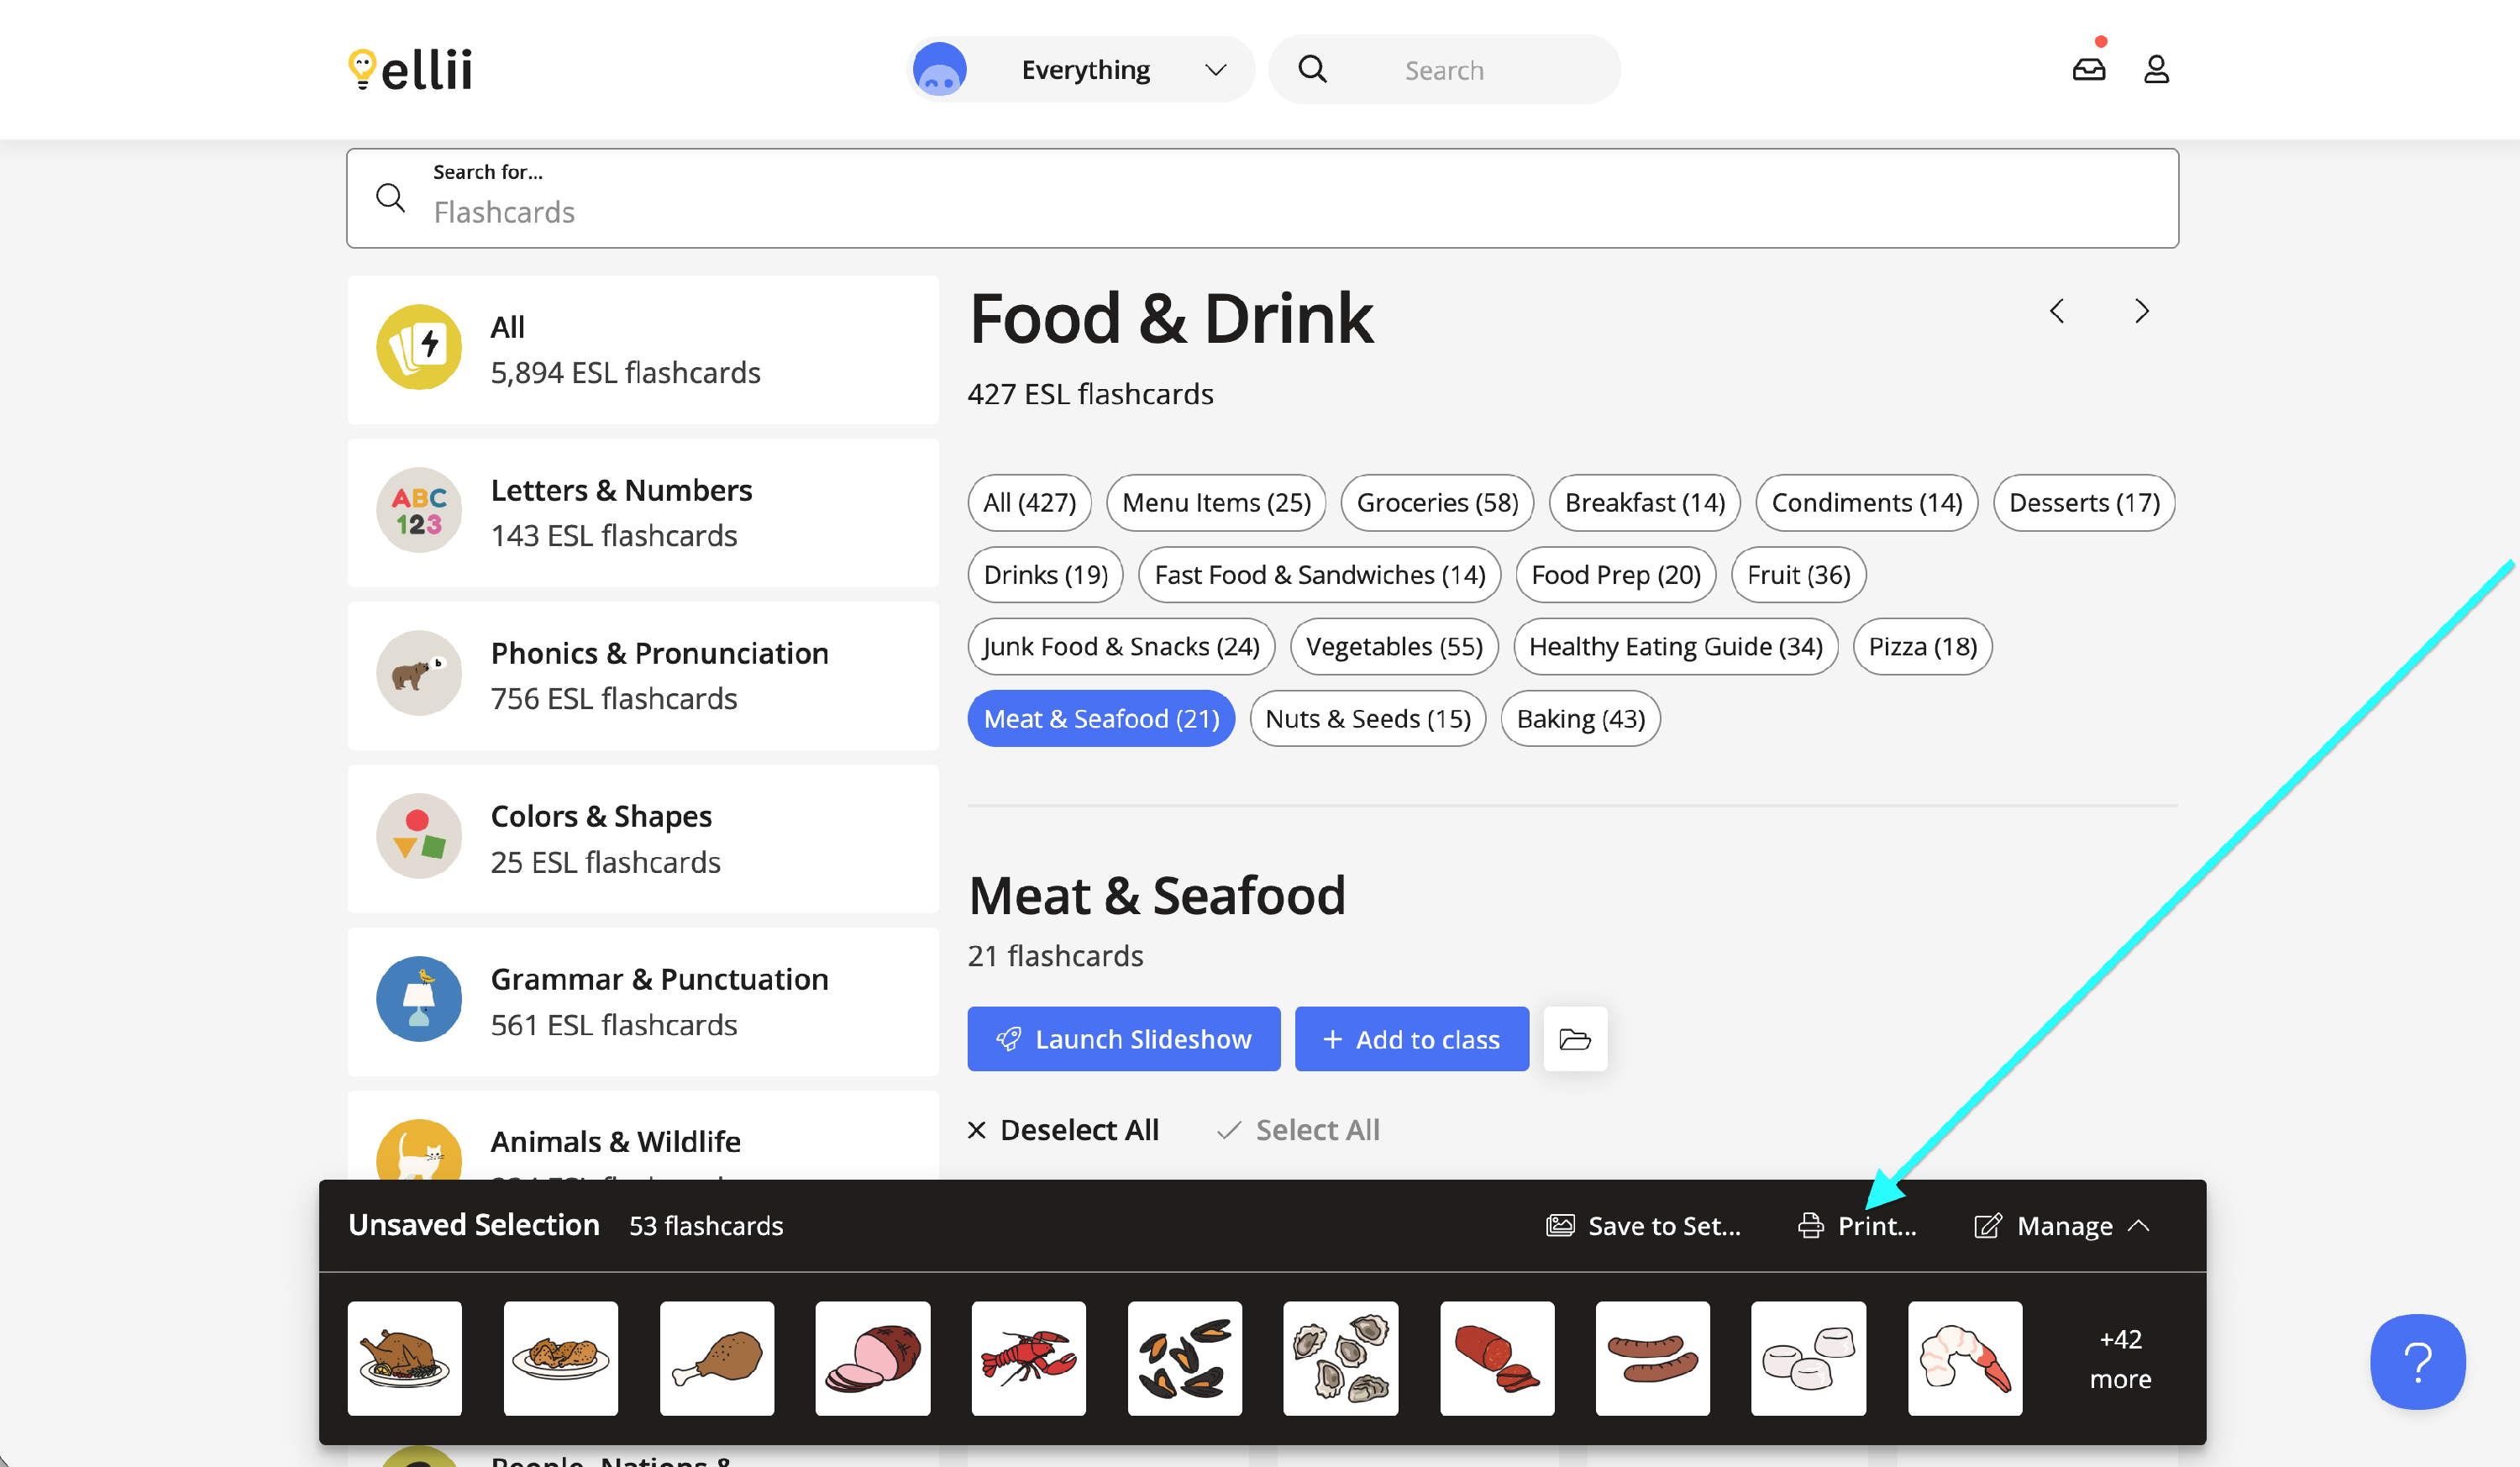
You can also print the unsaved flashcards in your drawer by clicking on Print.
Step 16
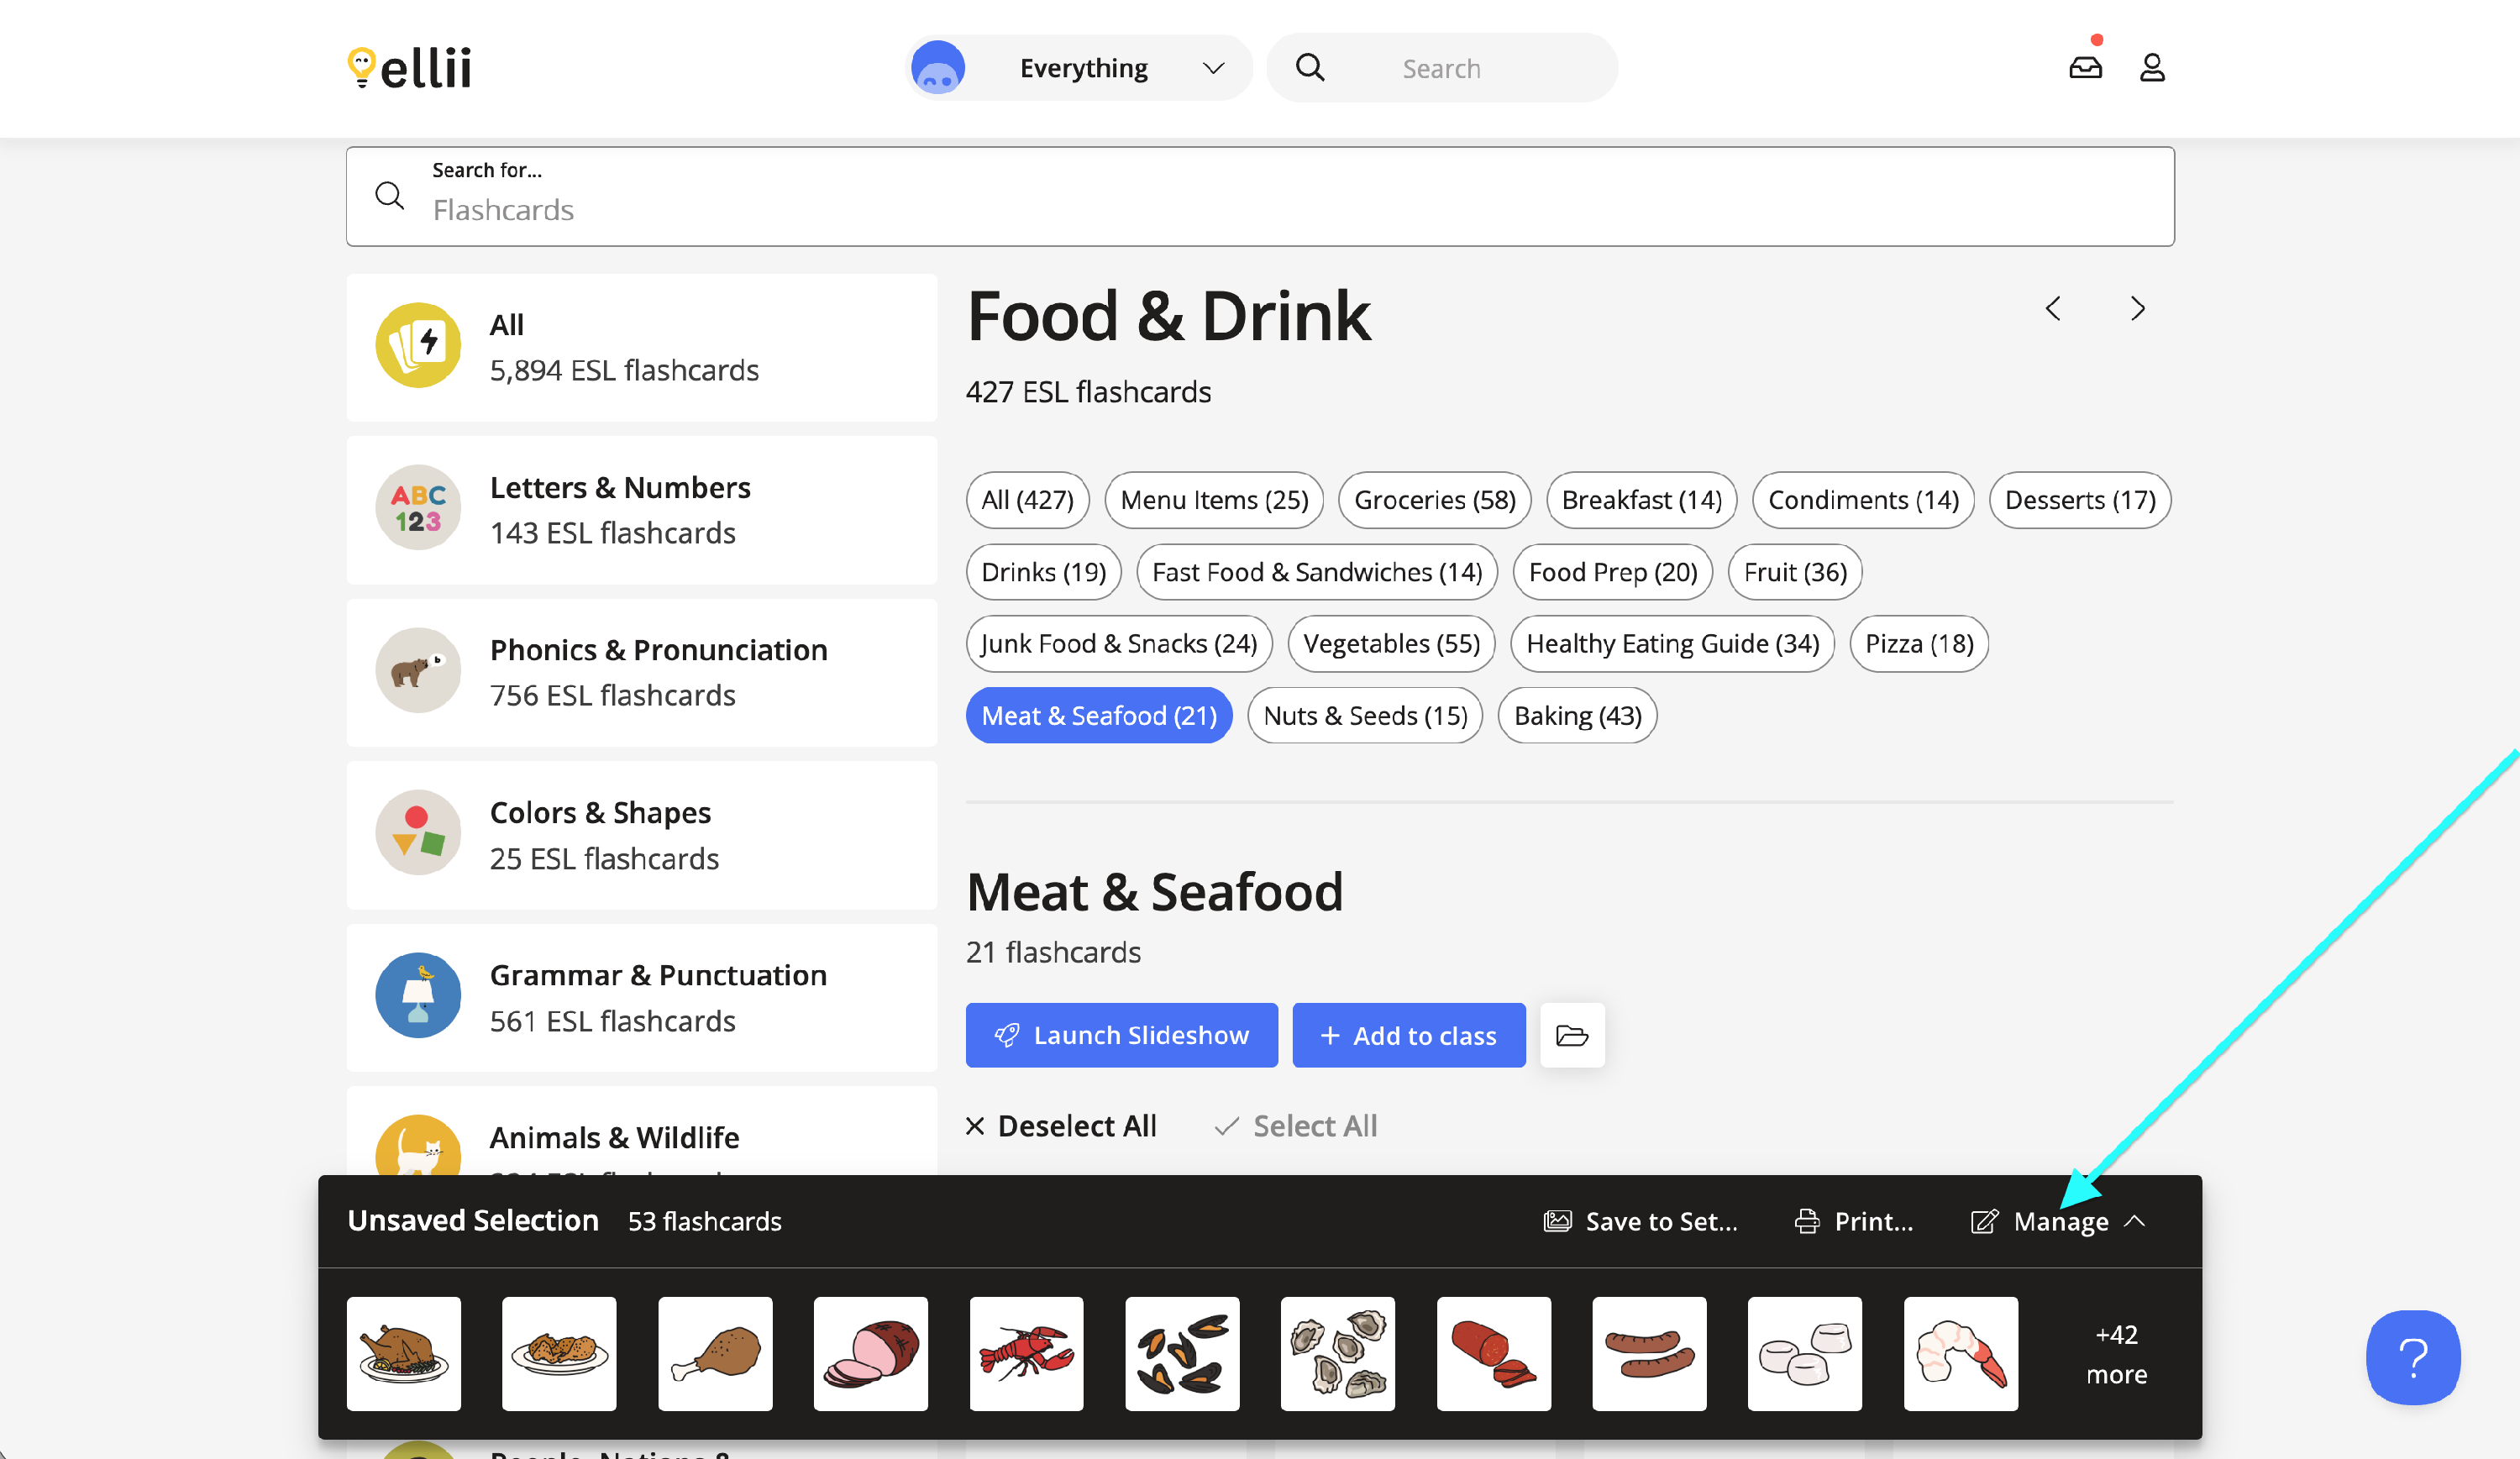
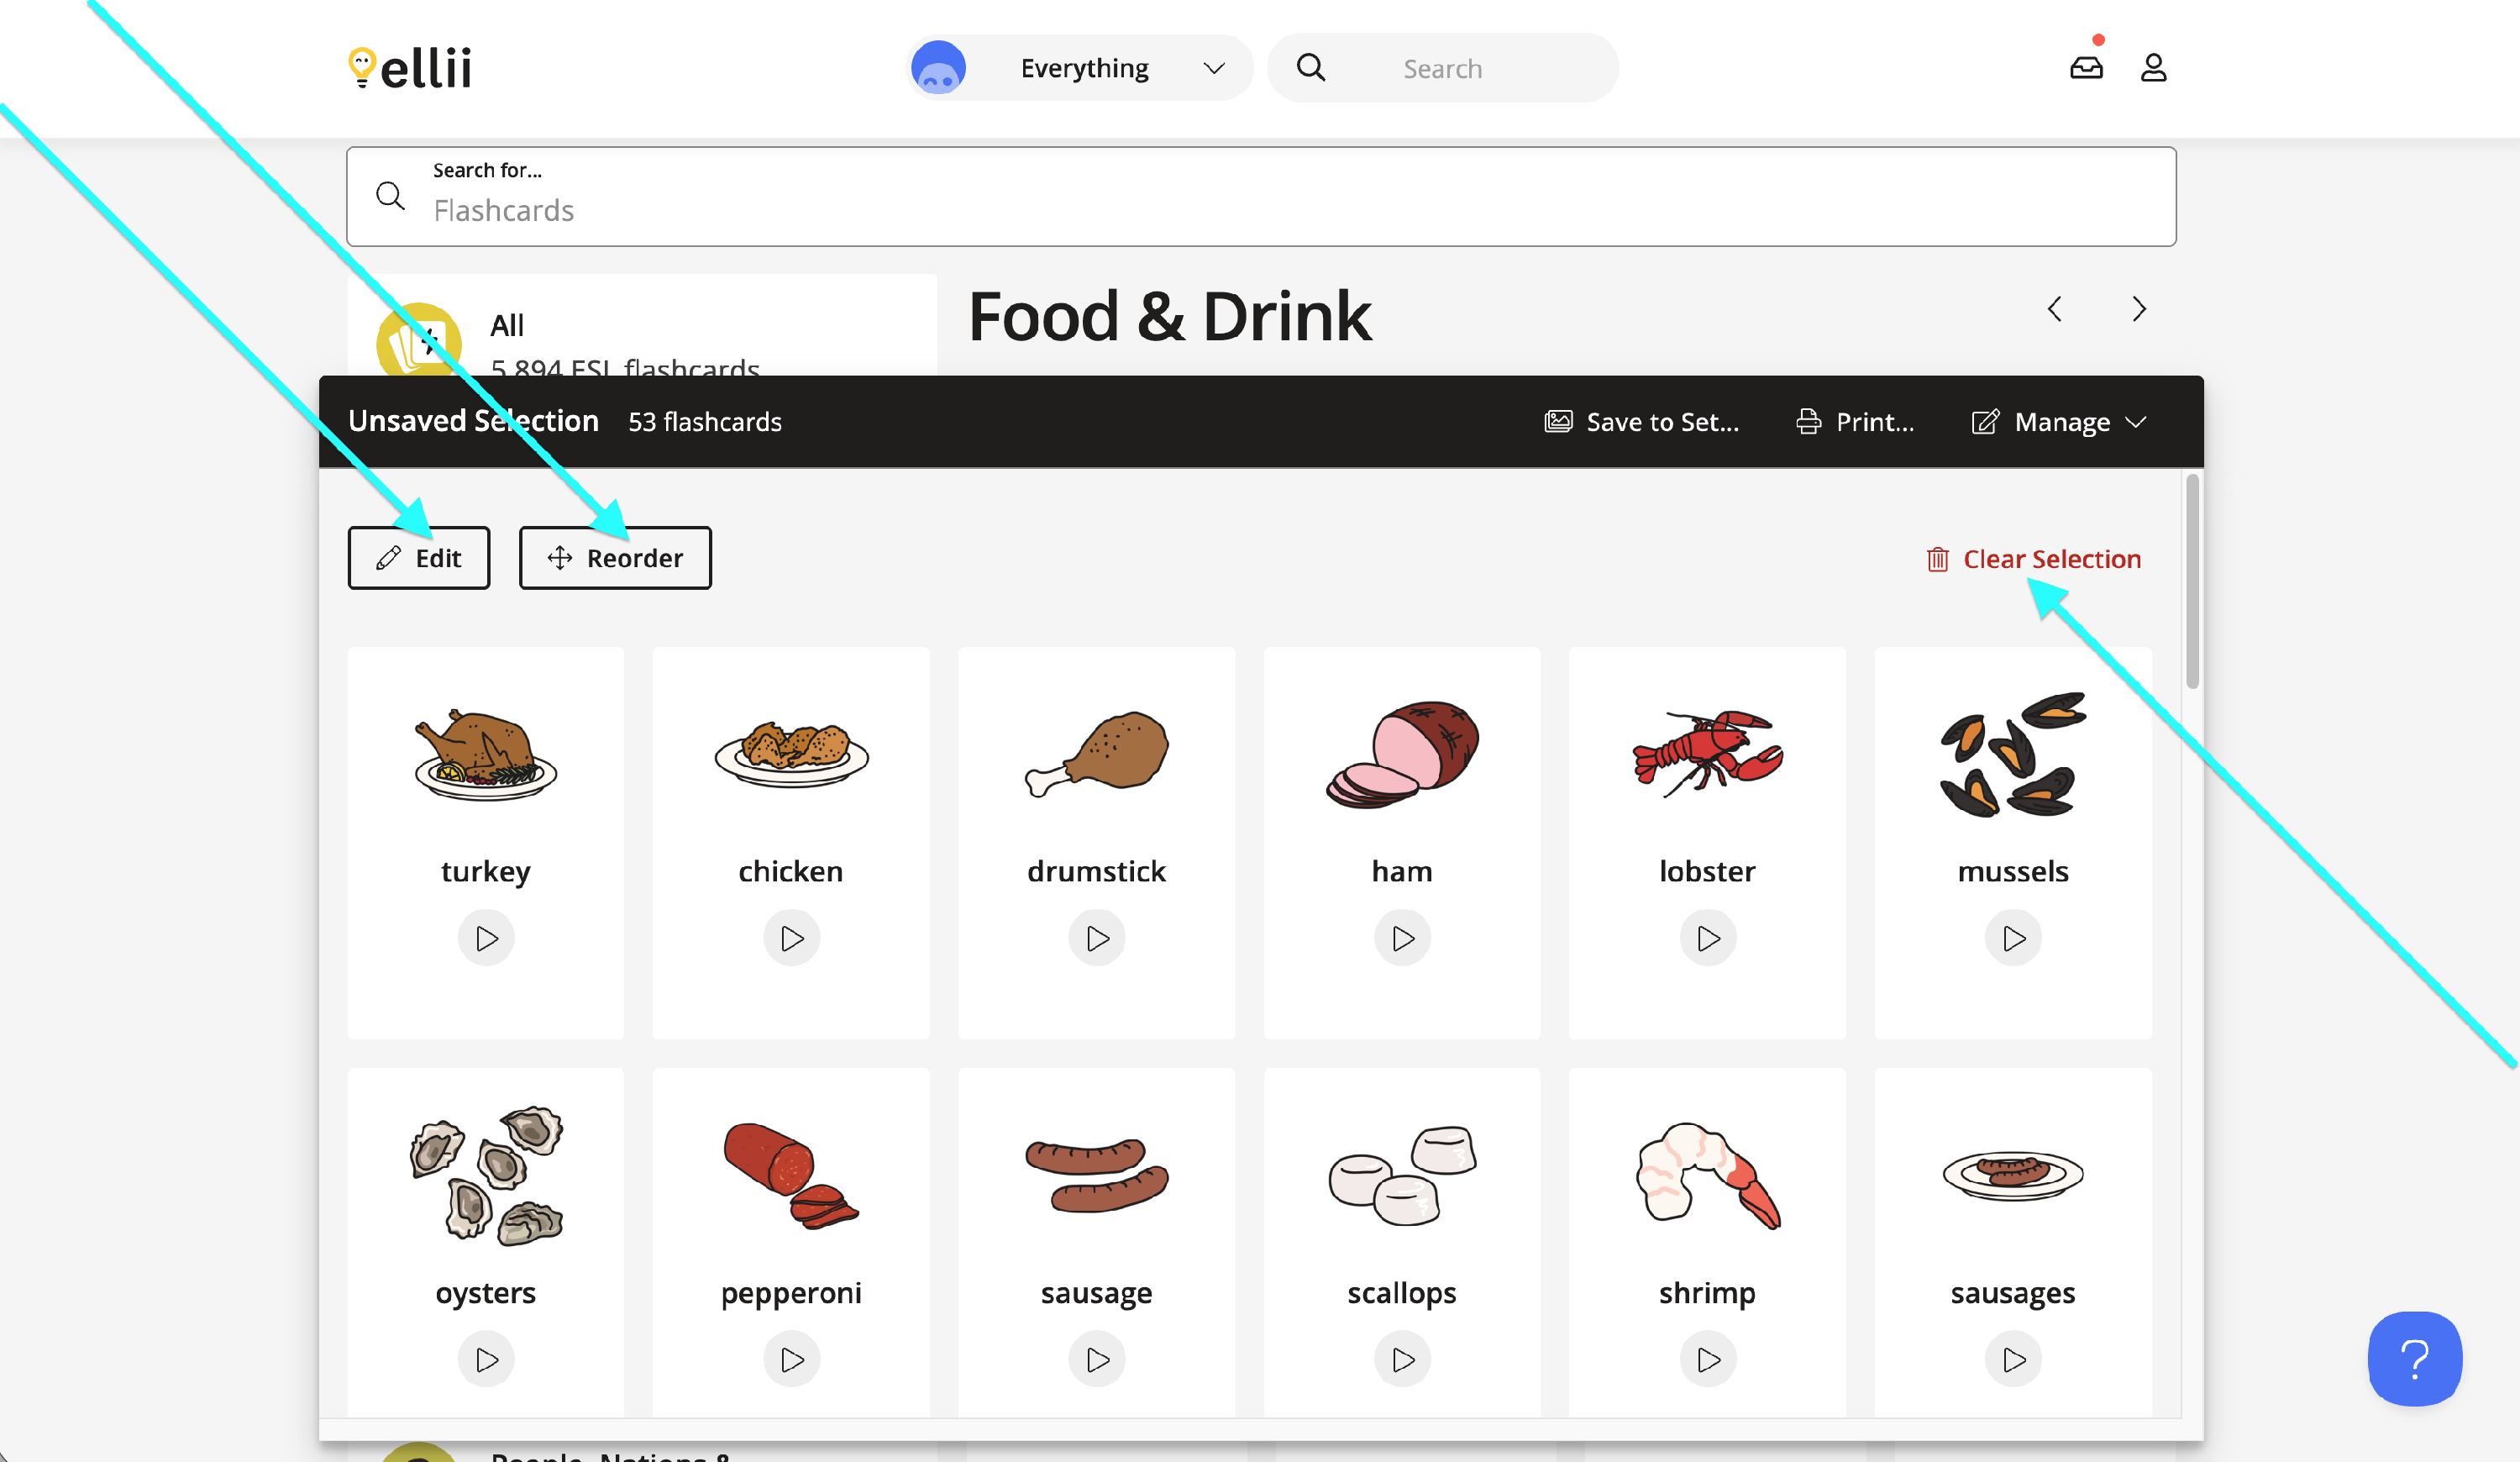
Clicking on Manage allows you to edit the text for the flashcards, change the order of the flashcards or clear the drawer.
For detailed instructions on how to print the flashcards in your set, please refer to this article: How to Print Flashcard Sets.
Please contact us if you have any difficulty creating or saving flashcard sets. We hope you enjoy using our flashcards with your students!
PS. Here is a blog post with 10 ways to use Flashcards in class!